
I am absolutely thrilled to share this Spooky Chocolate Chip Cookies Recipe with you because it combines my two all-time favorite things: the classic comfort of chocolate chip cookies and a fun, festive twist perfect for any Halloween or spooky-season celebration. These cookies deliver that perfect balance of chewy, buttery cookie goodness topped with a luscious, fluffy buttercream frosting that can be customized with colorful sprinkles and food coloring. I love how easy they come together and how impressive they look when served. If you’re looking for a crowd-pleaser that’s both delicious and delightfully themed, this recipe will quickly become a staple in your kitchen!
Why You’ll Love This Spooky Chocolate Chip Cookies Recipe
I can’t get enough of the rich, warm flavor of the chocolate chip cookie base in this recipe. The Pillsbury Purely Simple mix makes it so easy to achieve that ideal chewy texture with just the right amount of buttery sweetness. Adding festive sprinkles gives the cookies a playful punch, and then the buttercream frosting really elevates the whole experience. It’s creamy, subtly sweet, and perfectly balances the cookie’s flavor, making every bite irresistible.
What really excites me about these cookies is how simple they are to prepare. This recipe is straightforward enough for a quick weekday treat or a fun weekend baking project with the family. The frosting allows me to get creative with colors and designs, which makes it a real showstopper at parties or holiday gatherings. Whether you’re serving these for a spooky-themed event, a cozy night in, or just because you want an adorable twist on a classic, these cookies stand out for their festive charm and unbeatable taste.
Ingredients You’ll Need
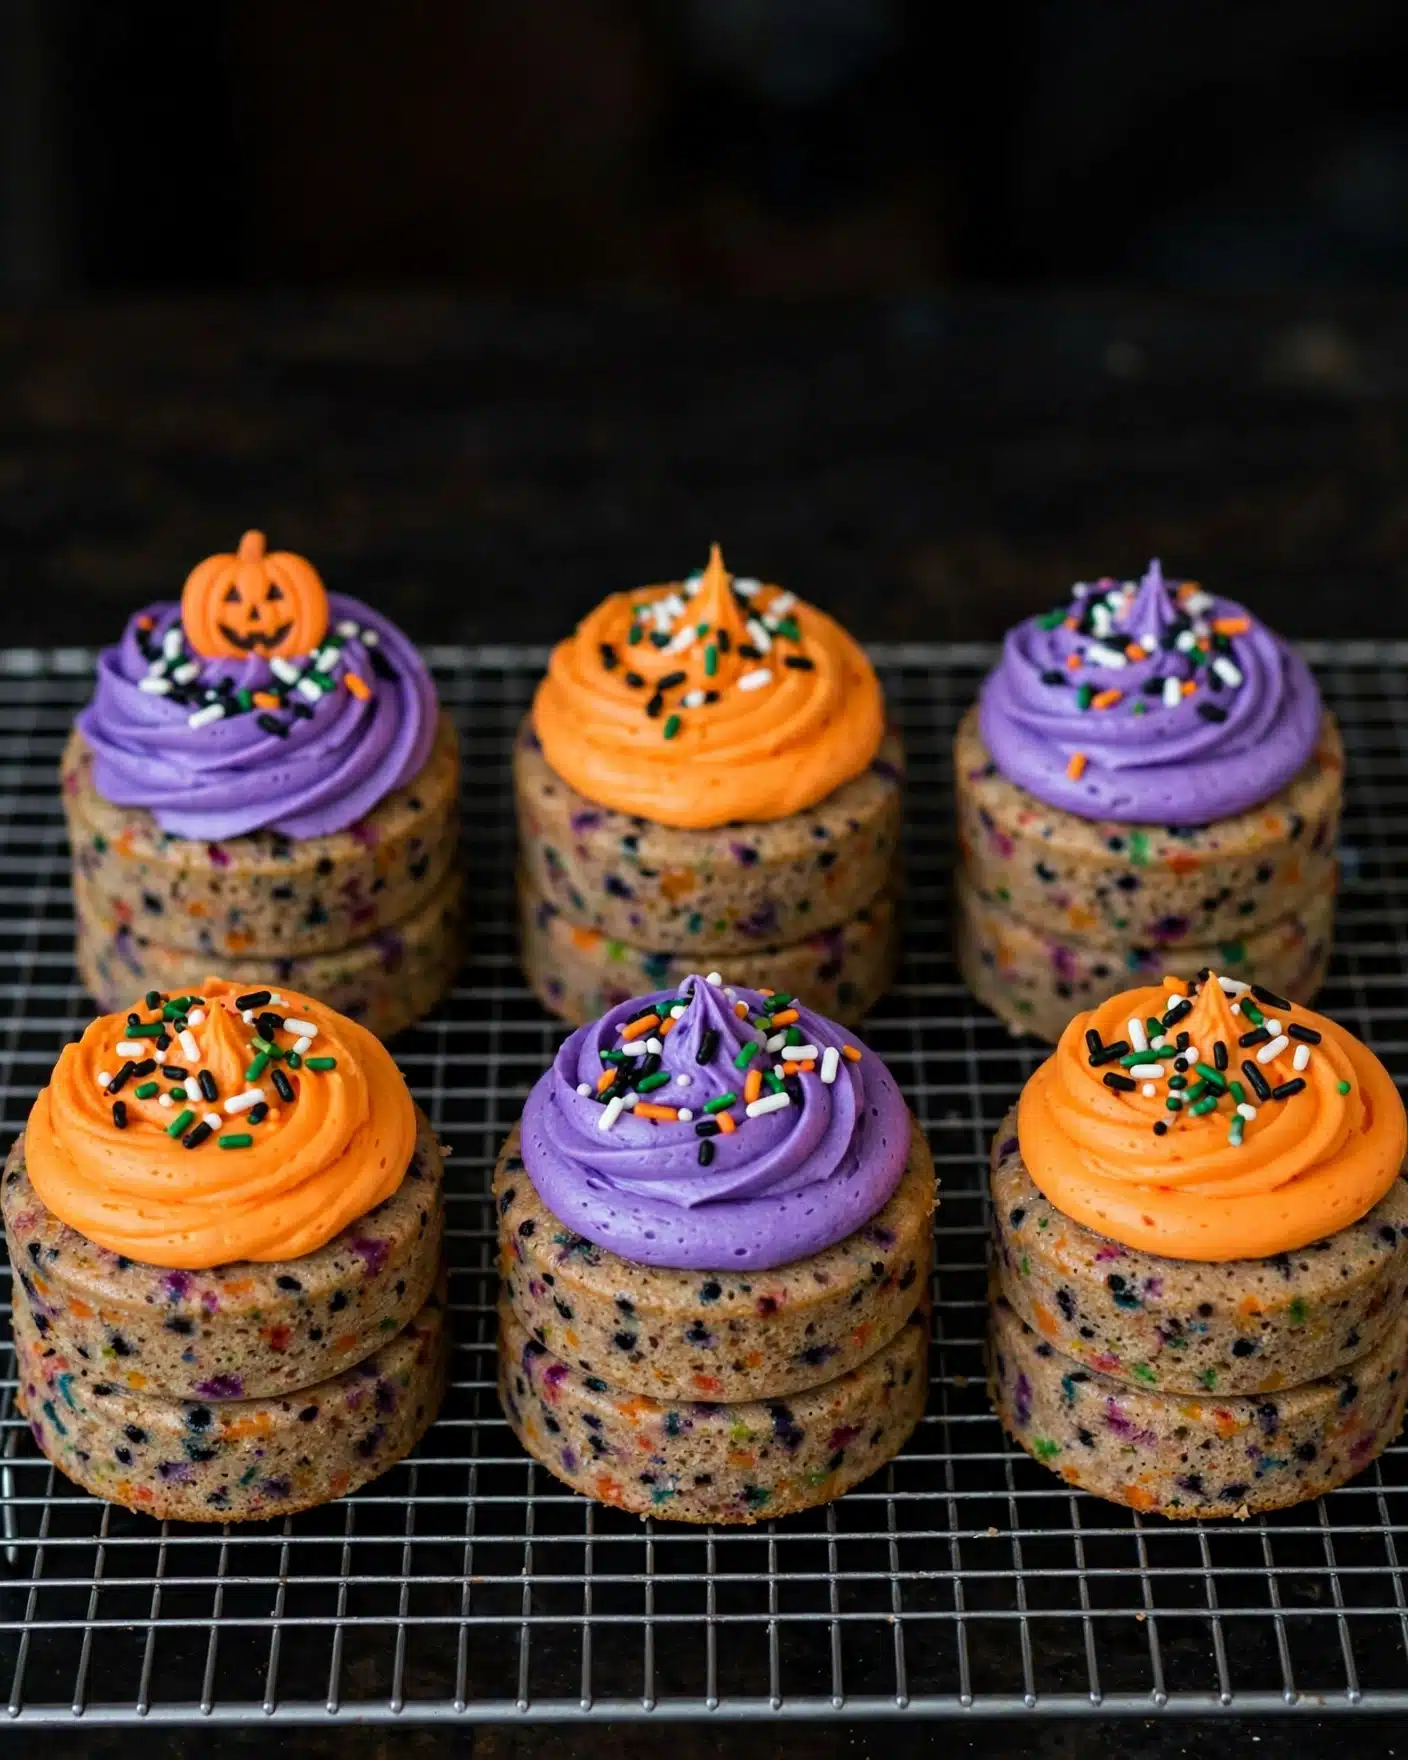
The ingredients for this Spooky Chocolate Chip Cookies Recipe are delightfully simple yet essential, each contributing to the perfect taste and texture. From the cookie mix for that signature chewy base to the butter and sugar that make the frosting so luscious, every component plays an important role in making this treat truly special.
- Pillsbury Purely Simple Chocolate Chip Cookie Mix: Provides a reliable, delicious cookie base with classic chocolate chips already included.
- Unsalted butter (room temperature): Adds richness and moisture to both the cookie dough and frosting.
- Egg: Binds the dough together to ensure a soft yet sturdy cookie texture.
- Festive sprinkles (optional): A fun, colorful addition that brings the spooky theme to life.
- Powdered sugar (sifted): Essential for creating that smooth, fluffy buttercream consistency.
- Pure vanilla extract: Enhances the flavor while helping the frosting stay bright white.
- Milk: Adjusts the buttercream’s thickness for easy spreading or piping.
- Gel food dye (optional): Lets you color the frosting creatively to match any spooky theme.
Directions
Step 1: Preheat your oven to 350°F and line an 8×8-inch baking pan with parchment paper to ensure your cookies bake evenly and come out smooth on the bottom.
Step 2: In a large mixing bowl, use an electric mixer to blend the cookie mix, butter, and egg until a soft, cohesive dough forms—be sure not to overmix!
Step 3: If you’re opting for that extra burst of festive fun, gently fold your sprinkles into the dough so they’re evenly distributed without breaking.
Step 4: Spread the dough evenly into the prepared baking pan, smoothing the top with a spatula to ensure uniform thickness.
Step 5: Bake the cookies in the preheated oven for 23 to 25 minutes, or until the edges start to turn golden but the centers remain soft. Keep a close eye—overbaking will dry them out.
Step 6: Remove the pan from the oven and transfer it to a wire rack to cool completely. Patience here is key so the frosting doesn’t melt.
Step 7: While the cookies cool, prepare the buttercream frosting. In the bowl of a stand mixer fitted with a paddle attachment or a large mixing bowl with an electric mixer, beat the softened butter on medium-high speed for about 6 minutes until light and fluffy.
Step 8: Lower the mixer speed to low and slowly add sifted powdered sugar, mixing until fully incorporated and smooth.
Step 9: Add the vanilla extract and 1 tablespoon of milk, then continue blending on low speed until the frosting is moistened. Add more milk one teaspoon at a time if needed to reach your desired spreading consistency.
Step 10: Increase the speed to high and beat the frosting for an additional 5 minutes or until the texture is silky, light, and fluffy.
Step 11: If you want to add some spooky colors, mix in gel food dye carefully until you achieve the shade you want for your themed frosting.
Step 12: Spread the buttercream evenly over the fully cooled cookie bars. For a fun twist, use a small biscuit cutter to cut the bars into individual cookies, then pipe the frosting on top and decorate with more festive sprinkles.
Servings and Timing
This recipe makes about 15 generous servings, perfect for sharing at small parties or Halloween gatherings. Preparation takes roughly 15 minutes, with baking requiring an additional 23 to 25 minutes. Cooling the cookie base fully before frosting can take about 10 to 15 minutes, and the frosting itself takes about 15 minutes to prepare. Altogether, expect around 45 minutes from start to delicious finish, which feels like a breeze for such an impressive and flavorful batch of cookies.
How to Serve This Spooky Chocolate Chip Cookies Recipe
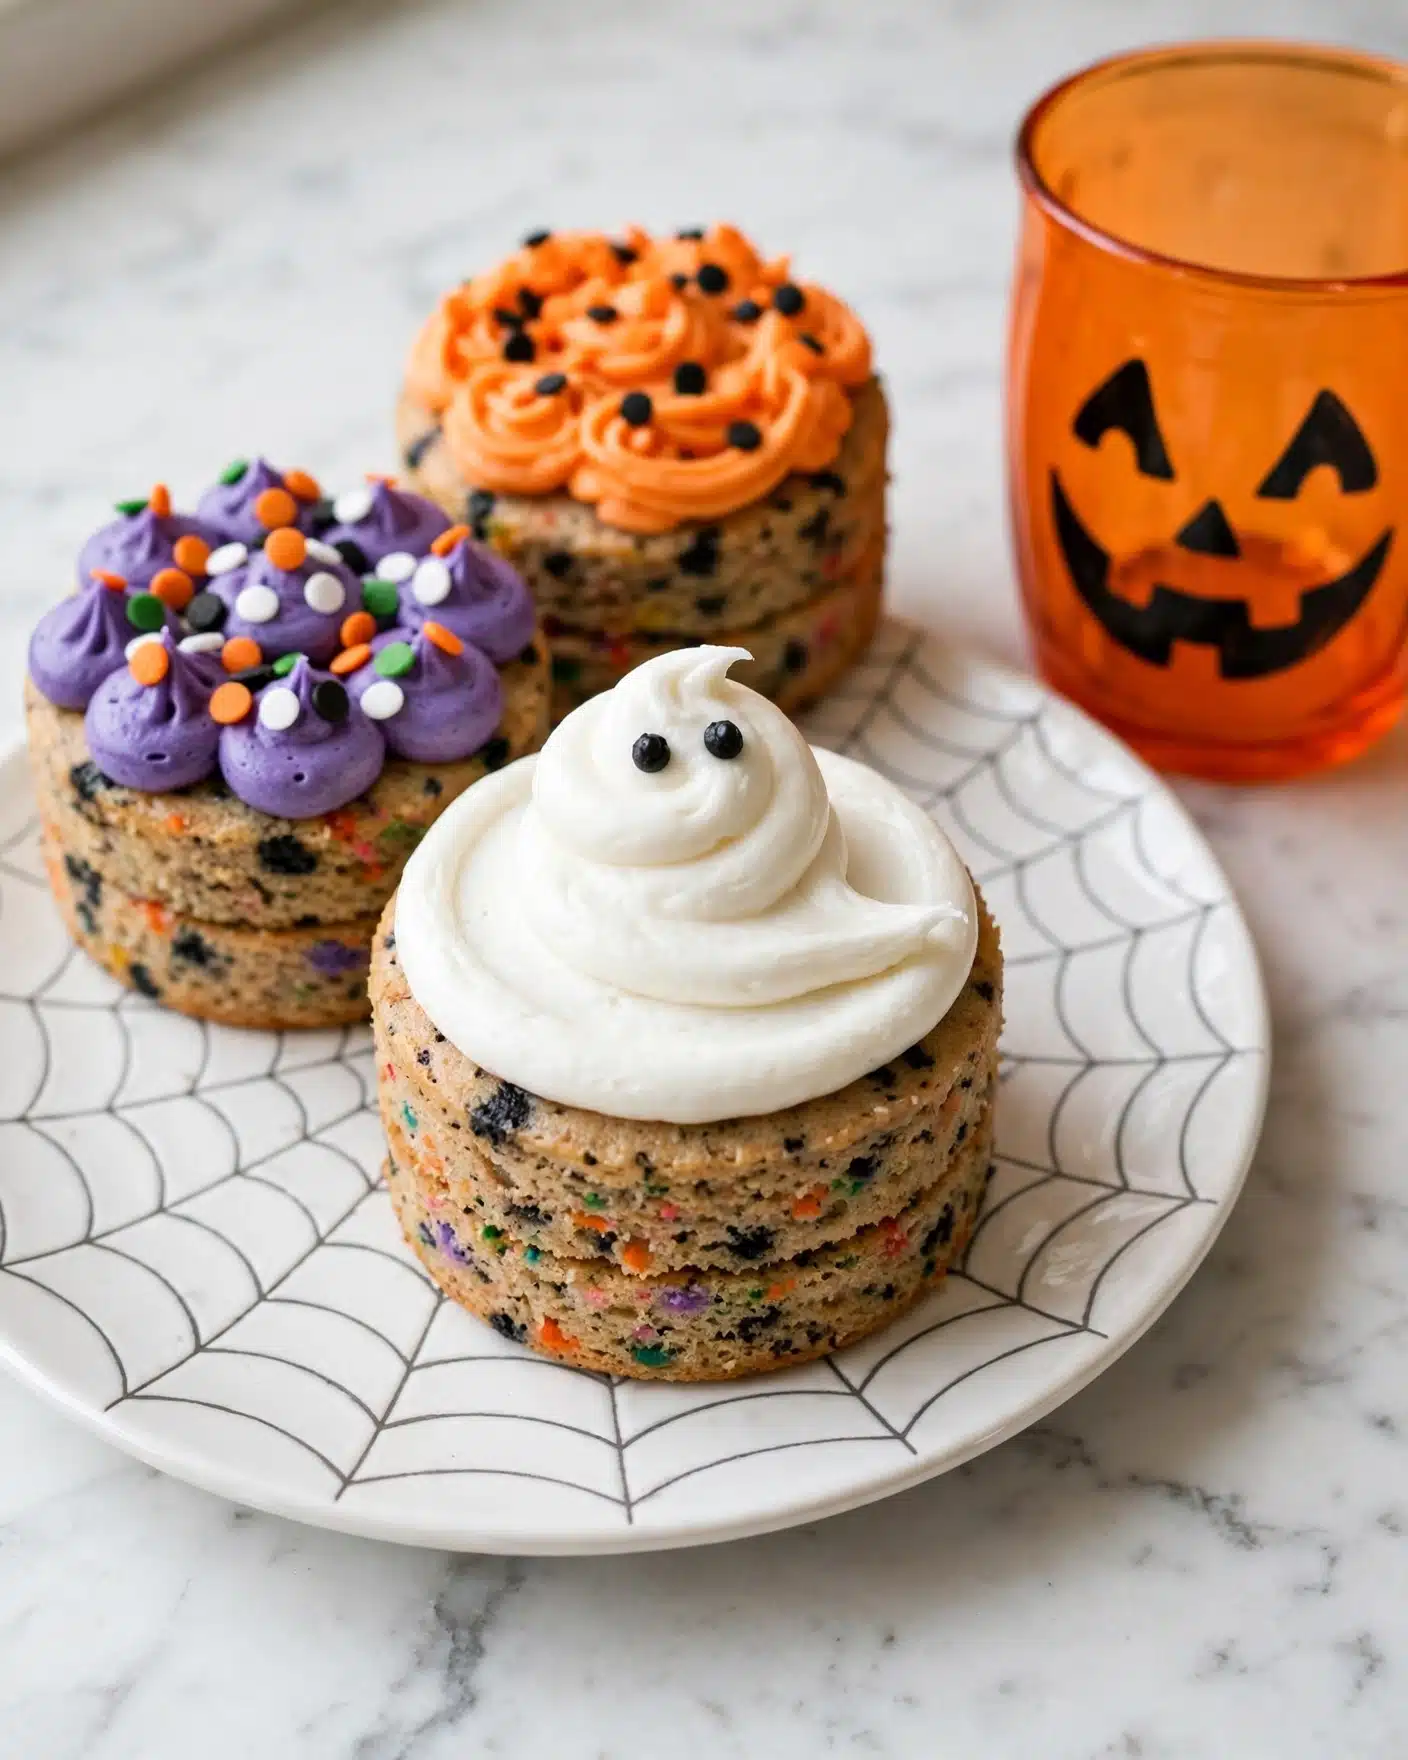
I love serving these cookies slightly chilled or at room temperature to let the buttery frosting stay firm but still soft enough to melt in your mouth. For a festive presentation, arranging them on a large platter surrounded by seasonal décor like mini pumpkins or faux spider webs instantly sets a spooky mood that guests adore.
Pairing these cookies with cold milk is a classic choice that never fails, but for an adult twist, I like offering a warm mug of spiced chai or a rich hot chocolate to complement the cookie’s buttery and chocolatey notes. On occasion, I’ve even seen them served alongside a glass of dessert wine, which balances the sweetness beautifully.
If you’re hosting a Halloween party or a festive family get-together, you can jazz up your plating by piping the frosting into fun shapes—ghosts, pumpkins, or little monsters—and topping with themed sprinkles or edible glitter. For portion control, cutting the bars into bite-sized cookies lets everyone sample a few flavors and colors without feeling too guilty. These cookies shine best as a centerpiece dessert or a hand-held treat during celebrations.
Variations
One of the things I adore about this Spooky Chocolate Chip Cookies Recipe is how adaptable it is to your preferences. If you prefer a healthier option, you can substitute unsalted butter with coconut oil or use a vegan egg replacement to make a plant-based version. The flavor remains rich and delicious, allowing everyone to enjoy these festive cookies.
If you want to play with the flavor profile, swapping out traditional chocolate chips for white chocolate or even mini peanut butter chips adds an unexpected twist. Alternatively, try adding a pinch of cinnamon or espresso powder to the dough for a subtle depth of flavor that makes these cookies uniquely yours.
While I usually bake this recipe in a pan for ease and festive shape, you could also portion out individual dough balls onto a cookie sheet to create classic round chocolate chip cookies, then frost them after baking. This method lets you get creative with piped frosting decorations or even sandwich the frosting between two cookies for delightful little cookie sandwiches.
Storage and Reheating
Storing Leftovers
To keep your leftover Spooky Chocolate Chip Cookies fresh, I recommend storing them in an airtight container at room temperature. This helps maintain the cookie’s soft texture and the frosting’s creamy consistency for up to 3 days. If your kitchen tends to be warm, refrigeration is a good option, but allow the cookies to come to room temperature before serving to enjoy the best flavor.
Freezing
Freezing these cookies is definitely possible and works well if you want to prepare ahead of time. I suggest freezing them unfrosted as cookie bars tightly wrapped in plastic wrap and then placed in a freezer-safe container or bag, where they can last for up to 2 months. Once you’re ready to enjoy, thaw them overnight in the fridge and then frost just before serving to keep the buttercream fresh and fluffy.
Reheating
If you’re reheating cookies with frosting, I find it best to let them come to room temperature naturally rather than using the microwave, which can melt the frosting and change the texture. For unfrosted cookie dough bars you want warm, a quick 10-15 second zap in the microwave can enhance softness. Avoid reheating in an oven to prevent drying out, as these cookies are best enjoyed tender and moist.
FAQs
Can I make this recipe without the cookie mix?
Absolutely! While the cookie mix makes this recipe super simple, you can use your favorite homemade chocolate chip cookie dough in place of the mix. Just be sure to adjust the butter and egg amounts to match your dough recipe for the best consistency.
What if I don’t want to use buttercream frosting?
If buttercream isn’t your favorite, cream cheese frosting pairs wonderfully with these cookies too, adding a tangy balance to the sweet dough. You can also simply dust the cooled cookies with powdered sugar for a lighter touch without frosting.
Can I add nuts or other mix-ins to the cookies?
Yes! Chopped walnuts, pecans, or even toffee bits add a lovely crunch and extra flavor. Just fold them into the dough gently along with or instead of the sprinkles before baking.
Is it possible to make these cookies gluten-free?
Definitely. Swap the cookie mix for a gluten-free version and ensure your sprinkles and other additions are free from gluten. Most gluten-free cookie mixes yield similar results, so you won’t lose much in flavor or texture.
How do I make the frosting colors vibrant?
Gel food coloring is the secret to bright, vivid frosting tones. I recommend adding the gel dye gradually and mixing well until you reach the desired shade. Avoid liquid food coloring as it can thin the frosting too much.
Conclusion
I truly hope you enjoy making and sharing this Spooky Chocolate Chip Cookies Recipe as much as I do. It’s one of those recipes that brings a little magic and joy to the kitchen, especially during festive seasons. Whether you keep it simple or go all out with colorful frosting and sprinkles, these cookies are sure to delight your family and friends. Give them a try and watch everyone’s faces light up with every bite!
PrintSpooky Chocolate Chip Cookies Recipe
Delightfully festive and easy to make, these Spooky Chocolate Chip Cookies combine a soft cookie base with creamy buttercream frosting, perfect for Halloween or any fun occasion. Made from a simple cookie mix and topped with colorful sprinkles and optional food dye, they offer a playful twist on classic chocolate chip cookies.
- Prep Time: 15 minutes
- Cook Time: 25 minutes
- Total Time: 45 minutes
- Yield: 15 servings
- Category: Dessert
- Method: Baking
- Cuisine: American
Ingredients
Cookie Dough
- 1 box Pillsbury Purely Simple™ Chocolate Chip Cookie Mix
- 1/2 cup unsalted butter (room temperature)
- 1 egg
- 1/3 cup festive sprinkles (optional)
Buttercream Frosting
- 1 cup unsalted butter (softened)
- 3 1/4 cups powdered sugar (sifted)
- 1 1/2 teaspoons pure vanilla extract
- 1–2 tablespoons milk
- Gel food dye (optional)
- Festive sprinkles for topping (optional)
Instructions
- Preheat Oven: Preheat your oven to 350°F (175°C) and line an 8×8-inch baking pan with parchment paper to prevent sticking and for easy cookie removal.
- Mix Cookie Dough: In a large bowl, use an electric mixer to combine the chocolate chip cookie mix, 1/2 cup of room temperature unsalted butter, and one egg until a soft dough forms.
- Add Sprinkles: If using, gently fold in the festive sprinkles to evenly distribute them within the dough without overmixing.
- Spread Dough: Evenly spread the cookie dough into the prepared baking pan, smoothing the surface with a spatula.
- Bake Cookies: Place the pan in the preheated oven and bake for 23-25 minutes until the cookies are set and lightly golden around the edges.
- Cool Cookies: Remove the pan from the oven and place it on a wire rack to cool completely to room temperature before frosting.
- Prepare Buttercream: Using a stand mixer fitted with a paddle attachment or an electric mixer in a large bowl, cream 1 cup softened butter on medium-high speed for about 6 minutes until light and fluffy.
- Add Sugar and Vanilla: Reduce mixer speed to low and slowly add sifted powdered sugar, beating until well combined. Add vanilla extract and 1 tablespoon milk, mixing until moistened.
- Adjust Consistency: If frosting is too thick, add milk 1 teaspoon at a time until desired smooth and spreadable consistency is achieved. Then beat on high speed for about 5 minutes to make the frosting fluffy.
- Color Frosting (Optional): If desired, add gel food dye to the buttercream and mix until color is evenly blended.
- Frost Cookies: Spread the prepared buttercream evenly over the cooled cookie bars or cut the bars into small circles and pipe frosting on top.
- Garnish: Top with additional festive sprinkles for a fun, colorful presentation before serving.
Notes
- For best results, ensure butter is softened to room temperature before mixing to achieve the perfect dough and frosting texture.
- Use gel food dye sparingly as it is concentrated and will yield vibrant colors without thinning the frosting.
- You can customize the sprinkles and colors to fit any holiday or theme beyond Halloween.
- Make sure cookies are completely cool before frosting to prevent the buttercream from melting.
- Store frosted cookies in an airtight container at room temperature for up to 3 days.


