
I’m so excited to share this Easy Hummus Cups Recipe with you because it’s hands-down one of my favorite appetizers to make when I want something fun, fresh, and irresistibly tasty. These little cups are crispy, golden bite-sized pieces of pizza crust filled with creamy hummus and topped with crisp cucumber and juicy cherry tomatoes, sprinkled with just the right touch of sea salt. They’re incredibly simple to whip up but look so impressive on any party platter or weeknight snack tray. Whenever I make them, they vanish fast and always get asked for by name!
Why You’ll Love This Easy Hummus Cups Recipe
What I truly adore about this recipe is how it balances flavors and textures so beautifully. The pizza crust cups come out delightfully crispy on the edges but still tender enough to hold the creamy, savory hummus inside. Adding fresh cucumber and bright cherry tomatoes gives the right amount of cool crunch and natural sweetness, elevating the whole bite. Every time I serve these, I catch myself sneaking a few before anyone else does because they are just that good.
From a practicality standpoint, this Easy Hummus Cups Recipe is a dream to prepare. It requires minimal ingredients, most of which you might already have in your kitchen or find easily at the store, especially the Pillsbury pizza crust that really makes this dish shine by keeping those cups perfectly shaped and crispy. Plus, these can be made in advance, making them wonderful for entertaining because you can assemble them ahead and store them in the fridge without losing that fresh, vibrant taste. Whether it’s a casual family get-together or a fancy holiday party, these cups always steal the show.
Ingredients You’ll Need
The ingredients for this recipe are straightforward but essential, each contributing something special—from the tender yet crispy base of pizza dough to the creamy hummus and fresh vegetable toppings that add both flavor and color.
- Pizza dough: I use Pillsbury Classic Pizza Crust because it holds the cup shape perfectly and crisps up nicely without puffing too much.
- Hummus: Whether you choose store-bought or homemade, go for a smooth, classic hummus to keep the flavors authentic and satisfying.
- Cucumber: Diced cucumber lets in a fresh crunch and a cool contrast to the creamy hummus.
- Cherry tomatoes: Quartered cherry tomatoes add a juicy burst of sweetness that brightens every bite.
- Sea salt: Just a pinch brings out the flavors and ties all the ingredients together wonderfully.
Directions
Step 1: Preheat your oven to 400°F (204°C) and lightly spray 20 mini muffin cups with cooking spray. Set aside 20 mini muffin paper liners along with pie weights, uncooked rice, or dried beans for later use.
Step 2: Roll out the pizza dough into a roughly 14-inch by 12-inch rectangle. Don’t worry about being too precise—close enough is perfect.
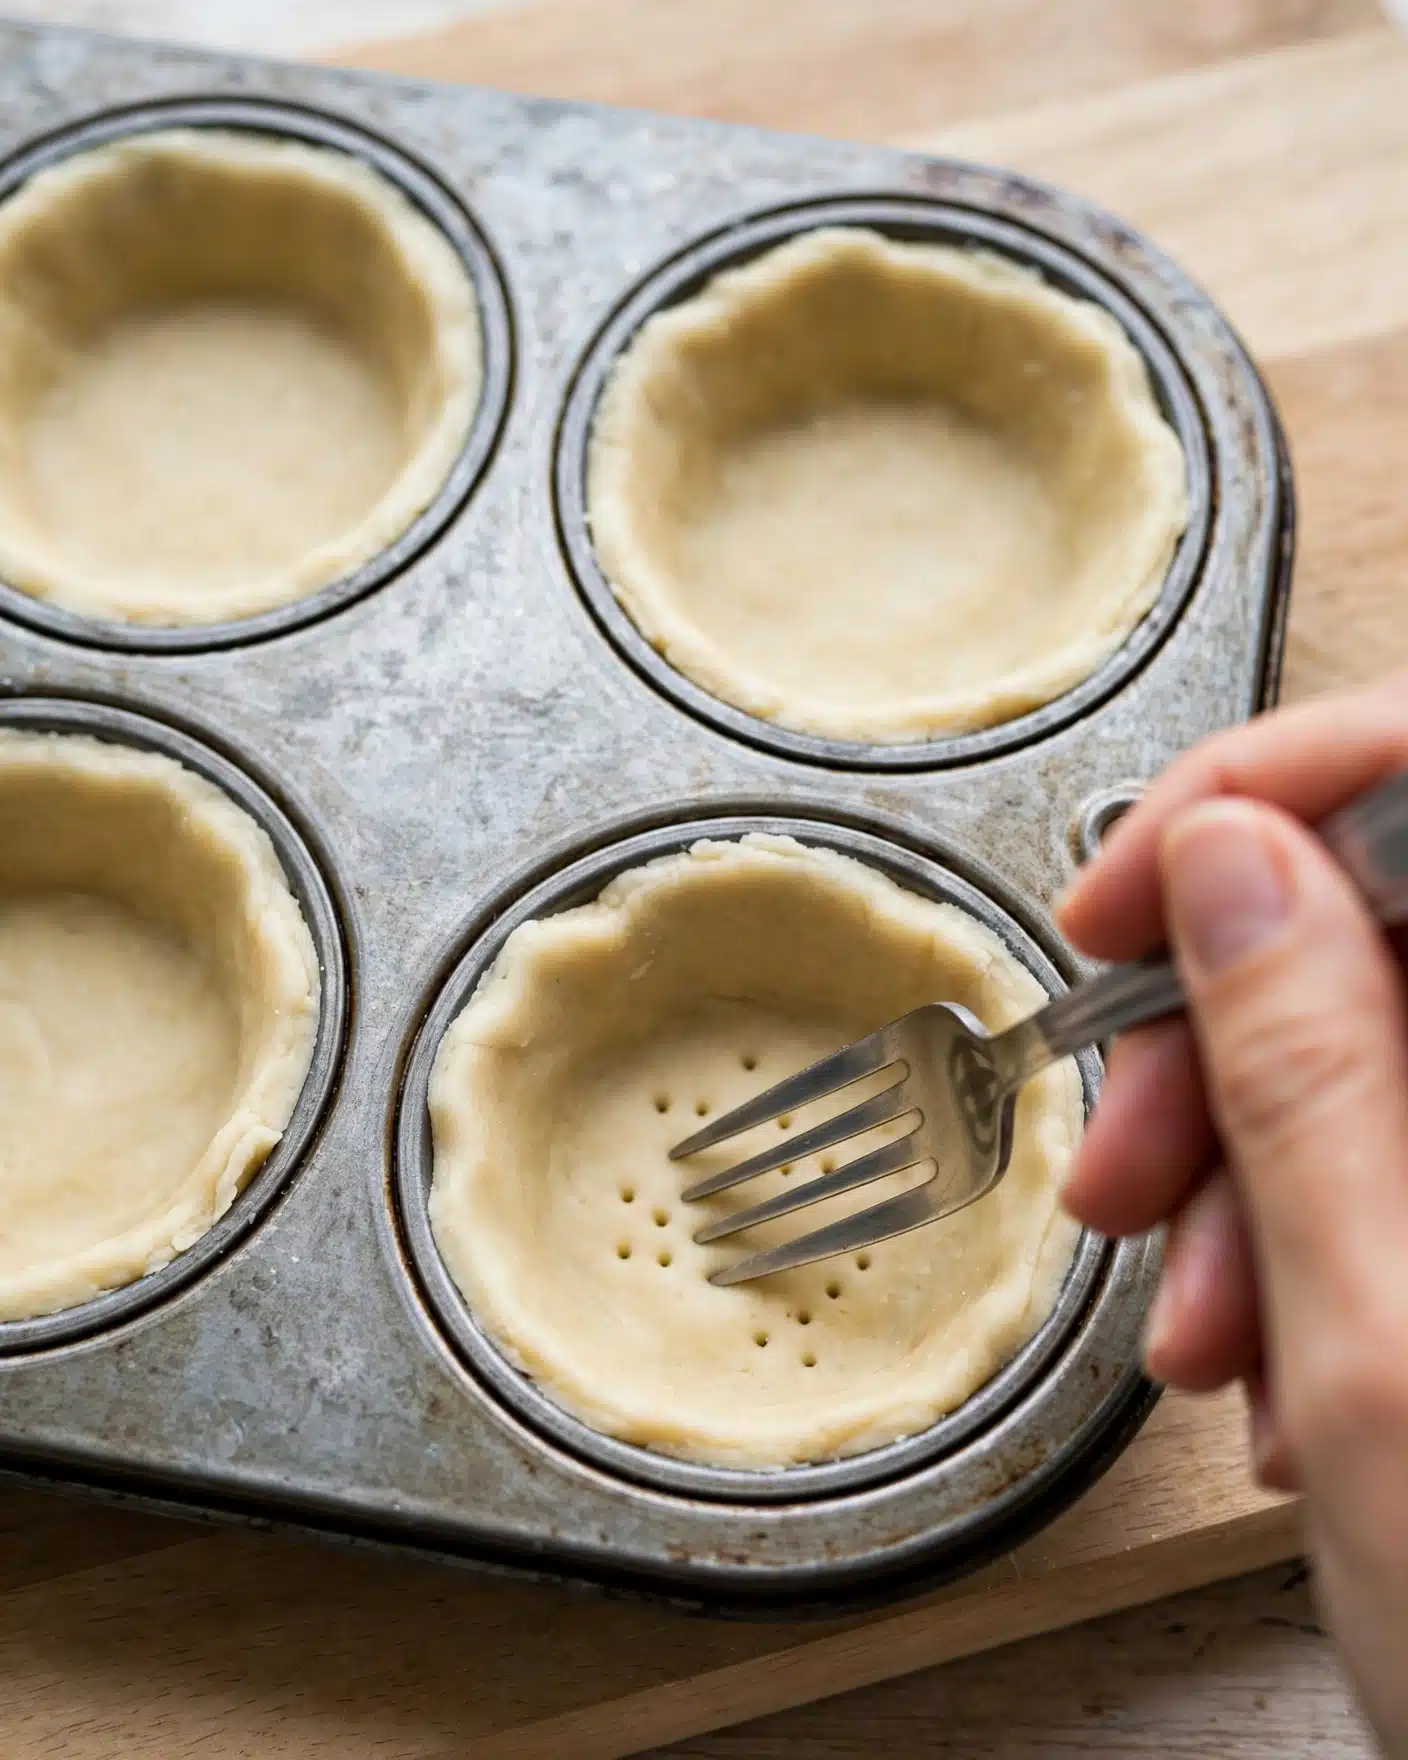
Step 3: Using a 2 ½-inch round cookie cutter, cut out 20 circles from the dough. Press each dough circle gently but firmly into the muffin cups, shaping them into little cups. Use a fork to prick the bottom of each dough cup 3-4 times. This prevents bubbling.
Step 4: Place a muffin liner inside each pizza dough cup, then fill them with pie weights, rice, or dried beans. This helps keep the dough from puffing up too much during baking.
Step 5: Bake the pizza cups for 8 to 10 minutes, or until the edges turn a lovely light golden brown. Remove from the oven and transfer the cups to a cooling rack so they cool completely.
Step 6: Once cooled, fill each pizza cup with a heaping teaspoon of hummus. Top with a few pieces of diced cucumber and a quarter of a cherry tomato. Finish with a light sprinkle of sea salt and watch them disappear quickly!
Servings and Timing
This recipe yields 20 individual hummus cups, perfect for sharing at parties or family gatherings. It takes about 15 minutes of prep time to get everything ready, and around 10 minutes to bake the pizza cups. Total time from start to finish is roughly 25 minutes. No resting time is needed after baking, but you will want to let the cups cool completely before filling for the best texture and taste.
How to Serve This Easy Hummus Cups Recipe
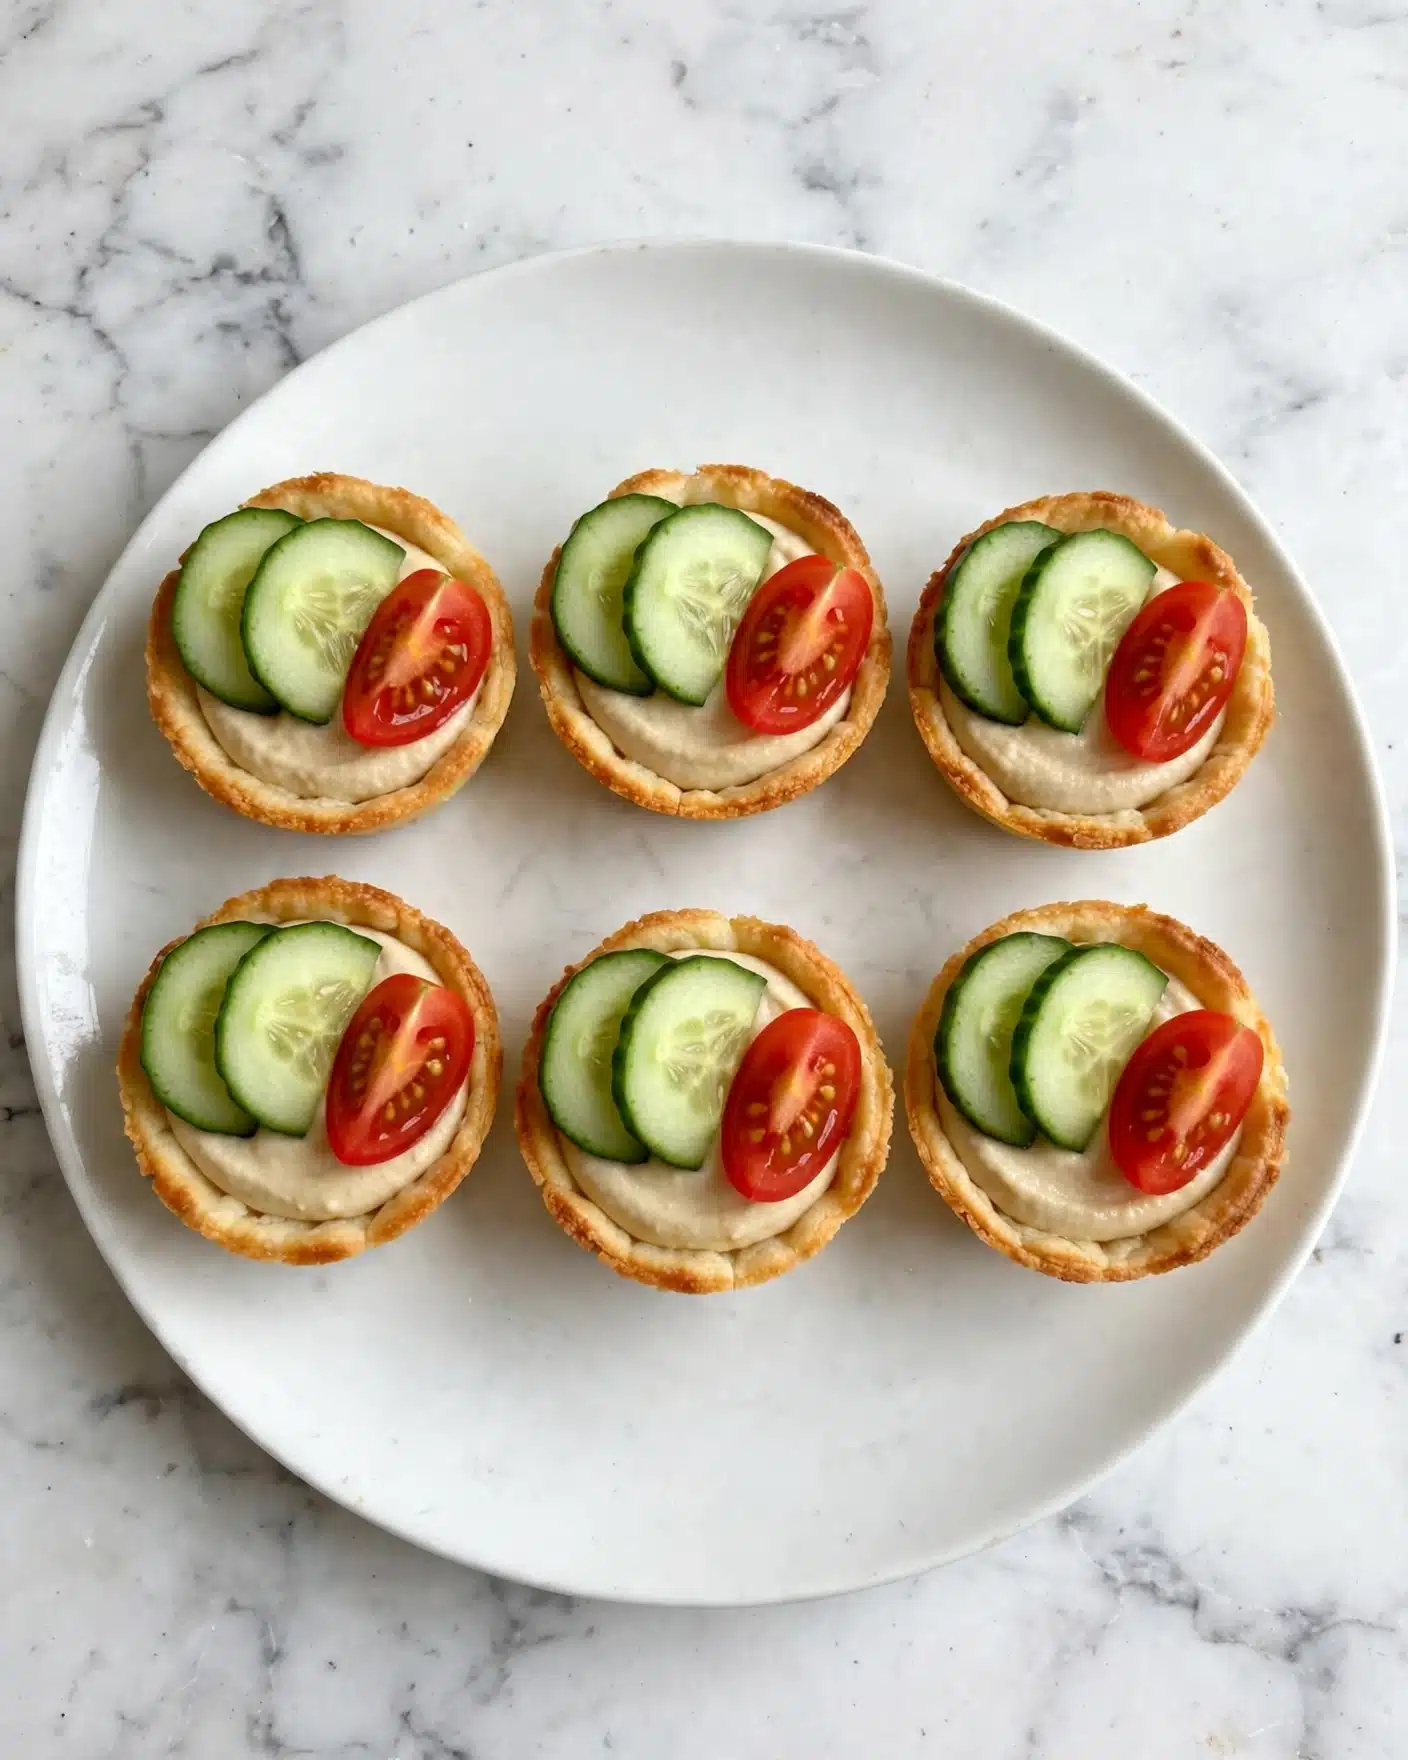
When I serve these Easy Hummus Cups Recipe bites, I like to arrange them neatly on a beautiful platter surrounded by extra garnishes like fresh herbs or lemon wedges for a bright pop of color. They’re perfect alongside crisp vegetable sticks, pita chips, or a simple mixed green salad to make a full appetizer spread. Warm tea or chilled sparkling water also pairs beautifully if you want a non-alcoholic option.
If you’re hosting a party, I love recommending these as finger food because guests can stand and mingle while grabbing a delicious cup. They hold their shape well and don’t make a mess, so they’re super easy for casual or formal settings. For a pairing with wine, a chilled Sauvignon Blanc or a light rosé complements the fresh and savory flavors of the hummus and vegetables perfectly.
These cups are best served at room temperature or slightly chilled. I usually prepare the dough cups ahead of time and fill them right before serving to keep the fresh toppings crisp and vibrant. Portion-wise, one or two per person is a great starter, but be prepared—they’re addictive and often disappear fast!
Variations
One of the reasons I keep coming back to this Easy Hummus Cups Recipe is how adaptable it is. You can easily swap out the classic hummus for flavored varieties like roasted red pepper or garlic for an extra kick. If you want to get really creative, try topping the cups with finely chopped olives, fresh herbs like parsley or dill, or even a drizzle of balsamic glaze. It adds a gourmet twist with minimal effort.
If you’re catering to dietary needs, these are naturally gluten-free if you use a gluten-free pizza crust—which I highly recommend if you’re serving a crowd with different preferences. They’re also vegan, as long as your hummus doesn’t contain any dairy or egg ingredients, so they fit well into plant-based diets. For a different crunch, swap cucumber for diced bell peppers or snap peas.
Finally, while baking is the classic method, I’ve experimented lightly pan-frying small dough discs to achieve an alternative crispness, though baking keeps them more uniform and less oily. Either way, this recipe invites fun exploration, and I encourage you to make it your own!
Storage and Reheating
Storing Leftovers
If you happen to have leftovers (which I highly doubt!), store the hummus cups separately in an airtight container in the fridge for up to 2 days. Keep the baked dough cups and the hummus filling apart until you’re ready to serve again to prevent the crust from getting soggy. When storing assembled cups, cover them tightly with plastic wrap.
Freezing
I don’t recommend freezing the fully assembled hummus cups because the fresh cucumber and tomato toppings won’t freeze well and can become watery. However, you can freeze the baked pizza cups alone. Place them in a single layer on a baking sheet to freeze initially, then transfer to a freezer-safe bag or container. They’ll keep fresh for up to 1 month. Just thaw before filling and serving.
Reheating
To reheat the baked dough cups, I gently warm them in a preheated oven at 350°F (175°C) for about 5-7 minutes to restore crispiness without drying them out. Avoid microwaving as it tends to make the cups chewy and less enjoyable. Once warm, add fresh hummus and toppings just before serving for best flavor and texture.
FAQs
Can I make the hummus from scratch for this recipe?
Absolutely! Homemade hummus is fantastic here and adds a fresh, personalized touch. You can blend chickpeas, tahini, lemon juice, garlic, olive oil, salt, and pepper to your taste. Just make sure the hummus is smooth enough to spoon easily into the cups.
What if I don’t have a mini muffin pan?
If you don’t have a mini muffin pan, you might try using a mini tart pan or even small ramekins, but note that shaping the dough cups might be trickier and baking times could vary. The muffin pan is ideal because it creates uniform, bite-sized cups that hold their shape perfectly.
Can I prepare the cups ahead of time?
Yes, and that’s one of the reasons this recipe is such a winner! You can bake the pizza cups hours ahead and store them separately from the hummus topping in an airtight container, then fill them right before serving to keep everything tasting fresh and crisp.
Are there any gluten-free options for the dough?
Definitely! Many stores carry gluten-free pizza dough or crusts now, and these work wonderfully for making the cups. Just follow the same baking instructions, although you might want to watch the cooking time as gluten-free dough can behave differently.
Can kids enjoy these hummus cups?
Oh yes! Kids usually love these because they’re small, handheld, and flavorful without being spicy or overwhelming. You can customize the toppings to suit their preferences too—maybe extra tomatoes or even a little shredded cheese if they like.
Conclusion
I genuinely hope you give this Easy Hummus Cups Recipe a try because it’s such a joy to make and eat—simple ingredients turning into little bites of happiness. Whenever I bring these to a gathering or make them for my family, I’m met with smiles and requests for more. They’re versatile, fun, and a refreshing way to enjoy hummus in a new form. I can’t wait for you to taste these and love them as much as I do!
PrintEasy Hummus Cups Recipe

These Easy Hummus Cups make a delightful and fun appetizer that’s perfect for parties or snacks. Featuring a crispy pizza crust base filled with creamy hummus and topped with crisp cucumber and juicy cherry tomatoes, these bite-sized treats come together quickly and can be prepared ahead of time for convenience.
- Prep Time: 15 minutes
- Cook Time: 10 minutes
- Total Time: 25 minutes
- Yield: 20 hummus cups
- Category: Appetizer
- Method: Baking
- Cuisine: Mediterranean
- Diet: Vegetarian
Ingredients
For the Pizza Cups
- 1 (13.8 oz) roll Pillsbury Classic Pizza Crust
- Cooking spray, for greasing muffin cups
- Pie weights, uncooked rice, or dried beans (for blind baking)
For the Filling and Topping
- ½ cup hummus (homemade or store-bought)
- ½ cup diced cucumber
- 5 cherry tomatoes, quartered
- ⅛ teaspoon sea salt
Instructions
- Preheat and Prepare Muffin Cups: Preheat your oven to 400°F (204°C) and lightly spray 20 mini muffin cups with cooking spray to prevent sticking. Set aside 20 mini muffin paper liners and gather pie weights, uncooked rice, or dried beans for baking the pizza cups.
- Roll Out Dough: Form the pizza dough into an approximate 14-inch by 12-inch rectangle. It doesn’t need to be perfect, just close enough to get the circles from.
- Cut Dough Circles: Using a 2 ½-inch round cookie cutter, cut out 20 circles from the dough. Press each dough circle firmly into the prepared muffin cups to form the cup shape. Pierce the bottom of each pizza cup 3 to 4 times with a fork to prevent bubbling during baking.
- Blind Bake Pizza Cups: Place a mini muffin liner inside each dough-formed cup, then fill with pie weights, uncooked rice, or dried beans. This keeps the dough from puffing up too much and maintains the cup shape during baking.
- Bake the Cups: Bake in the preheated oven for 8 to 10 minutes until the edges turn a light golden brown. Once baked, transfer the pizza cups to a cooling rack and allow them to cool completely.
- Fill and Garnish: When cooled, spoon a heaping teaspoon of hummus into each pizza cup. Top with diced cucumber and a quartered cherry tomato. Finish each cup with a light sprinkle of sea salt to enhance the flavors.
Notes
- You can fill the hummus cups up to 1 hour in advance; cover with plastic wrap and refrigerate to keep them fresh and prevent drying out.
- Pillsbury Classic Pizza Crust works best as it creates sturdy, less puffy cups compared to some homemade doughs.
- If using homemade dough that puffs up too much, use the trick of lining each cup with mini muffin liners and filling with pie weights or dried beans to maintain the shape.
- Let pizza dough rest at room temperature for 5 to 10 minutes if it is too elastic and bounces back when rolling.


