
I absolutely adore making these Pine Cone Brownies Recipe because they transform a simple brownie into an irresistible, festive treat that’s as fun to make as it is to eat. Combining the rich, fudgy texture of homemade brownies with the crunch of sliced almonds and a glossy chocolate coating, these pine cone shapes are perfect for sharing at holiday parties or cozy winter nights. Every bite feels like a little celebration, and I love how the presentation brings a whimsical touch to any dessert table.
Why You’ll Love This Pine Cone Brownies Recipe
When I first tried this Pine Cone Brownies Recipe, the flavor blew me away. The brownies are perfectly fudgy and rich, and the chocolate frosting not only adds an extra layer of smoothness but also makes the texture so luscious. The sliced almonds give a wonderful crunchy contrast that reminds me of autumn walks and the cozy crackle of falling leaves. Honestly, the taste alone makes me want to bake double batches just to have extras on hand.
What really makes me keep coming back to this recipe is how straightforward it is despite its impressive look. You don’t need fancy ingredients or complicated techniques, but the end result feels fancy enough to impress guests or make a festive gift. I’ve brought these to family gatherings, potlucks, and even casual get-togethers, and everyone always asks for the recipe. Plus, shaping the brownies into pine cones is a fun, hands-on activity that’s perfect for involving kids or friends in the kitchen.
Ingredients You’ll Need
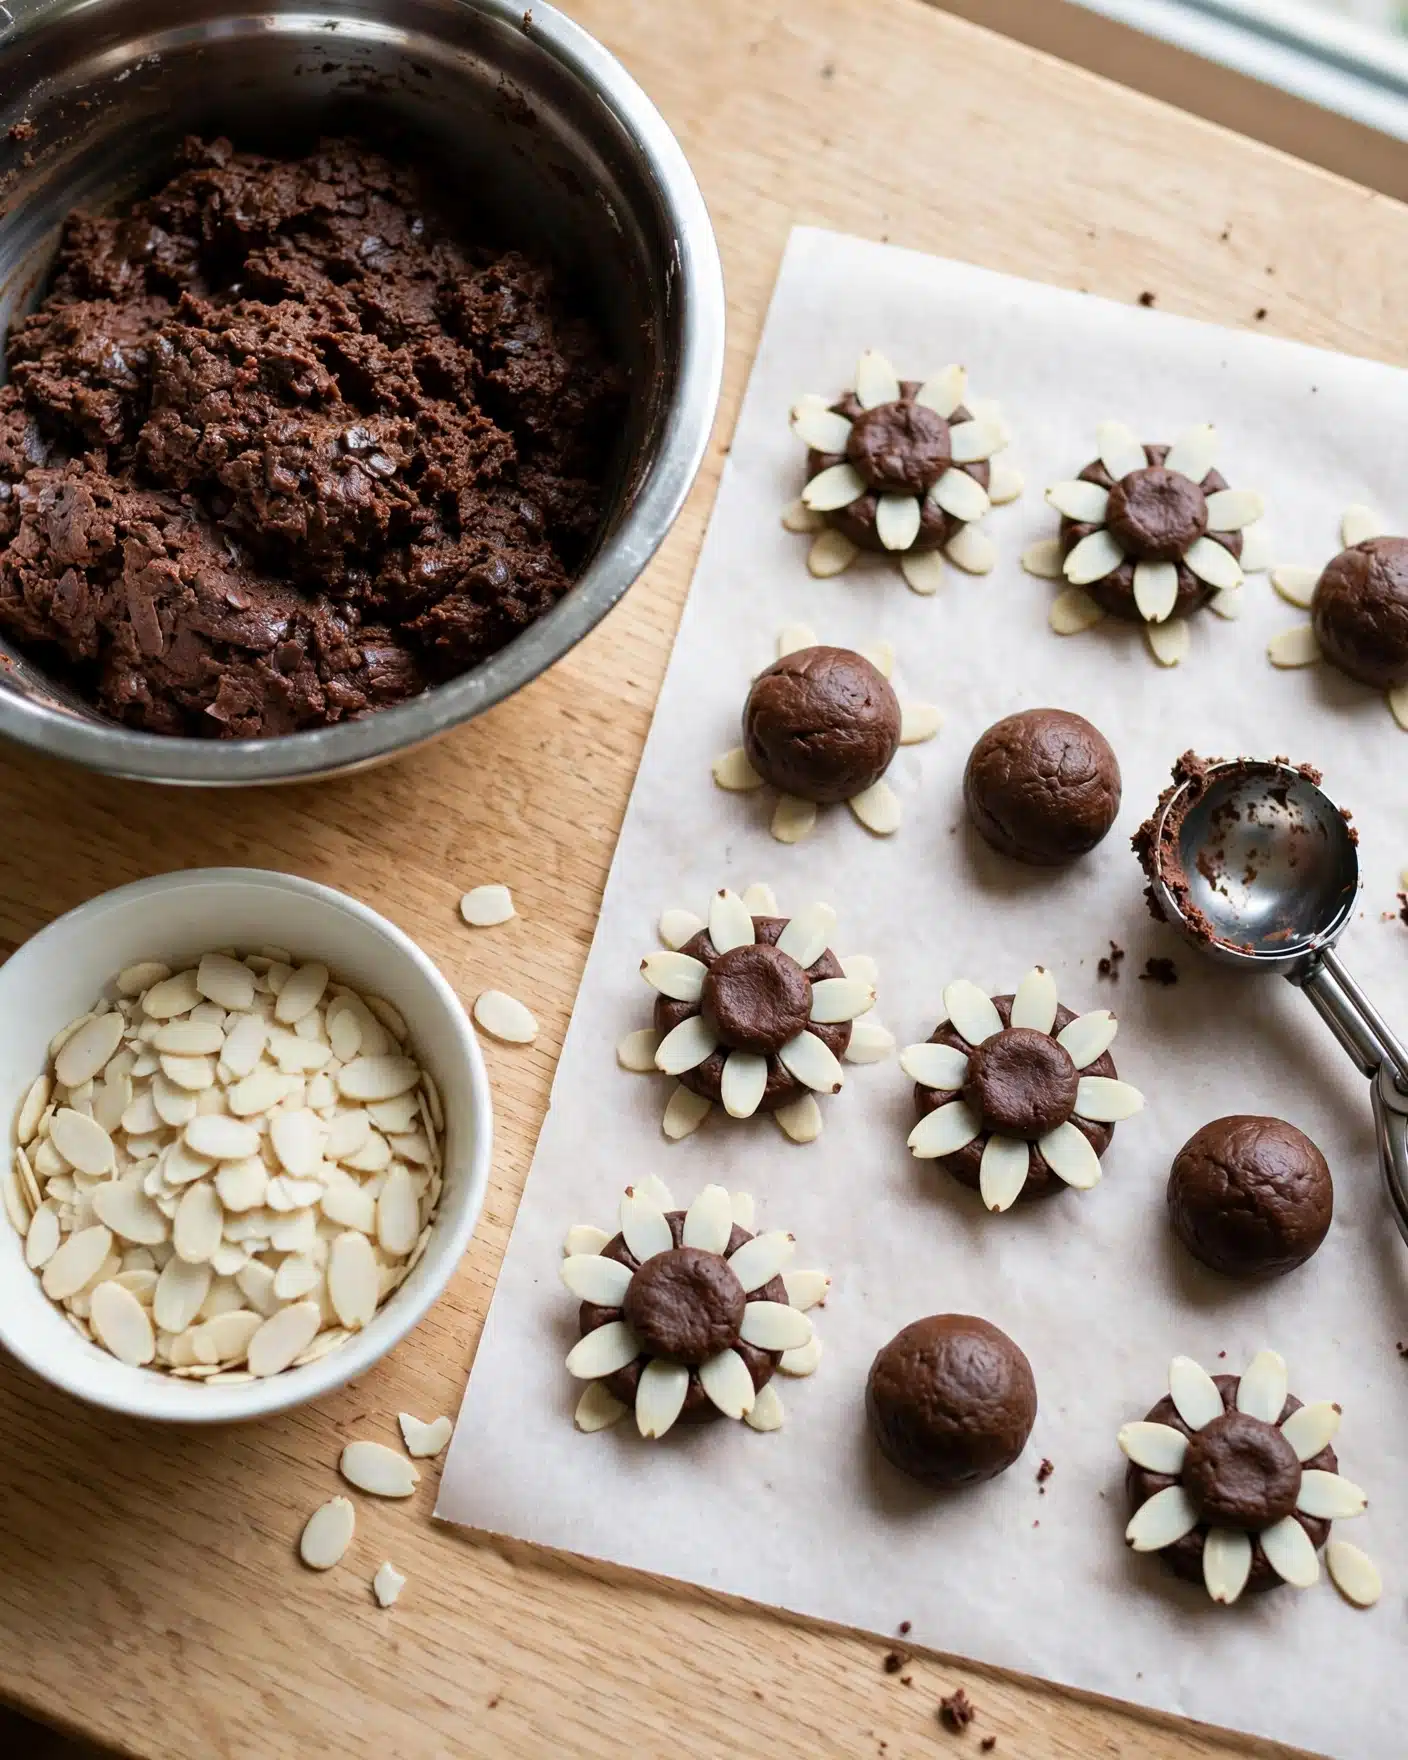
These ingredients might be simple, but each plays an essential role in creating the flavor, texture, and visual appeal of the pine cone brownies. From the rich brownie base to the crunchy almonds and smooth frosting, every component contributes to this delightful holiday treat.
- Brownie mix: A classic boxed brownie mix keeps things easy while ensuring a consistently tasty, fudgy base.
- Chocolate frosting: Using thick chocolate frosting helps bind the brownie mixture and creates the luscious coating for a fudgy finish.
- Sliced almonds: These add texture and visually mimic pine cone scales beautifully, giving the brownies their signature look.
- Confectioners’ sugar: A light dusting adds a touch of elegance and mild sweetness to complement the chocolate.
Directions
Step 1: Preheat your oven and bake the brownies according to the package instructions. Make sure to let them cool just enough to handle—about five minutes resting in the pan is perfect before moving to the next step.
Step 2: Transfer the warm brownies to a mixing bowl and add half of the chocolate frosting. Using a stand mixer or hand mixer, beat everything together until the mixture is smooth and easy to handle. This step transforms the brownies into a pliable dough that’s perfect for shaping.
Step 3: Scoop out tablespoon-sized portions of the brownie mixture. Using your hands, shape each portion into a teardrop to mimic the form of a pine cone. This takes a little patience but is really fun to do.
Step 4: Press sliced almonds into each brownie shape, arranging them so the pointy ends face outward to recreate the scales of a pine cone. If the mixture starts sticking too much to your fingers, wash and dry your hands often. If you find it tricky to stick the almonds in, use a butter knife to gently make small indentations before placing the almonds.
Step 5: Microwave the remaining chocolate frosting in a microwave-safe bowl in 15-second bursts, stirring between intervals until smooth and melted. Place your pine cones on a wire rack over a baking sheet and carefully spoon or pipe the melted frosting over each one, covering the almonds completely.
Step 6: Let the frosting cool to room temperature, allowing the chocolate coating to harden and set beautifully over your pine cone brownies.
Step 7: Lightly dust the chilled pine cones with confectioners’ sugar to add a snowy, festive touch. Serve or store as you wish!
Servings and Timing
This Pine Cone Brownies Recipe yields about five dozen adorable, bite-sized pine cones, perfect for sharing at parties or gifting. Prep time is approximately 20 minutes, mainly spent shaping and decorating, while baking takes around 25-30 minutes depending on your oven. Cooling and frosting add another 15 minutes or so, making the total time close to one hour and five minutes. Planning a bit of extra time to let the chocolate harden ensures your pine cones hold their shape beautifully.
How to Serve This Pine Cone Brownies Recipe
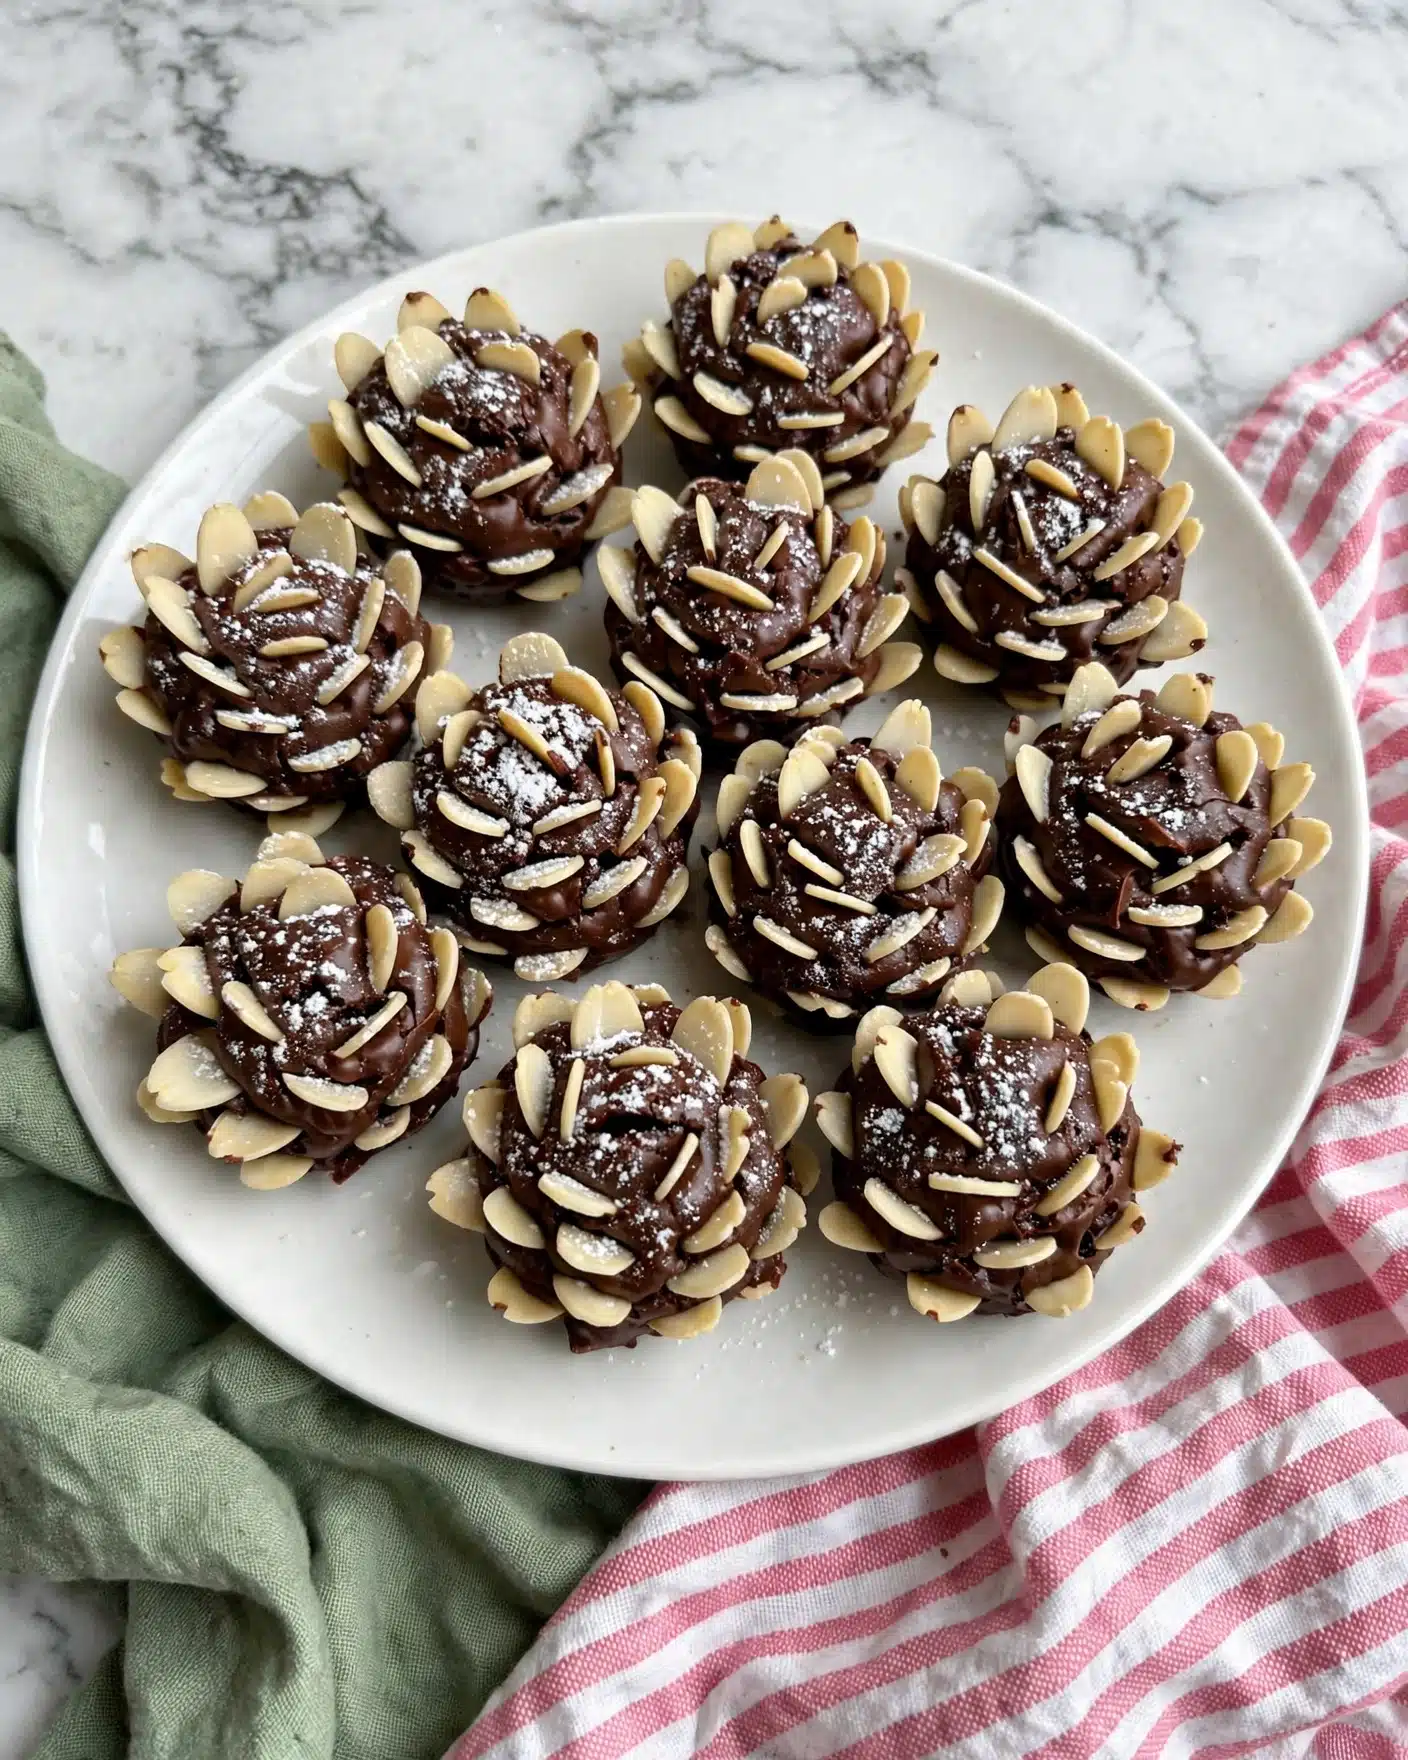
I love serving these pine cone brownies as a centerpiece dessert at holiday gatherings or winter celebrations. They look stunning arranged on a rustic wooden platter with sprigs of pine or holly for a festive vibe. You can portion them small for bite-sized treats, which makes them perfect finger food for parties or potlucks.
For garnishing, a light dusting of confectioners’ sugar makes them look like they’ve just been dusted with fresh snow, adding an irresistible winter charm. You could also drizzle a little extra melted white chocolate if you want to create a two-tone effect, making the design pop even more. Fresh berries or a sprig of mint make lovely colorful accents for plating.
When it comes to pairing drinks, I personally enjoy these brownies with a rich cup of coffee or a glass of full-bodied red wine like a Zinfandel, which complements the chocolate perfectly. For a kid-friendly option, a cold glass of milk or a hot cup of cocoa works beautifully. These dreamy treats are best served at room temperature or slightly chilled to maintain the perfect fudgy texture, but they also warm up nicely for a gooey experience.
Variations
If you want to mix things up, I like experimenting with different nuts instead of sliced almonds—pecans or pistachios add a unique flavor and texture. For those who prefer a bit of extra crunch, tossing in some chopped nuts inside the brownie mixture before baking is a lovely surprise. If you want to amp up the chocolate, adding chocolate chips into the brownie batter creates extra melty pockets.
For dietary adjustments, this recipe can easily be made gluten-free by swapping in your favorite gluten-free brownie mix. Vegan folks can look for dairy-free brownie mixes and chocolate frostings, and I’ve had good luck using coconut oil-based frosting alternatives. Texture and flavor remain fantastic! Also, consider adding a splash of espresso powder to the brownie mix to deepen the chocolate flavor without overpowering the pine cone effect.
Instead of the classic oven bake, I’ve even tried making small individual brownie cups to shape the pine cones once cooled, which can be fun if you want portable single-serving options. Feel free to tweak the shape and size to match whatever occasion you have in mind! The possibilities are truly endless, but the signature charm of the pine cone look is what makes this recipe so memorable.
Storage and Reheating
Storing Leftovers
Once you’ve made your pine cone brownies, store any leftovers in an airtight container to keep them fresh and protect that delicate chocolate coating. I find a single layer in a sturdy container works best to avoid breaking the almond “scales.” Stored this way at room temperature, they stay delicious for up to 3 days. If your kitchen is warm, popping them in the fridge helps maintain their shape, though the texture will firm up quite a bit.
Freezing
These brownies freeze wonderfully. I recommend placing them in a single layer on a baking sheet to flash freeze for about an hour, then transferring the pine cones to a freezer-safe container or zip-top bag with parchment paper between layers to prevent sticking. Frozen pine cone brownies keep well for up to 2 months. When you’re ready to enjoy them, thaw at room temperature for about 30 minutes to bring back that fudgy texture without melting the chocolate coating.
Reheating
Because these treats are best enjoyed at room temperature or slightly chilled, I don’t usually recommend reheating. However, if you prefer a warm brownie experience, gently warm individual pine cones in the microwave for 5-7 seconds, being careful not to melt the chocolate coating too much. Avoid reheating in the oven, as it can dry out the brownies and cause the almonds to burn. I find a quick microwave warm-up is enough to bring out the gooey goodness without losing that beautiful pine cone shape.
FAQs
Can I make the brownies from scratch instead of using a mix?
Absolutely! While the Pine Cone Brownies Recipe uses a boxed mix for convenience, a rich, fudgy homemade brownie batter would work beautifully too. Just make sure your brownies are moist and dense enough to hold the shape once mixed with frosting.
What if I don’t have sliced almonds? Can I use something else?
Yes, you can substitute with other thin nuts such as slivered almonds, chopped pecans, or pistachios for a different texture and flavor. Just keep them thin enough to mimic the pine cone “scales.” Pumpkin seeds might even be a creative alternative!
Is there a way to make these vegan or gluten-free?
Definitely! Choose a vegan and gluten-free brownie mix and pair it with dairy-free chocolate frosting. There are so many great brands today that do not sacrifice flavor or texture, so your pine cone brownies can fit your dietary preferences without losing their charm.
How long do these brownies stay fresh?
Stored properly in an airtight container at room temperature, the pine cone brownies remain fresh for up to three days. Refrigerating can extend this to about a week, but expect the texture to firm up. Freezing is your best bet for longer storage.
Can I prepare these pine cone brownies ahead of time?
You can definitely make and shape the brownie mixture a day ahead, then store the shaped pine cones covered in the fridge. Wait to apply the melted frosting and dusting with confectioners’ sugar until right before serving for the freshest look and taste.
Conclusion
I can’t recommend this Pine Cone Brownies Recipe enough if you’re looking for a show-stopping dessert that’s surprisingly easy and so delicious. The blend of fudgy brownies, crunchy almonds, and silky chocolate frosting makes each bite feel like a cozy celebration. Whether you’re sharing these at holiday parties, gifting them to friends, or just indulging yourself on a cold day, they’re guaranteed to impress and delight. I hope you have as much fun making and eating them as I do!
PrintPine Cone Brownies Recipe
Delightfully festive Pine Cone Brownies combine fudgy baked brownies with rich chocolate frosting and sliced almonds arranged to resemble pine cones, perfect for holiday gatherings or unique dessert presentations.
- Prep Time: 15 minutes
- Cook Time: 35 minutes
- Total Time: 1 hour 5 minutes
- Yield: 5 dozen
- Category: Dessert
- Method: Baking
- Cuisine: American
Ingredients
Brownie Base
- 1 package (16.3 ounces) brownie mix
Frosting & Decoration
- 2 cans (16 ounces each) chocolate frosting
- 1 cup sliced almonds
- Confectioners’ sugar, for dusting
Instructions
- Bake the brownies: Prepare and bake the brownie mix according to the package directions. Once baked, let the brownies stand in the pan for five minutes to slightly cool and set.
- Mix them with frosting: Transfer the warm brownies to the bowl of a stand mixer along with half of the chocolate frosting. Beat together until the mixture is smooth and well combined, ensuring the brownies are pliable for shaping.
- Form the pine cones and add almonds: Scoop the brownie mixture by the tablespoonful and shape each portion by hand into a teardrop resembling a pine cone. Arrange sliced almonds around the shape by pressing them in with the pointy ends facing outward to simulate pine cone scales. For easier shaping, wash and dry your hands frequently to keep the mixture from sticking. If needed, use a butter knife to create small indentations to help almond placement.
- Coat them in melted chocolate: Place the remaining chocolate frosting in a microwave-safe bowl and gently melt it in 15-second increments, stirring in between to prevent burning. Position the shaped pine cone brownies on a wire rack over a baking tray and spoon or pipe the melted frosting over each to cover the almonds completely. Allow the frosting to cool and harden, forming a glossy chocolate coating.
- Dust them with confectioners’ sugar: Lightly dust the finished pine cone brownies with confectioners’ sugar for a snowy, festive touch before serving.
Notes
- Using half the frosting in the mixture and the other half for coating ensures the pine cones hold together well and have a shiny chocolate finish.
- Washing your hands periodically while shaping helps prevent the brownie mixture from sticking excessively to your skin.
- If almond placement is challenging, creating small indentations with a butter knife makes it easier to press almonds securely.
- These brownies can be stored in an airtight container at room temperature for up to 3 days or refrigerated for longer freshness.


