
I absolutely adore making this Monster Cookies Recipe whenever I want to surprise my family with something colorful, fun, and irresistibly delicious. Each cookie is a bright, chewy bundle of flavor packed with buttery dough, festive colors, and those delightful M&Ms and eyeballs that bring a playful monster vibe. These cookies never fail to brighten up any gathering and always leave everyone wanting more.
Why You’ll Love This Monster Cookies Recipe
What makes this Monster Cookies Recipe so special to me is the way the flavors and textures come together in such perfect harmony. The dough itself is buttery and soft, with just the right amount of chewiness, while the M&Ms add a sweet crunch that makes each bite exciting. The colorful dough balls give the cookies a fun, almost magical look that instantly brings on smiles. Every time I bake these, I feel like I’m creating more than just cookies—I’m making little edible works of art that taste as amazing as they look.
I also love how incredibly straightforward the recipe is, even if you’ve never made monster cookies before. The steps are simple, and the dough comes together quickly, making it a great project for an afternoon with family or friends. Plus, after just seven minutes in the oven, you get perfectly soft cookies that stay tender and gooey inside. These cookies really shine for Halloween parties, kids’ playdates, or anytime you want to bring a splash of fun to your dessert table. They stand out because they’re not just tasty but truly memorable and festive.
Ingredients You’ll Need
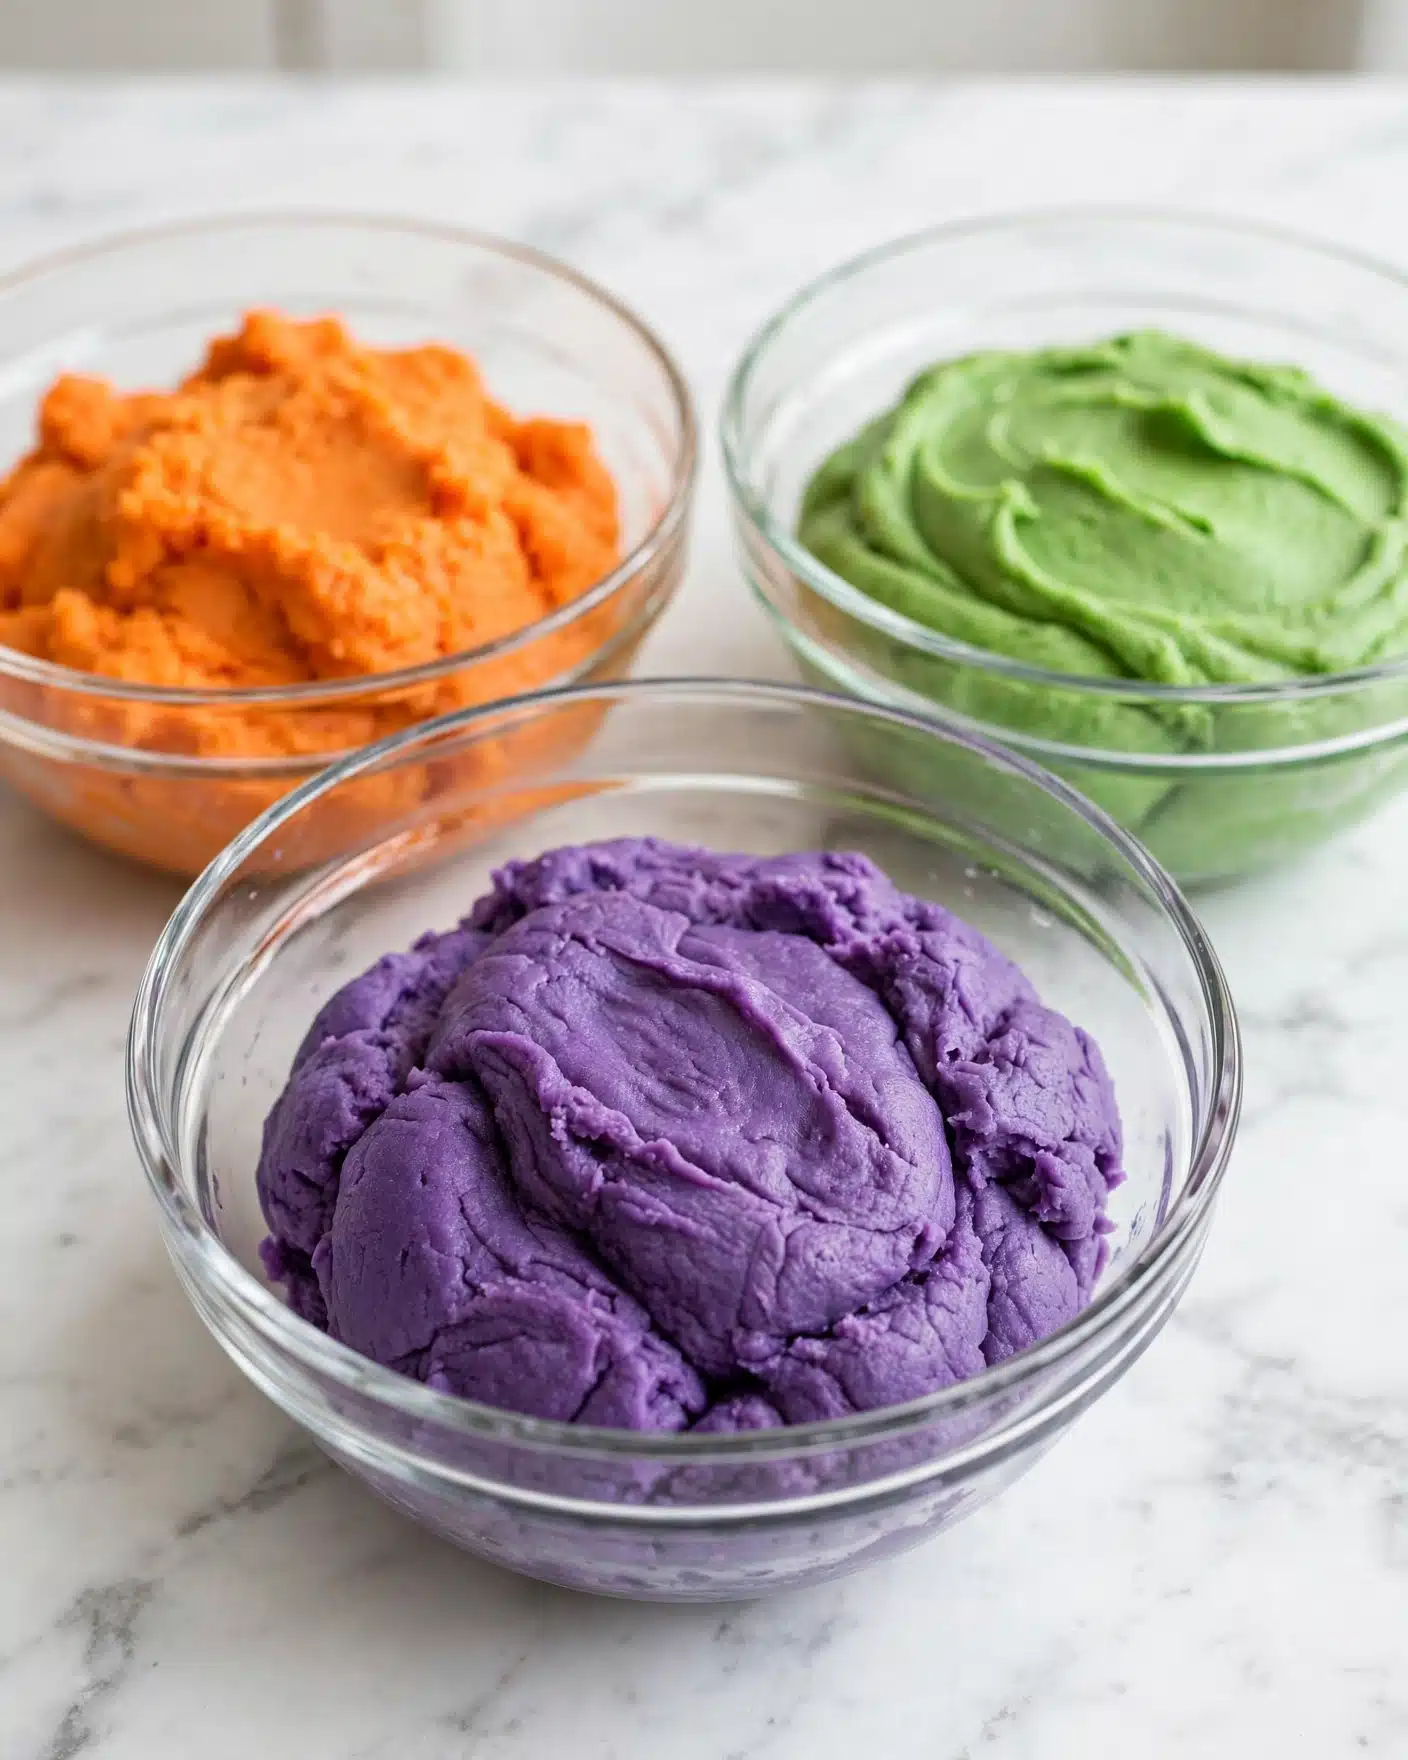
The magic in these Monster Cookies starts with some surprisingly simple but essential ingredients. Each one plays a special role in creating the flavor, texture, and those iconic colorful swirls that make these cookies so fun and inviting.
- All-purpose flour: The base of our dough, providing structure and that tender crumb we love.
- Baking soda and baking powder: These leaveners ensure the cookies rise just right, with a lovely lightness.
- Salt: A small but essential touch to balance sweetness and enhance flavors.
- Unsalted butter: Adds rich creaminess and helps create that soft cookie texture.
- Granulated sugar and light brown sugar: The perfect combo for sweetness and slight chew.
- Egg: Acts as a binder and adds moisture to the dough.
- Vanilla extract: Gives a warm, inviting depth to the cookies’ flavor.
- Gel icing colors (green, orange, purple): These create the fun, vibrant dough colors without adding extra moisture.
- Sanding sugar (optional): For a delicate sparkle and light crunch on the outside.
- Eyeballs and M&Ms: The star decorations that bring these monster cookies to life and add sweet bursts of flavor.
Directions
Step 1: Preheat your oven to 350°F (180°C) and line your baking sheets with parchment paper or silicone baking mats. This prevents sticking and helps the cookies bake evenly.
Step 2: In a medium bowl, whisk together the flour, baking soda, baking powder, and salt. Set this dry mixture aside for now.
Step 3: In a large mixing bowl, cream the room temperature butter with the granulated and brown sugars. Use medium speed on your mixer for 2 to 3 minutes until the mixture becomes light in color and wonderfully fluffy. You’ll notice the transformation, which is your sign to move on.
Step 4: Beat in the egg until it’s fully combined, then stir in the vanilla extract. This builds the flavor base and consistency.
Step 5: Gradually add your dry ingredient mixture to the wet ingredients. Mix until the dough is thick, cohesive, and not sticky. Resist the urge to overmix here—it’s crucial for the perfect cookie texture.
Step 6: Divide the dough evenly into three bowls. Tint each bowl with a small amount of green, orange, or purple gel icing color. Remember, less is more when it comes to the gel color to maintain dough consistency.
Step 7: Scoop 1 1/2 tablespoon-sized balls of dough. You can gently roll each into a smooth ball. If you want, roll the balls in sanding sugar, but I find skipping this helps the eyeballs and M&Ms stick better later.
Step 8: Place the dough balls on your prepared baking sheets, making sure to space them a couple of inches apart since they will spread.
Step 9: Bake for 7 to 8 minutes. You’re aiming for cookies that spread slightly and look soft in the centers, with edges just starting to turn golden. Remove them from the oven a bit before they look fully set to keep them chewy.
Step 10: Right after taking the cookies out of the oven, press on the eyeballs and M&Ms to decorate. The residual heat will soften the candies just enough to make them stick nicely.
Step 11: Allow the cookies to cool on the baking sheet for 4 to 5 minutes before transferring them carefully to a wire rack to cool completely. This resting step helps them set perfectly.
Servings and Timing
This Monster Cookies Recipe makes about 32 cookies—perfect for sharing or a big batch of treats. It takes roughly 45 minutes for prep, including mixing and shaping the dough, and only 7 to 8 minutes to bake. Overall, you’re looking at about 52 minutes from start to finish, including cooling time. These cookies come together fairly quickly, giving you plenty of time to prepare for your party or afternoon snack craving.
How to Serve This Monster Cookies Recipe
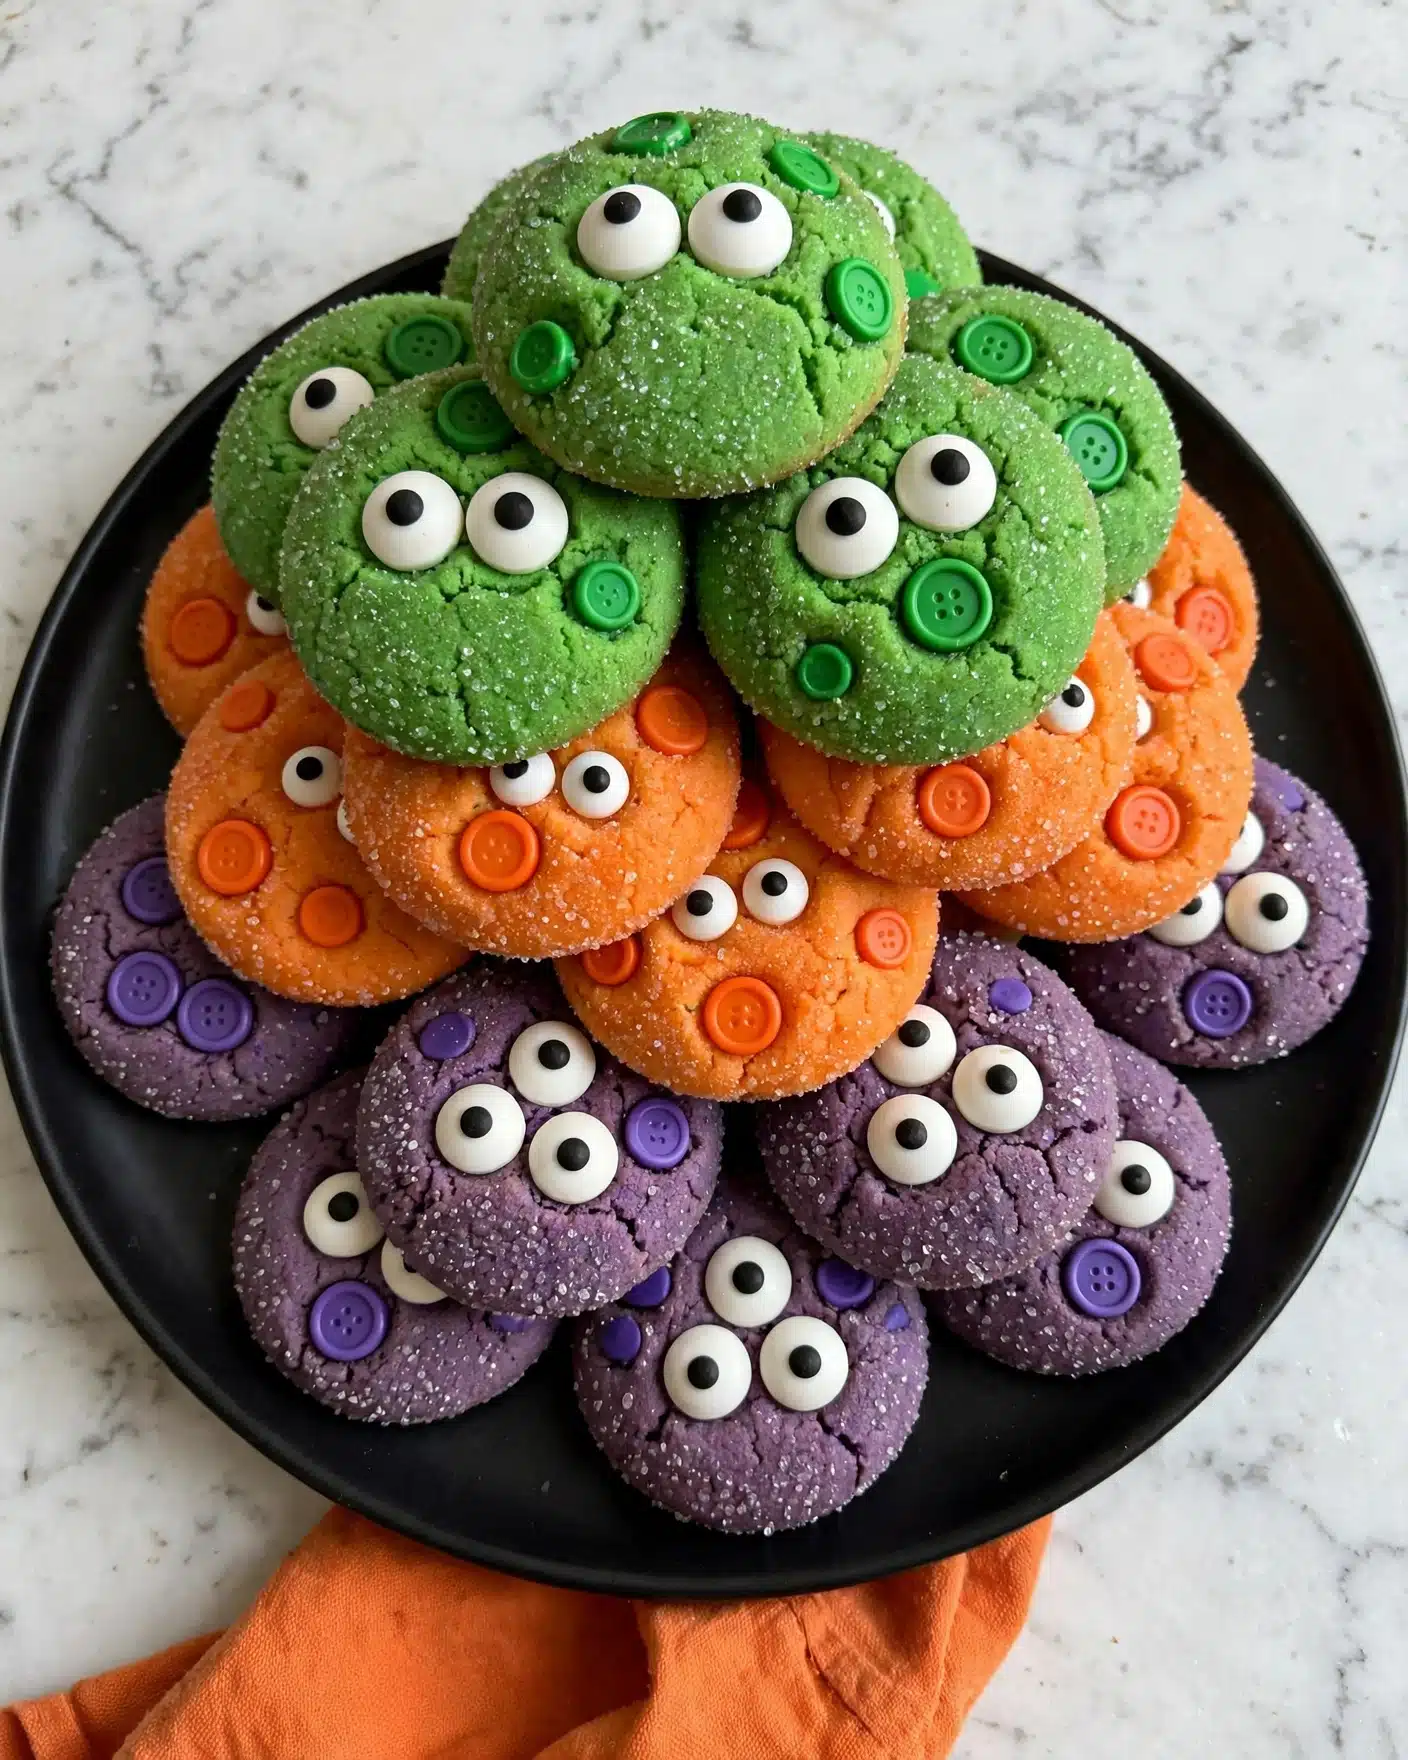
Whenever I serve these monster cookies, I like to keep the presentation as fun and colorful as the cookies themselves. They look fantastic piled on a bright platter or arranged on a pretty cake stand. For a party, I might scatter a few extra candy eyeballs and M&Ms around the serving plate to extend the playful monster theme. I’ve even found that placing a few alongside simple milk glasses adds a nostalgic touch that everyone loves.
These cookies pair wonderfully with cold milk, but I also enjoy them with a warm cup of coffee or hot chocolate, especially on cooler days. If you want to get fancy, they can be a quirky dessert alongside a scoop of vanilla ice cream for an indulgent treat. Because of their fun appearance and size, they’re perfect for Halloween gatherings, kids’ birthday parties, or casual weekend baking sessions with friends.
I usually recommend serving these monster cookies at room temperature so you get the full chewy texture and the candy toppings hold their shape. If you’re serving right after baking, just wait for them to cool slightly so the cookies aren’t too fragile. Portion-wise, one or two cookies per person is usually enough as they are delightfully rich and sweet.
Variations
I love experimenting with this Monster Cookies Recipe to keep it fresh and interesting. One of my favorite tweaks is swapping regular M&Ms for peanut butter or caramel-filled M&Ms for a different flavor burst. You can also add mini chocolate chips or even chopped nuts for added texture and richness. The gel colors can be any hues you want, which makes this cookie super adaptable for different holidays or events.
For anyone with dietary needs, this recipe can be made gluten-free by replacing the all-purpose flour with a trusted gluten-free flour blend, and it still turns out great with only slight adjustments to baking time. Vegans can try substituting the butter for coconut oil or a vegan butter spread and using flax eggs as an egg replacement, though the texture will be a bit different but still delicious.
If you want to mix things up even further, try baking the dough as bars instead of individual cookies or even make no-bake version bites by chilling the dough and shaping it into smaller treats. I personally enjoy the classic oven method best for that fresh-baked aroma and the perfect chewy bite every time.
Storage and Reheating
Storing Leftovers
These monster cookies keep wonderfully for several days if stored properly. I like to place them in an airtight container at room temperature, stacking them with parchment paper between layers to prevent sticking. Stored like this, they’ll stay fresh and chewy for up to 5 days, perfect for making ahead or enjoying bit by bit.
Freezing
You can absolutely freeze these cookies! I recommend freezing them on a baking sheet first until firm, then transferring them to a freezer-safe bag or container. They keep well in the freezer for up to 3 months. When you want to enjoy them, just thaw at room temperature or warm gently in the microwave for a few seconds to refresh that soft texture.
Reheating
To bring back the fresh-from-the-oven feel, I usually reheat monster cookies in a microwave for about 10 seconds or pop them in a warm oven at 300°F (150°C) for 3 to 4 minutes. Avoid reheating too long, or they might dry out. This quick heat softens the cookie and slightly melts the candy toppings again, reviving that freshly baked magic.
FAQs
Can I use other types of candy instead of M&Ms?
Absolutely! You can swap M&Ms for any similar-size candy like mini Reese’s Pieces, chocolate chips, or even colorful jelly beans. Just keep in mind how the candy melts or adheres to the cookie when warm.
How do I prevent the cookies from spreading too much?
The key is not to add too much gel coloring since it adds moisture, and to scoop uniform dough balls chilled or at room temperature. Using parchment-lined sheets and proper spacing also helps control spreading.
Can I make the dough ahead of time?
Yes, the dough can be prepared up to 24 hours in advance. Just wrap it tightly and refrigerate, then divide and color just before baking for best results.
What makes these cookies “monster” cookies?
It’s the vibrant colored dough combined with fun candy “eyeballs” that give the cookies a playful monster appearance. It’s all about the whimsical visual that makes them stand out from usual cookies.
Are these cookies crunchy or soft?
They’re soft and chewy with lightly crisp edges. The short baking time helps keep that tender inside, while the edges set just enough for a slight bite.
Conclusion
I genuinely hope you give this Monster Cookies Recipe a try because it’s one of those joyful recipes that delivers big smiles and loads of fun every time. Whether you’re baking for a festive occasion or a simple cozy day at home, these cookies offer an amazing combination of bold colors and delicious flavor. I can’t wait for you to experience the chewy, colorful magic of these monster cookies, just as I have with everyone I share them with.
PrintMonster Cookies Recipe

These Monster Cookies are a fun and colorful treat perfect for Halloween or any festive occasion. Featuring vibrant hues from gel icing colors and decorated with spooky eyeballs and M&Ms, these soft and chewy cookies are easy to make and sure to delight kids and adults alike. With a soft center, a slight crunch on the edges, and a playful appearance, they combine classic cookie flavors with a whimsical twist.
- Prep Time: 45 minutes
- Cook Time: 7-8 minutes
- Total Time: 52 minutes
- Yield: 32 cookies
- Category: Dessert
- Method: Baking
- Cuisine: American
Ingredients
Dry Ingredients
- 2 3/4 cups (358g) all-purpose flour (measured correctly)
- 1 tsp baking soda
- 1/2 tsp baking powder
- 1/2 tsp salt
Wet Ingredients
- 1 cup (224g) unsalted butter, room temperature
- 1 cup + 2 tbsp (233g) granulated sugar
- 2 tbsp (28g) light brown sugar
- 1 large egg
- 2 tsp vanilla extract
Coloring and Decorations
- Green, Orange and Purple gel icing color
- Green, Orange and Purple sanding sugar (optional)
- Edible eyeballs
- M&Ms candies
Instructions
- Preheat Oven and Prepare Baking Sheets: Set your oven to 350°F (180°C). Line baking sheets with parchment paper or silicone baking mats and set them aside to be ready for the dough.
- Mix Dry Ingredients: In a medium bowl, whisk together the all-purpose flour, baking soda, baking powder, and salt. Set this mixture aside for later.
- Cream Butter and Sugars: Using a large mixing bowl and a mixer on medium speed, beat the room temperature unsalted butter with granulated and brown sugars until the mixture is fluffy and lighter in color, approximately 2-3 minutes. This step is crucial to incorporate air and achieve the perfect texture.
- Add Egg and Vanilla: Crack in the large egg and mix until fully incorporated. Then add the vanilla extract and mix again until combined.
- Combine Dry Ingredients: Slowly add the flour mixture to the wet ingredients and mix just until combined. The dough should be thick and not sticky. Avoid overmixing to prevent tough cookies.
- Divide and Color Dough: Divide the dough evenly into three separate bowls. Add a small amount of green gel icing color to one bowl, orange to the second, and purple to the third. Mix each until the color is evenly distributed but avoid adding too much gel to prevent spreading.
- Form Cookie Balls: Using approximately 1 1/2 tablespoons of dough, roll into balls. Optionally, roll each ball into colored sanding sugar to coat, although this may make candy decoration adhesion more difficult.
- Bake Cookies: Place the cookie balls on the prepared baking sheets spaced evenly. Bake for 7-8 minutes until centers look soft and edges are just starting to turn golden. Remove promptly to prevent overbaking.
- Add Decorations: Immediately after removing cookies from the oven, press edible eyeballs and M&Ms into the warm cookies to secure them as the cookies cool.
- Cool Cookies: Allow the cookies to cool on the baking sheets for 4-5 minutes, then transfer to wire racks to cool completely before serving or storing.
Notes
- Do not overmix the dough after adding flour to maintain a tender texture.
- Use gel icing colors sparingly to avoid adding extra moisture which causes the cookies to spread too much.
- Sanding sugar is optional; it adds sparkle but can make decorations less sticky.
- Press candies and eyeballs onto cookies while still warm to help them adhere better.
- Cookies are best stored in an airtight container to maintain freshness.


