
I absolutely love sharing this Easy No-Knead Skillet Bread Recipe with friends and family because it captures the magic of fresh, homemade bread without the fuss of traditional kneading. To me, this bread is a revelation—crispy on the outside, wonderfully airy and tender on the inside, with a subtle rustic charm that feels both comforting and impressive. The simplicity of mixing a few basic ingredients, letting the dough do its thing, and then popping it into a hot skillet makes the process so approachable and rewarding. Whenever I need a quick but special bread to accompany a meal, this recipe is my go-to. It truly brings that bakery-worthy loaf vibe right into my kitchen with minimal effort and maximum flavor.
Why You’ll Love This Easy No-Knead Skillet Bread Recipe
What really makes this Easy No-Knead Skillet Bread Recipe stand out to me is the flavor profile. The slow fermentation time allows the natural sweetness and subtle tanginess of the dough to develop fully, creating a crust that is deeply golden and bursting with toasty, almost nutty notes. Inside, the crumb stays moist and airy with this delicate open texture that I just can’t get enough of. I think the gentle addition of fresh herbs like rosemary or thyme really elevates the bread, giving it just a hint of earthiness that pairs beautifully with everything from soups to cheeses.
Another thing I adore about this recipe is how unbelievably easy it is. There’s no need for fancy equipment or complicated techniques—just a bowl, some patience, and a cast-iron skillet. The fact that it requires zero kneading is a game-changer, especially when time is tight or when I want to bake fresh bread without making a big mess. Because it’s cooked in a skillet, the crust develops beautifully crispy edges that remind me of a perfect artisan loaf, but with a shortcut that anyone can handle. I love serving this bread at casual dinners, weekend brunches, or even for a cozy night in; it’s versatile, stunning, and reliably delicious every time.
Ingredients You’ll Need
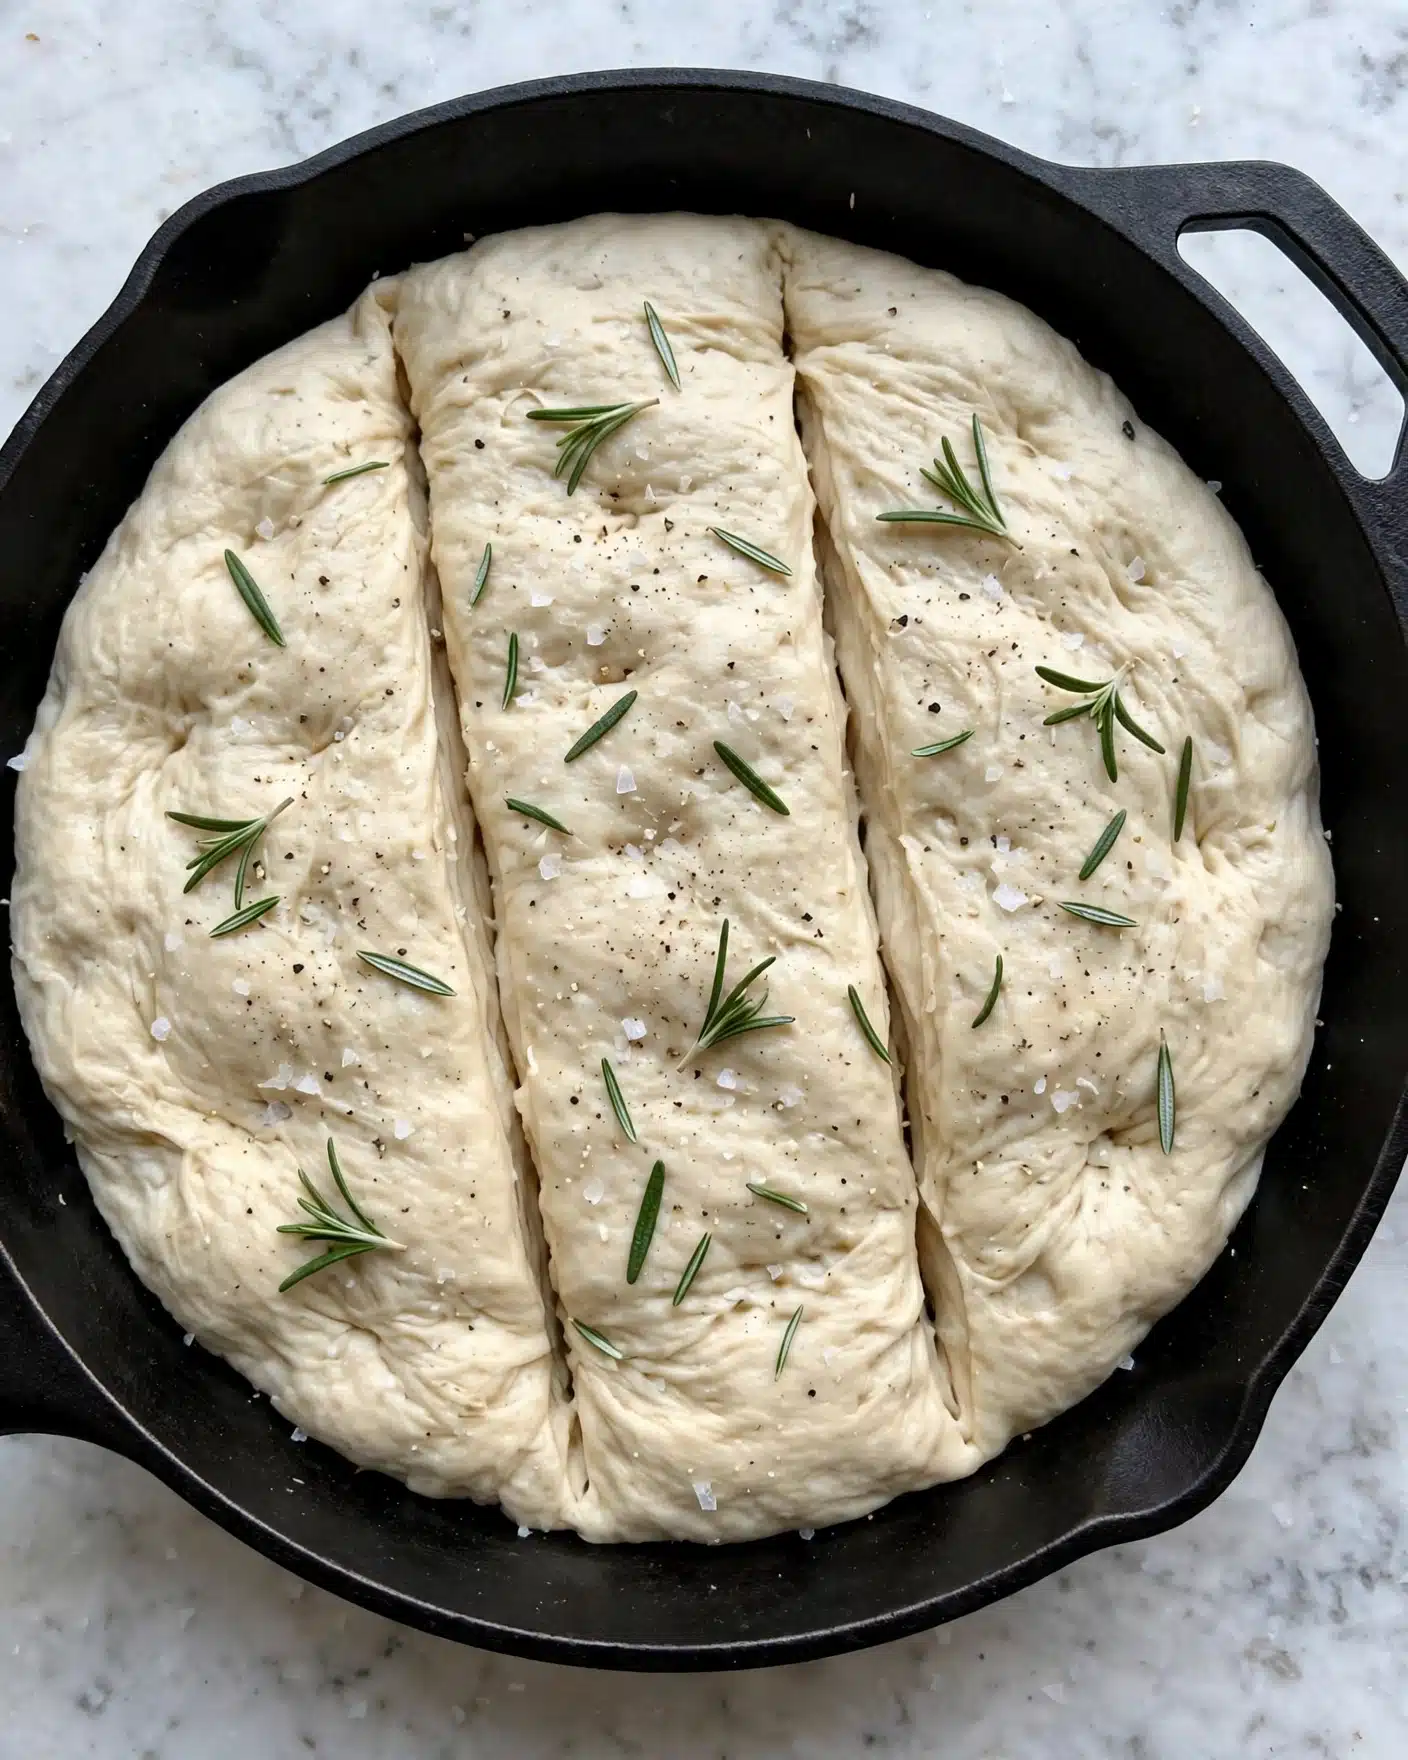
This recipe relies on a handful of simple, honest ingredients that each play an essential role. Together, they give the bread its structure, flavor, and irresistible crust.
- All-purpose or bread flour: Using good quality flour ensures a great rise and chewy texture.
- Kosher salt: Enhances flavor without overpowering and controls yeast activity.
- Instant or active dry yeast: Gives life to the dough with essential fermentation.
- Warm water (120°F-130°F / 48-54°C): Activates the yeast gently without killing it.
- Fresh herbs (optional): Adds a fragrant herbal note that brightens up every bite.
Directions
Step 1: In a large mixing bowl, I add all the ingredients and stir them together until combined. Then I use my hands to knead gently just until all the flour is hydrated—there’s really no heavy kneading involved; just enough to form a shaggy dough.
Step 2: I cover the bowl tightly with plastic wrap or even a shower cap, which I find works amazingly well, and let the dough bulk ferment at room temperature for about 3 and a half hours. The dough is ready when it has doubled in size and looks bubbly on top, which is always exciting to watch!
Step 3: While the dough is resting, I lightly oil the bottom and sides of my cast-iron skillet, usually around 8 to 10 inches in diameter. This helps create that signature crisp crust and prevents sticking.
Step 4: I gently pour the dough from the bowl into the skillet and dust the top lightly with flour. Then, I cover it loosely and let it proof again for 30 to 45 minutes until it looks puffy and filled with air.
Step 5: Meanwhile, I position an oven rack in the middle and preheat the oven to 400°F (205°C) so it’s nice and hot when the bread goes in.
Step 6: As an optional but satisfying step, I like to make a few shallow slashes across the top of the dough with a sharp knife or bread lame. This allows the bread to expand beautifully and adds to its rustic look. Sometimes I sprinkle extra chopped herbs and a pinch of coarse salt on top for added flavor and texture.
Step 7: I place the skillet into the oven and bake for about 35 minutes, keeping an eye out for that gorgeous deep golden crust. If I want to be precise, I check that the internal temperature hits about 200°F (93°C).
Step 8: After baking, I let the bread cool for at least one hour before slicing. This resting time helps the crumb set perfectly and makes it easier to slice. I serve wedges straight from the skillet or carefully remove the loaf with a spatula for a pretty presentation.
Servings and Timing
This Easy No-Knead Skillet Bread Recipe makes one generous loaf, perfect for serving 4 to 6 people depending on appetite and accompaniments. The active prep time is minimal—only about 10 to 15 minutes mixing and shaping. However, the dough requires about 3 and a half hours for bulk fermentation plus 30 to 45 minutes of proofing before baking. The bread then bakes for roughly 35 minutes, followed by at least one hour of cooling. So, from start to finish, you’re looking at close to 5 hours, but most of that is hands-off time. It’s truly worth the wait!
How to Serve This Easy No-Knead Skillet Bread Recipe
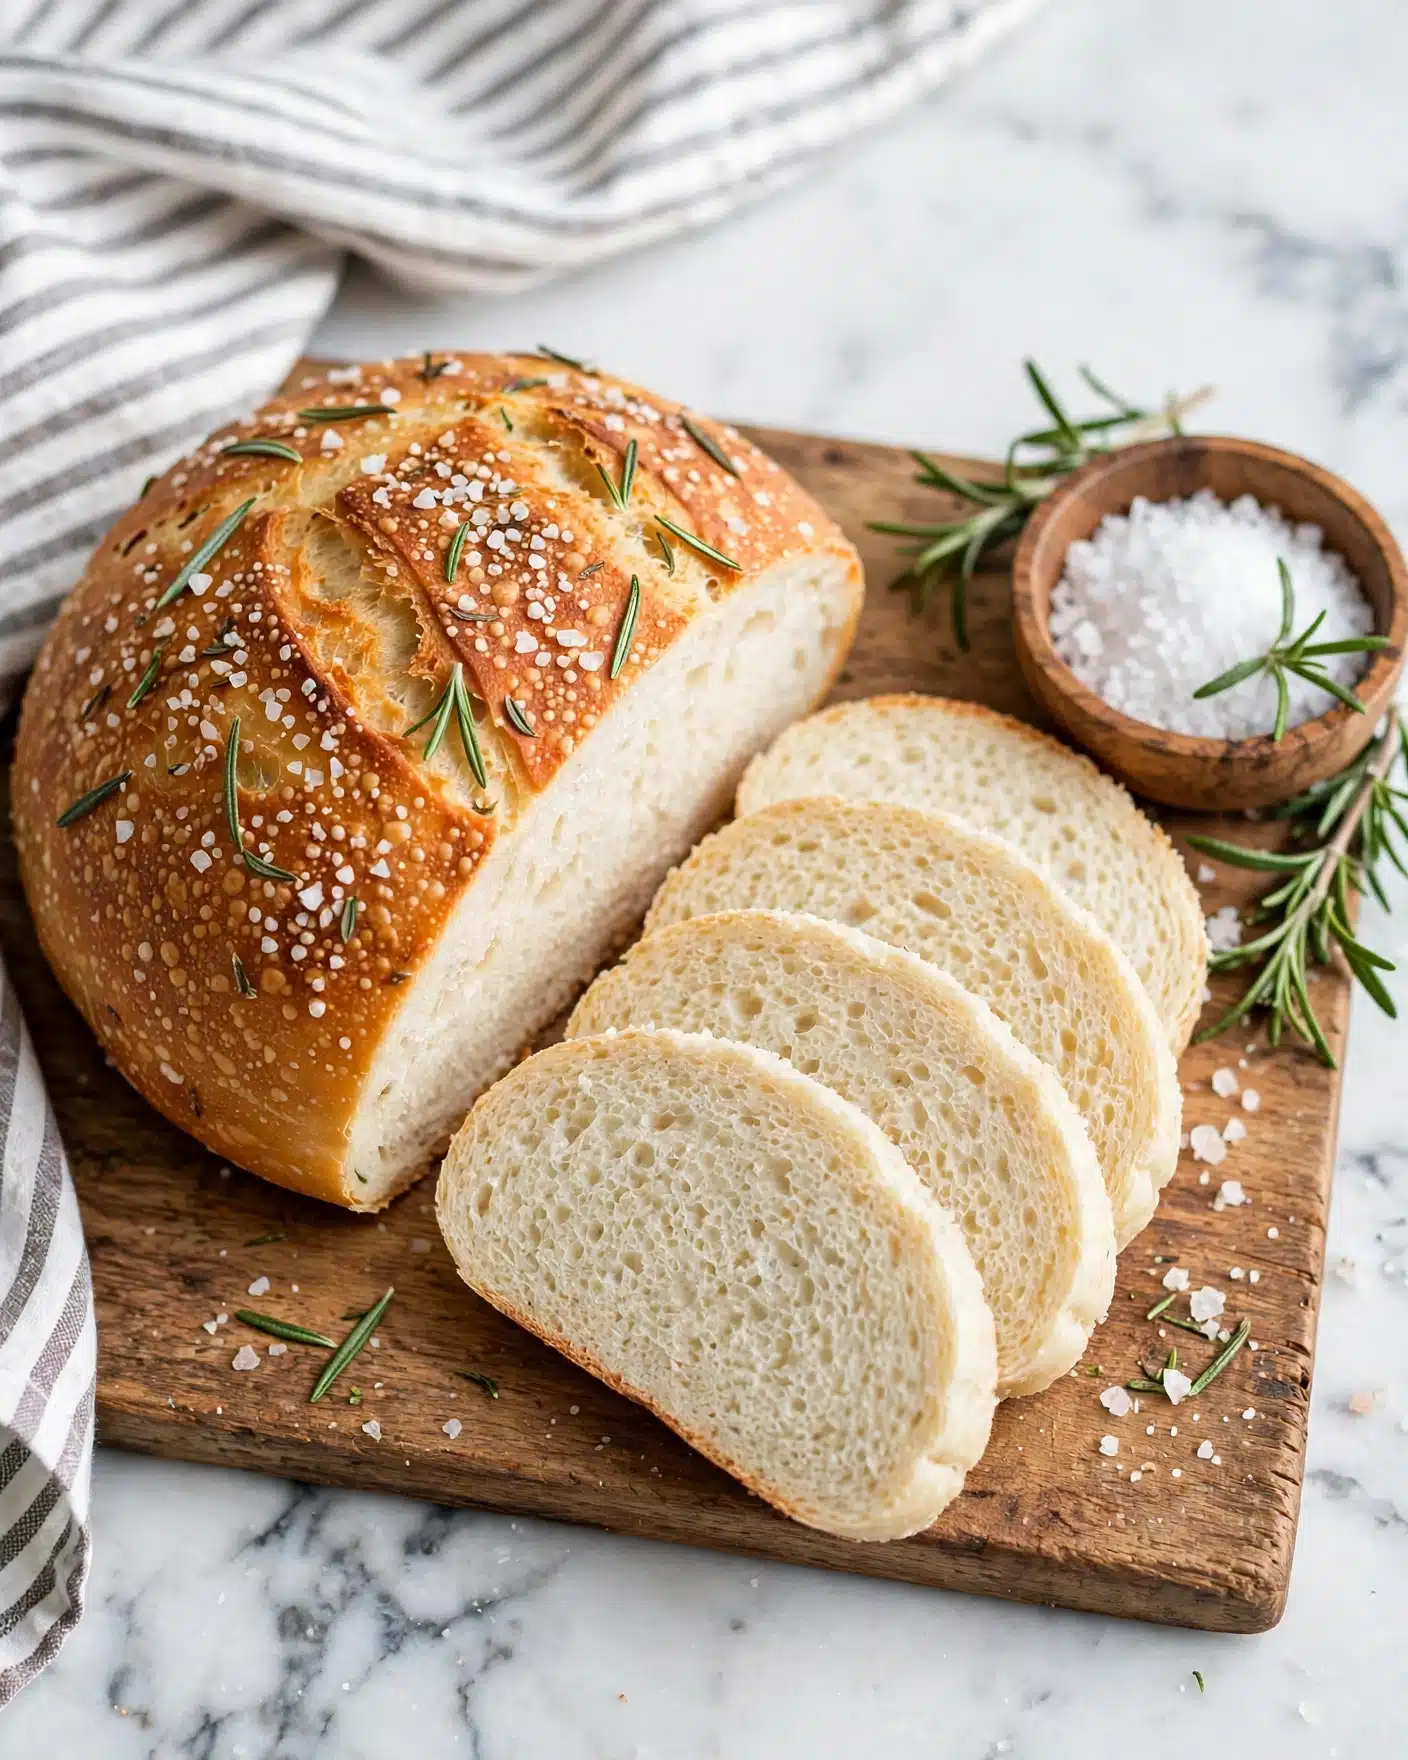
When I serve this skillet bread, I love keeping it simple so the texture and flavor shine. It’s incredibly versatile, pairing wonderfully with just about anything. For casual meals, I slice it warm and serve alongside a bowl of homemade soup or a fresh salad, soaking up the delicious juices and dressings. The fresh herb notes in the bread make it a fantastic partner for roasted vegetables or a cheese platter, especially with creamy brie or sharp cheddar.
For a bit more flair, I like to brush the top of the warm bread with a little melted butter or garlic-infused olive oil before serving, adding a glossy finish and extra aroma. A sprinkling of flaky sea salt and chopped fresh herbs on top just before plating can really elevate the presentation, making it look like something straight out of a bakery window. I usually slice wedges or thick rounds and arrange them nicely on a rustic wooden board or a large plate to invite guests in.
When it comes to drinks, this bread is a dream with a glass of fruity red wine like a Pinot Noir or a chilled Sauvignon Blanc. Non-alcoholic options like sparkling water with a squeeze of lemon or a lightly brewed herbal tea also complement the herbaceous notes beautifully. Whether it’s a cozy weeknight dinner, a holiday feast, or a casual gathering with friends, I find this bread adds a warm, inviting touch that everyone appreciates. Serving it warm brings out all the best qualities, but it’s still tasty at room temperature if you want to prepare ahead.
Variations
I love experimenting with this Easy No-Knead Skillet Bread Recipe to suit different moods and dietary needs. For example, substituting whole wheat flour for half of the all-purpose flour adds a wholesome, nutty depth and a bit more chewiness, which I find delightful. If you prefer a gluten-free version, using a suitable gluten-free flour blend works well, though I recommend adding a teaspoon of xanthan gum to help mimic the elasticity of gluten.
For vegan variations, this recipe is already naturally plant-based, but I like to sneak in extra flavor by adding roasted garlic or chopped olives right into the dough before the bulk fermentation stage. When I’m feeling adventurous, I also try adding spices such as smoked paprika or za’atar to bring new savory notes that lift the bread into something really exciting and unique.
You can also explore different cooking methods: while the skillet gives the bread that coveted crust, I’ve framed this recipe for baking directly on a preheated baking stone or sheet pan for a thinner, flatter loaf. Additionally, using a Dutch oven with a lid during the initial baking phase traps steam and develops an even crispier crust, giving you a bit more variety to choose from depending on what equipment you have handy.
Storage and Reheating
Storing Leftovers
Leftover bread from this Easy No-Knead Skillet Bread Recipe keeps beautifully if stored properly. I usually let it cool completely first, then wrap it gently in a clean kitchen towel and place it in a paper bag or a bread box to maintain the crust’s crispness while preventing it from drying out. If you prefer plastic wrap or airtight containers, be aware that the crust may soften slightly, but the bread inside stays tender. Typically, it will keep fresh for about 2 to 3 days at room temperature.
Freezing
This bread freezes quite well, which is great for extending its shelf life. I slice the loaf once it’s fully cooled and wrap individual portions tightly in plastic wrap followed by a layer of aluminum foil or a freezer-safe ziplock bag. This double wrapping protects it from freezer burn and helps preserve taste and texture. Frozen bread can last about 2 to 3 months. When you’re ready to enjoy it, simply thaw slices at room temperature or reheat them directly.
Reheating
To revive the bread’s fresh-baked charm, I recommend reheating in a preheated oven at 350°F (175°C) for 8 to 10 minutes. Wrapping the bread loosely in foil keeps it from drying out if you prefer it softer; otherwise, baking it uncovered restores a crispy crust beautifully. I avoid microwaving as it tends to make the bread chewy or soggy. If you have a toaster oven, that’s another excellent method for reheating single slices quickly, giving you back that crunchy crust with just the right warmth inside.
FAQs
Can I use all-purpose flour instead of bread flour?
Absolutely! Both all-purpose and bread flour work well in this recipe. Bread flour has a higher protein content which gives a chewier texture and better rise, but all-purpose flour still yields a tender, delicious loaf. Feel free to use what you have on hand without worry.
Do I need to knead the dough at all?
No kneading is required beyond mixing the ingredients until fully combined and squeezing the dough to hydrate all the flour. The long fermentation period develops the gluten naturally, resulting in that airy, open crumb without the effort of kneading.
Can I add other flavorings or inclusions?
Definitely! Fresh herbs like rosemary or thyme are a perfect touch, but I also enjoy adding things like garlic, olives, sun-dried tomatoes, or even seeds and nuts. Just gently fold these into the dough after the bulk fermentation but before proofing in the skillet.
What if I don’t have a cast-iron skillet?
If you don’t have a cast-iron skillet, a heavy oven-safe pan or a Dutch oven works well too. The goal is to have a vessel that traps heat evenly and helps develop the crust. Just make sure it’s oven-safe to 400°F (205°C).
How can I tell when the bread is fully baked?
The bread should be a deep golden brown on top and have an internal temperature of about 200°F (93°C) when done. If you don’t have a thermometer, tap the bottom of the loaf and listen for a hollow sound—it’s a good indicator that the bread is baked through.
Conclusion
I truly hope you give this Easy No-Knead Skillet Bread Recipe a try because it has brought so much joy and deliciousness into my kitchen with such little effort. It’s a perfect recipe to build confidence around bread baking while treating yourself to that amazing homemade loaf feeling. Whether you’re a seasoned baker or just starting out, this bread will quickly become a staple you’re proud to serve at any table. Happy baking, and enjoy every warm, crusty slice!
PrintEasy No-Knead Skillet Bread Recipe
This Easy No-Knead Skillet Bread recipe makes a rustic, crusty loaf with minimal effort. Combining simple pantry ingredients, this bread requires no kneading and uses a cast-iron skillet for baking, yielding a beautifully golden crust and soft, airy crumb. Perfect for beginners and anyone craving homemade bread without the fuss.
- Prep Time: 15 minutes
- Cook Time: 35 minutes
- Total Time: 4 hours 50 minutes
- Yield: 1 loaf (about 1 large skillet bread)
- Category: Bread
- Method: Baking
- Cuisine: American
Ingredients
Dry Ingredients
- 630 grams (5 ¼ cups) all-purpose flour or bread flour
- 2 ¼ teaspoons kosher salt
- ¾ teaspoon instant yeast or 1 teaspoon active dry yeast
Wet Ingredients
- 420 grams (1 ¾ cups) water at about 120°F-130°F (48-54°C)
Optional Ingredients
- 1 tablespoon fresh chopped herbs, like rosemary or thyme
- Additional chopped herbs and coarse salt for topping
Instructions
- Combine Ingredients: In a large mixing bowl, add all dry ingredients and water. Stir to combine, then use your hands to squeeze and knead lightly until all flour is fully hydrated.
- Bulk Fermentation: Cover the bowl with plastic wrap or a shower cap and let the dough rise at room temperature for about 3 ½ hours, or until it doubles in size and becomes bubbly on top.
- Prepare Skillet: Lightly oil the bottom and sides of an 8-10 inch cast-iron skillet to prevent sticking.
- Shape and Proof Dough: Gently transfer the dough into the oiled skillet, dust the top with a little flour, and let it proof for 30-45 minutes until it becomes puffy and full of air pockets.
- Preheat Oven: Place an oven rack in the center position and preheat the oven to 400°F (205°C).
- Optional Scoring: Slash the top of the dough a few times with a sharp knife or bread lame, and if desired, sprinkle additional chopped herbs and coarse salt on top.
- Bake: Place the skillet in the preheated oven and bake for about 35 minutes, until the bread is a deep golden brown and the internal temperature reaches 200°F (93°C).
- Cool and Serve: Remove the skillet from the oven and let the bread cool for at least 1 hour before slicing. Slice wedges directly from the skillet or use a spatula to remove the loaf.
Notes
- Using warm water (120°F-130°F) activates the yeast effectively for proper fermentation.
- For a more herby flavor, add chopped rosemary or thyme optionally into the dough or sprinkle on top before baking.
- Letting the bread cool completely preserves the texture and prevents gummy crumb.
- A cast-iron skillet provides excellent heat retention and crust formation; alternative oven-safe heavy pans can be used.
- Slashing the dough allows controlled expansion and adds an artisanal look.


