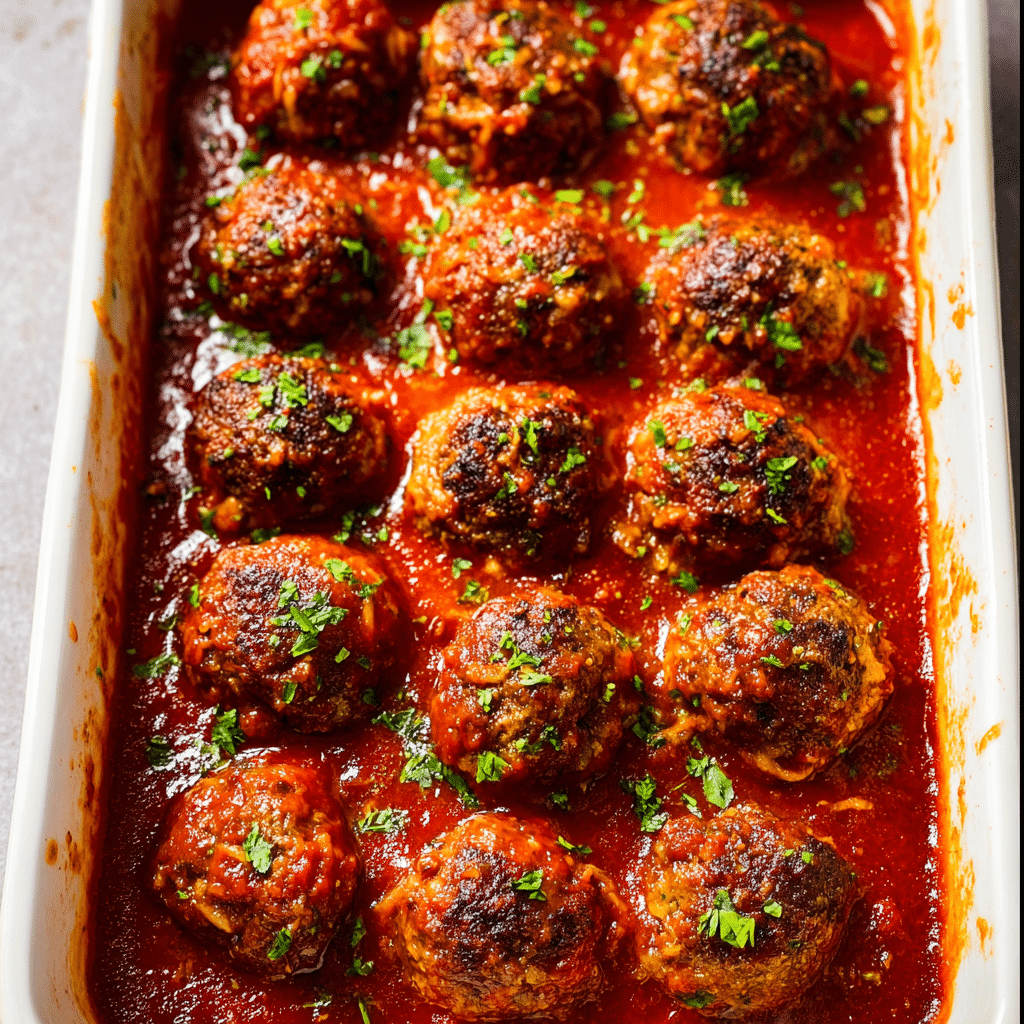
Porcupine Meatballs are the kind of classic comfort food that instantly takes you back to grandma’s kitchen. Imagine tender beef meatballs speckled with rice (like adorable little “quills”), all cozied up in a luscious tomato sauce that bubbles away in the oven until every bite is absolutely savory and satisfying. This is a family-friendly dish that promises both hearty flavor and nostalgia, making it a star at any dinner table. With simple ingredients and big payoff, Porcupine Meatballs are a meal you’ll return to, time and again.
Ingredients You’ll Need
These Porcupine Meatballs come together from a handful of approachable ingredients you probably already have on hand. Each plays a special role — from the tender beef right down to the sprinkle of fresh parsley on top, every element adds to the savory, homey finish we all crave.
- Lean ground beef: The heart of the meatballs, I recommend 85% or 93% lean for just the right balance of tenderness and flavor.
- Yellow onion (finely diced): Gives a subtle sweetness and texture that melds right into the meatballs.
- Long-grain rice: This is what creates the signature “porcupine” look as it cooks and pokes through the meatballs!
- Large egg: Acts as the binder, holding everything gently together without making it dense.
- Worcestershire sauce: A punchy splash for extra umami and depth that wakes everything up.
- Garlic powder: Adds gentle warmth and rounds out the seasoning.
- Onion powder: Backs up the fresh onion for double flavor.
- Fine sea salt: Essential for pulling out all the flavors of the other ingredients.
- Freshly ground black pepper: Balances the richness with a little bite.
- Tomato sauce: The comforting base for the sauce, adding color and robust tang.
- Low sodium chicken stock: Lightens and extends the sauce while letting all the seasonings shine.
- Italian seasoning: Brings a wonderful herbal note to each mouthful.
- Minced garlic: For a burst of flavor in the sauce itself.
- Fresh parsley (chopped): A final bright flourish for color and freshness.
How to Make Porcupine Meatballs
Step 1: Prep and Preheat
Start off strong by preheating your oven to 400°F, ensuring it’s perfectly hot when your meatballs are ready to go in. Lightly spray a 9×13-inch baking dish with nonstick spray—this is your guarantee the sauce won’t stick or burn, and cleanup will be blissfully easy.
Step 2: Mix the Meatball Ingredients
Grab a big mixing bowl and bring together your ground beef, onion, rice (uncooked, so it cooks up tender inside the meatball), egg, Worcestershire sauce, garlic powder, onion powder, salt, and pepper. Using clean hands or a sturdy spoon, just mix until it looks well combined—don’t overwork, or the meatballs can get tough.
Step 3: Shape the Meatballs
Now for the fun part: Form the mixture into about 1-inch meatballs. You should get around 20-24 little porcupines, depending on your scooping style. Try to keep them all the same size so they bake evenly. Set them aside on a plate or board as you go.
Step 4: Make the Tomato Sauce
In a separate bowl, stir together the tomato sauce, chicken stock, Italian seasoning, minced garlic, onion powder, salt, and black pepper. This dreamy sauce will slowly soak into the meatballs and rice as everything bakes up together, creating maximum tenderness and flavor.
Step 5: Assemble in the Baking Dish
Pour half of that tomato sauce mixture into your prepared baking dish, spreading it out to create a tomatoey bed for the meatballs. Then, arrange your uncooked meatballs in a single layer on top—nestle them close but not crowded. Pour the remaining sauce over the top to nicely cover each one.
Step 6: Bake Until Tender
Cover the whole pan tightly with aluminum foil to encourage the porcupine effect—steamy, even cooking for the rice and meat. Bake for about 1 hour, until the rice is tender and peeks through those meatballs just like quills, and everything is deliciously bubbly and irresistible.
Step 7: Garnish and Enjoy
When they’re done baking, finish with a scattering of fresh chopped parsley. That bit of green adds a splash of color and a fresh, herby aroma that offers a beautiful contrast to the rich tomato sauce.
How to Serve Porcupine Meatballs
Garnishes
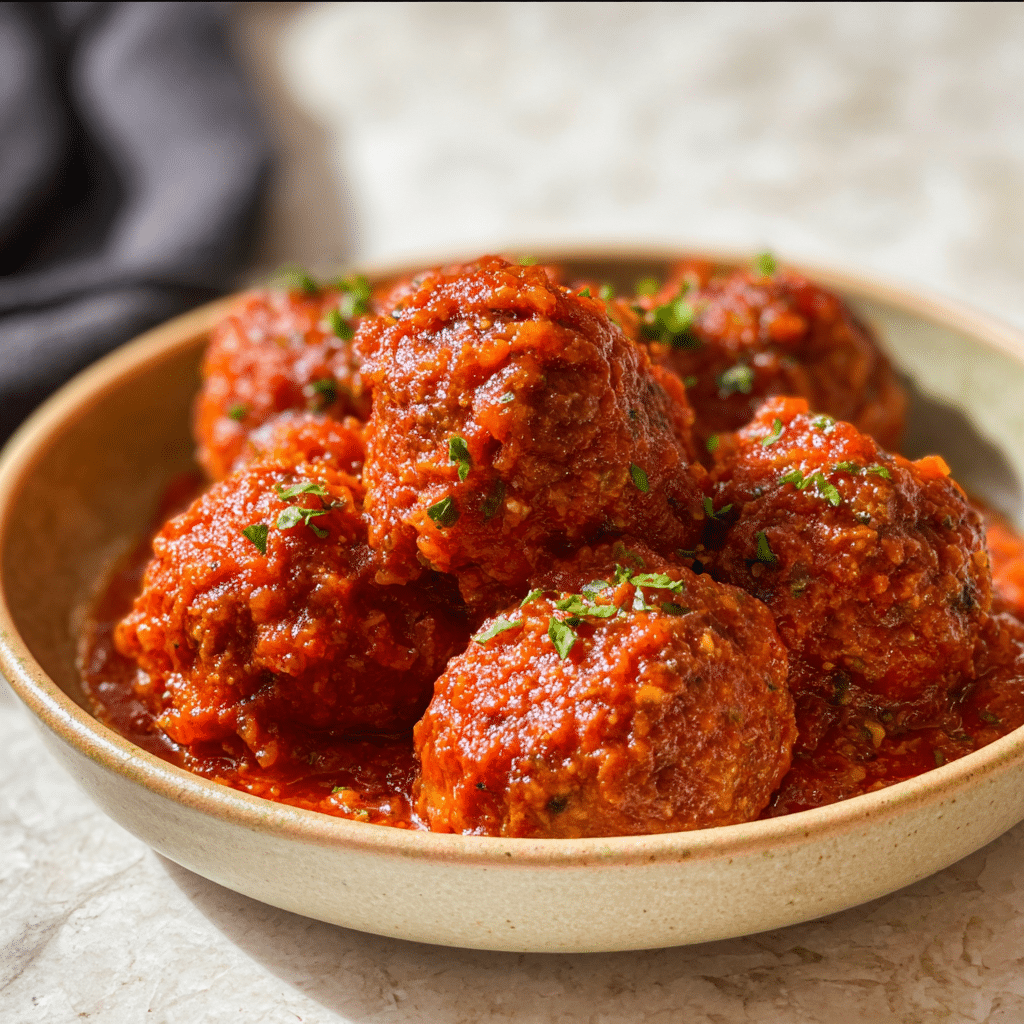
A sprinkle of chopped fresh parsley is a must for that visual pop and fresh flavor. If you’re feeling fancy, a touch of grated Parmesan or a pinch of crushed red pepper is also wonderful. These garnishes wake up the plate and make Porcupine Meatballs look extra inviting.
Side Dishes
Mashed potatoes are the classic partner here—their creamy base soaks up every last bit of that tangy tomato sauce. Crusty bread is another favorite for mopping up the goodness, but you can go lighter with simple steamed green beans, a leafy salad, or fluffy rice. Porcupine Meatballs are incredibly versatile, so don’t be afraid to get creative with your sides!
Creative Ways to Present
For a fun twist, serve Porcupine Meatballs atop garlic toast slices for a rustic appetizer, or tuck a couple with sauce into a fresh sub roll for an epic meatball sandwich. For crowds or potlucks, keep them warm right in the baking dish and let everyone help themselves—just set out a big spoon and plenty of napkins.
Make Ahead and Storage
Storing Leftovers
Once your Porcupine Meatballs have cooled to room temperature, transfer them to an airtight container and refrigerate. They’ll keep beautifully for up to 3 or 4 days, making them a fantastic make-ahead option for busy lunches or a second easy dinner.
Freezing
If you want to meal-prep, you can freeze Porcupine Meatballs before or after baking. For uncooked, freeze meatballs on a sheet pan until firm, then store in a freezer bag for up to 2 months—thaw before baking. You can also freeze the finished dish and reheat straight from the freezer, making it a real lifesaver for future you!
Reheating
For reheating from the fridge, a minute or two in the microwave will do the trick, or warm them in a covered baking dish in a 350°F oven for about 10–15 minutes. If frozen, let them thaw in the fridge overnight or reheat covered in the oven at 350°F for 25–30 minutes until hot and bubbly.
FAQs
Can I use ground turkey instead of beef for Porcupine Meatballs?
Absolutely! Ground turkey works great and makes for a slightly lighter dish. Just keep in mind the flavor will be a bit different, so taste your mixture and adjust the seasonings as needed.
Should the rice be cooked or uncooked before adding to the meatballs?
The magic of Porcupine Meatballs relies on using uncooked long-grain rice. As the meatballs bake, the rice cooks and expands, creating those little “quills” and soaking up all the flavors from the meat and sauce.
What is the best way to keep meatballs from falling apart?
Using an egg as a binder helps tremendously, but don’t overmix the meat mixture—just until everything holds together. If your mix seems too wet, add a teaspoon or two of bread crumbs (though traditionally, they’re not needed).
Can I make Porcupine Meatballs in advance?
Yes! You can shape the meatballs and prep the sauce a day ahead, keeping them separate or assembled in the fridge. When you’re ready, just bake as directed. It’s a perfect dish when you need dinner ready with minimal last-minute work.
Is it necessary to cover the meatballs while baking?
Yes, covering with foil is key—it traps steam so the rice cooks properly inside the meatballs and the sauce stays rich and luscious. Remove the foil for the last few minutes if you’d like the top to set and thicken a little more.
Final Thoughts
If you’re hunting for a recipe that brings everyone to the table with smiles and seconds, you can’t go wrong with Porcupine Meatballs. They’re truly the definition of cozy home cooking, and once you try them, you’ll be eager to make them part of your regular rotation. Gather your loved ones and let this dish work its comfort-food magic!
PrintPorcupine Meatballs Recipe
These Porcupine Meatballs are a classic, comforting dish featuring flavorful meatballs made with ground beef and rice, simmered in a rich tomato sauce. This easy-to-make recipe is perfect for a cozy family dinner and pairs well with mashed potatoes or crusty bread.
- Prep Time: 15 minutes
- Cook Time: 1 hour
- Total Time: 1 hour 15 minutes
- Yield: 6 servings
- Category: Main Dish
- Method: Baking
- Cuisine: American
- Diet: Gluten Free
Ingredients
Porcupine Meatballs:
- 1 pound lean ground beef (85% or 93%)
- ½ medium yellow onion, finely diced
- ½ cup long-grain rice
- 1 large egg
- 1 tablespoon Worcestershire sauce
- 1 teaspoon garlic powder
- 1 teaspoon onion powder
- ¾ teaspoon fine sea salt
- ½ teaspoon freshly ground black pepper
Sauce:
- 29 ounces tomato sauce
- 1 cup low-sodium chicken stock
- 1 tablespoon Italian seasoning
- 2 teaspoons minced garlic (about 2 to 3 cloves)
- 1 teaspoon onion powder
- ½ teaspoon fine sea salt
- ½ teaspoon freshly ground black pepper
Garnish:
- 1 tablespoon fresh parsley, chopped
Instructions
- Preheat oven to 400°F. Spray a 9×13 baking dish with nonstick cooking spray and set aside.
- Meatballs: In a large mixing bowl, combine the ground beef, onion, rice, egg, Worcestershire sauce, garlic powder, onion powder, salt, and pepper. Form into 1-inch meatballs and set aside.
- Sauce: In a medium bowl, combine tomato sauce, chicken stock, Italian seasoning, garlic, onion powder, salt, and pepper. Pour half of the sauce into the baking dish, place meatballs on top, then cover with remaining sauce. Bake covered for 1 hour at 400°F.
- Garnish with chopped parsley before serving.
Notes
- Refrigerate leftover meatballs in an airtight container for up to 3-4 days. Reheat in the microwave or oven.
- To freeze uncooked meatballs, freeze individually before storing in a freezer-safe bag for up to 2 months. Thaw before cooking. Cooked meatballs can also be frozen for up to 3 months.
- Affiliate links for tools and equipment: 9×13 Glass Baking Dish, Glass Mixing Bowls.
Nutrition
- Serving Size: 1 serving
- Calories: 226 kcal
- Sugar: 6g
- Sodium: 1054mg
- Fat: 6g
- Saturated Fat: 2g
- Unsaturated Fat: 3g
- Trans Fat: 0.3g
- Carbohydrates: 23g
- Fiber: 3g
- Protein: 21g
- Cholesterol: 78mg





Этот сборник информации привлекает множеством мелких деталей и необычных ракурсов. Мы предлагаем взгляды, редко полезные, но способные немного разнообразить знакомство с темой.
Подробнее читать – [url=https://rostov-narkologiya.ru/uslugi-ot-narkomanii/mefedronovaya-zavisimost/]сиалис онлайн[/url]