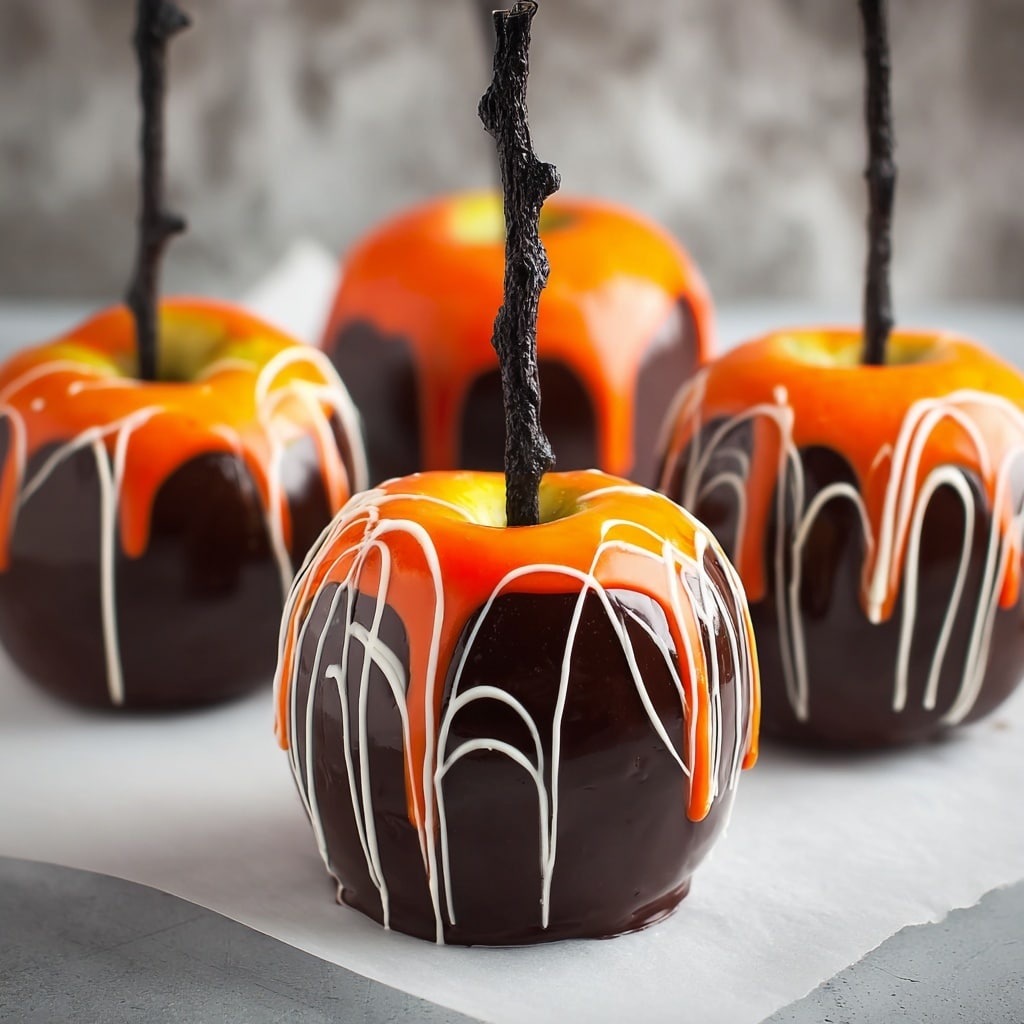
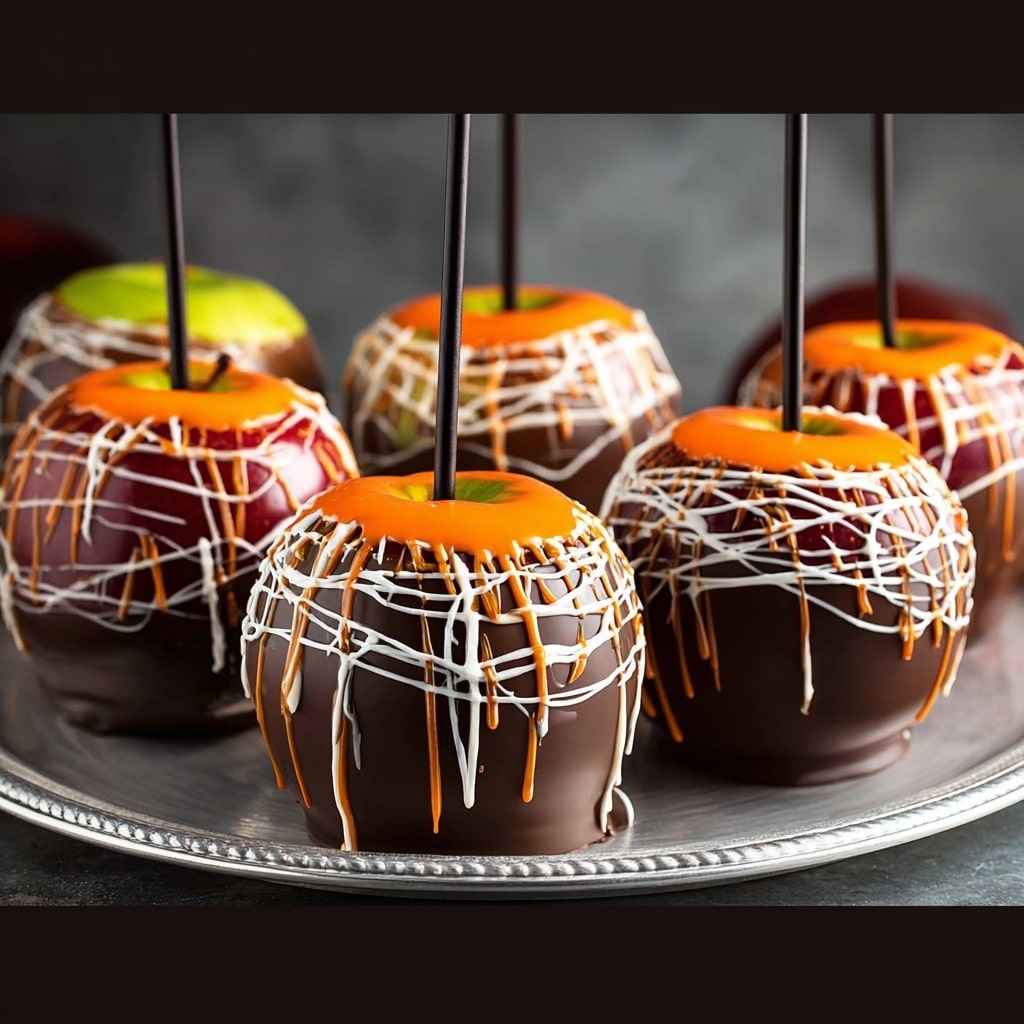
If you’re looking for a treat that turns any gathering into a festive occasion, let me introduce you to my absolute favorite: Marshmallow Dipped Apples Recipe. Imagine crisp, juicy apples enveloped in a cloud of sweet marshmallow, crowned with rich chocolate layers and delicate white chocolate stripes. They’re fun to make, a dream to eat, and guaranteed to dazzle both kids and adults alike! This recipe is a joyful twist on the classic caramel apple, adding playful textures and irresistible flavors that promise to become a tradition in your own kitchen.
Ingredients You’ll Need
What I adore about the Marshmallow Dipped Apples Recipe is how it transforms a handful of everyday ingredients into a magical, show-stopping dessert. Each item in this lineup isn’t just a building block; it’s what elevates the taste, appearance, and fun factor of every bite.
- Firm apples: The crispest, juiciest apples hold up best and balance out the sweet coating beautifully.
- Sturdy sticks: Whether wooden skewers or holiday-themed sticks, you want them strong to keep each apple steady and easy to handle.
- Non-stick spray: An absolute essential for mess-free marshmallow dipping and easy lifting after chilling.
- Campfire® HallowMallows (about 1/2 bag): Their soft, puffy texture melts like a dream for that signature marshmallow layer.
- Butter (3 tablespoons): Adds silkiness and shine, keeping the marshmallow coating perfectly smooth and spreadable.
- Dark chocolate candy coating (4 ounces): A rich, bittersweet contrast that sets beautifully over the marshmallow.
- White chocolate candy coating (1 ounce): Just enough for an elegant drizzle that pops against the darker chocolate.
How to Make Marshmallow Dipped Apples Recipe
Step 1: Prep the Apples and Sticks
Start by washing and drying your apples thoroughly so the marshmallow sticks and doesn’t slide off. Gently remove the stems and firmly insert your chosen sticks into the top of each apple, pressing deep enough so they’ll support all those delicious layers to come.
Step 2: Prepare the Baking Surface
Line a baking sheet with parchment paper and give it a light spray of non-stick spray. This tiny step makes a massive difference in keeping your marshmallow dipped apples from sticking, making cleanup a breeze later on.
Step 3: Melt Marshmallows and Butter
Grab a large microwave-safe bowl and combine your marshmallows with butter. Microwave the mixture for 45 seconds, stir, then zap again for another 30 seconds. If it’s not yet smooth, continue microwaving in short 10-second bursts, stirring each time, until you have a silky, pourable marshmallow coating.
Step 4: Coat the Apples in Marshmallow
Holding the apple by its stick, use a spoon to gently cover it with the melted marshmallow mixture, leaving a small reveal of apple at the very top. Let any excess drip off, then quickly place your marshmallow-coated apple onto the prepared baking sheet to set. Repeat with the rest—don’t worry if it gets a little messy, that’s half the fun!
Step 5: Chill the Marshmallow Layer
Pop your baking sheet of marshmallow-dipped apples into the fridge and let them chill for about 15 minutes. This helps the marshmallow set so the next chocolatey layer goes on nice and neat.
Step 6: Dip in Dark Chocolate Candy Coating
Melt your dark chocolate candy coating according to package instructions. Working one apple at a time, dip it into the chocolate so that you leave a tempting stripe of marshmallow peeking through. Transfer each coated apple to a fresh sheet of parchment and chill again until set—this doesn’t take long, so keep an eye out!
Step 7: Drizzle with White Chocolate Candy Coating
Melt the white chocolate coating the same way, then, holding each apple sideways, use a fork to artfully drizzle white chocolate stripes over the set dark chocolate layer. Place the apples back on the sheet and chill one last time so everything firms up.
Step 8: Serve and Enjoy!
Once fully set, your Marshmallow Dipped Apples Recipe is ready to be enjoyed straight off the stick or sliced up to share—a celebration on a stick, made in your own kitchen!
How to Serve Marshmallow Dipped Apples Recipe
Garnishes
For that extra wow-factor, you can sprinkle crushed nuts, colorful sprinkles, or even edible glitter over the wet chocolate layers before they set. This not only adds crunch and color, but it also lets you personalize your Marshmallow Dipped Apples Recipe for any holiday or occasion.
Side Dishes
These apples are indulgent, so pair them with something light and tart to balance the sweetness. A simple fruit salad or citrus wedges work beautifully. For a kid’s party, serve alongside popcorn for a fun, fairground-inspired treat combo.
Creative Ways to Present
If you’re gifting or entertaining, stand each apple upright in a cupcake liner or wrap individually in cellophane tied with festive ribbons. For parties, stack them on a cake stand or tuck sliced apples onto a serving platter with toothpicks for easy sharing.
Make Ahead and Storage
Storing Leftovers
Store any leftover apples in an airtight container in the refrigerator. The marshmallow and chocolate coatings help seal in freshness, but they’re definitely best enjoyed within two days while the apple stays crisp.
Freezing
Freezing the completed Marshmallow Dipped Apples Recipe isn’t recommended, as the apples will release moisture and the coating may become sticky or crack when thawed. If you must freeze, do so only with plain apples, then dip and coat them fresh before serving.
Reheating
This treat is best enjoyed chilled or at room temperature. If you prefer a gooier bite, let the apples sit out for 5–10 minutes to take off the chill—no reheating required, and this keeps the coatings perfectly intact!
FAQs
Can I use different types of apples?
Absolutely! While tart, firm varieties like Granny Smith are classic, sweet apples like Fuji or Honeycrisp are wonderful too. Just make sure whatever you pick is crisp and fresh.
What’s the best way to keep marshmallow from sliding off?
Dry your apples thoroughly after washing. Any moisture (or waxy residue) can prevent the marshmallow from sticking. Also, slightly roughing up the surface with a paper towel can help the coating grip better.
Can I substitute marshmallow fluff for melting marshmallows?
Although it’s tempting for convenience, melting marshmallows with butter gives the Marshmallow Dipped Apples Recipe that stretchy, glossy layer you just can’t achieve with fluff. Stick to the original for best results!
How far in advance can I make these?
They’re at their best when made the day you plan to serve them, but you can prepare them up to 24 hours ahead. Be sure to keep them refrigerated and allow them a few minutes at room temperature before serving.
How do I get clean slices for serving?
Use a sharp, lightly oiled knife to prevent sticking, and slice apples just before serving to keep them fresh and picture-perfect. Alternatively, offer them whole for a whimsical treat-on-a-stick experience!
Final Thoughts
If you’ve never tried making the Marshmallow Dipped Apples Recipe at home, now’s the perfect time to spoil yourself and your loved ones. These sweet, crunchy delights are as much fun to make as they are to eat. Trust me—once you see those chocolate-drizzled apples gleaming on your counter, you’ll be hooked for life!
PrintMarshmallow Dipped Apples Recipe
Indulge in these decadent Marshmallow Dipped Apples that blend the sweetness of marshmallows and chocolate with the crispness of fresh apples for a delightful treat.
- Prep Time: 10 minutes
- Total Time: 30 minutes
- Yield: 6 servings
- Category: Dessert
- Method: Microwaving, Melting, Dipping
- Cuisine: American
- Diet: Vegetarian
Ingredients
Ingredients for Marshmallow Coating:
- 1/2 bag Campfire® HallowMallows
- 3 tablespoons butter
Ingredients for Apples:
- 6 firm apples, washed and dried completely
- 6 sturdy sticks (wooden skewers, wooden chopsticks, or decorative holiday sticks)
- Non-stick spray
- 4 ounces dark chocolate candy coating (bark or wafers)
- 1 ounce white chocolate candy coating (bark or wafers)
Instructions
- Prepare Apples: Remove stems of apples and insert sticks into the tops of the apples.
- Coat with Marshmallow Mixture: Melt marshmallows and butter, then spoon the mixture over each apple, leaving some apple exposed. Place on a baking sheet.
- Chill: Chill the marshmallow-coated apples until the layer sets.
- Coat with Dark Chocolate: Dip the chilled apples into melted dark chocolate, leaving some of the marshmallow layer visible. Chill until set.
- Drizzle with White Chocolate: Melt white chocolate, then drizzle it over the dark chocolate layer on the apples. Chill again until set.
- Serve: Enjoy the apples on sticks or sliced on a platter.
Notes
- For added decoration, consider sprinkles or crushed nuts on the chocolate-coated apples.
- Store any leftovers in the refrigerator for up to 2 days for the best taste and texture.
Nutrition
- Serving Size: 1 apple
- Calories: Approx. 250
- Sugar: Approx. 25g
- Sodium: Approx. 50mg
- Fat: Approx. 12g
- Saturated Fat: Approx. 7g
- Unsaturated Fat: Approx. 4g
- Trans Fat: 0g
- Carbohydrates: Approx. 35g
- Fiber: Approx. 3g
- Protein: Approx. 2g
- Cholesterol: Approx. 10mg


