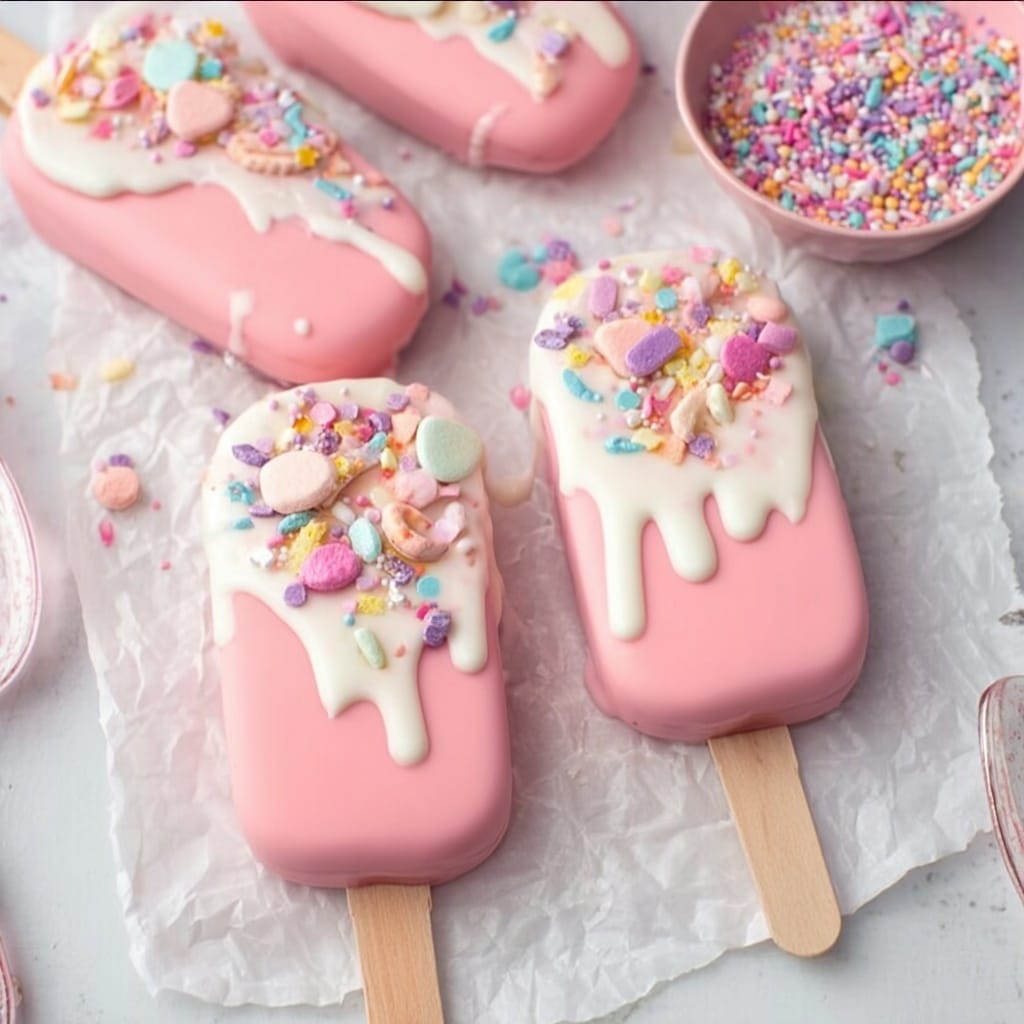
Say hello to an irresistible treat that’s equal parts adorable and decadent—Cakesicles! These brownie-based pops are the ultimate mashup of luscious, fudgy cake and vibrant, crackly chocolate shell, turning your favorite dessert into a handheld masterpiece. Whether you’re looking for a showstopper for a birthday party or just craving a whimsical kitchen adventure, Cakesicles will absolutely dazzle both eyes and tastebuds. Plus, with endless possibilities for colors, sprinkles, and decorations, you can create a sweet pop for any season or celebration!
Ingredients You’ll Need
With just a handful of approachable ingredients, you can whip up a batch of Cakesicles that look like they came straight from a trendy bakery. Each component is essential—bringing chewy texture, rich chocolate flavor, and plenty of playful color to the finished treat!
- Brownie Mix (18.3 ounces): Choose a chewy fudge variety for an extra-rich base with deep cocoa notes and a moist, dense crumb.
- Vegetable Oil (⅔ cup): Keeps the brownies tender and adds essential moisture to the mix.
- Large Eggs (2, room temperature): Help bind everything together while contributing to that decadent, fudgy texture.
- Water (3 tablespoons): Brings the batter to the perfect consistency—neither too stiff nor too loose.
- Milk Chocolate Frosting (½ cup): Acts like edible glue! Mixed into crumbled brownies, it creates a pliable, cake-pop style “dough.”
- Pink Candy Melting Wafers (3 cups): Give Cakesicles their classic pop-of-color shell and a hint of creamy, sweet flavor.
- White Almond Bark (4 ounces): Perfect for drizzling dramatic, “melty” decorations on top.
- Candy Sprinkles: The fun factor! Go wild with shapes and hues to match any occasion.
How to Make Cakesicles
Step 1: Bake the Brownies
Preheat your oven to 350°F and line a 9×9 baking dish with parchment paper, making sure to leave enough overhang on two sides so you can easily lift out the brownies later. Stir together the brownie mix, oil, eggs, and water in a large mixing bowl until well combined—be careful not to over-mix to keep the brownies tender. Pour the batter into the prepared pan and smooth it out. Bake for 25–28 minutes, or until a toothpick comes out clean. Let the brownies cool completely (at least 45 minutes to an hour).
Step 2: Crumble and Combine
Once your brownies are fully cooled, lift them from the pan using the parchment paper sling. Tear or break them into chunks, then either use your hands or a food processor to break them down into fine crumbs. This is the secret to that classic Cakesicles texture! Transfer the crumbs to a bowl and mix in the milk chocolate frosting until everything comes together in a smooth, pliable dough. Don’t be afraid to get in there with clean hands—it’s the best tool!
Step 3: Prepare the Candy Coating
In a microwave-safe bowl, melt the pink candy wafers in 30-second intervals, stirring well after each burst, until completely smooth. This will become your Cakesicles’ shiny, eye-catching outer shell. Spoon about 1.5–2 tablespoons of melted candy into each mold, using the back of the spoon to coat all sides evenly. You want a generous layer, but not too thick. Insert popsicle sticks into the molds while the coating is still soft.
Step 4: Fill the Molds
Shape your brownie mixture into little oblong “bars” with your hands. Gently press each one into the mold, over the popsicle stick, until the mix is level with the top of the mold. This step is fun and a bit like crafting—take your time to make sure the stick is centered and the brownie mixture is well-packed, which helps the Cakesicles stay intact when unmolding.
Step 5: Seal and Set
Spoon a little more melted pink candy over the back of each Cakesicle and carefully spread it to cover the brownie mixture completely. Try to keep the edges neat; this not only looks professional but also helps your Cakesicles pop out easily later. Allow everything to set in the fridge until firm—patience here pays off!
Step 6: Drizzle and Decorate
Once the candy shells are set, melt the white almond bark in a small microwave-safe dish. Drizzle it generously over the tops and edges of your Cakesicles to make them look like luscious, melting ice cream pops. While the almond bark is still wet, shower with your favorite candy sprinkles for extra flair. Let everything set completely before enjoying or gifting.
How to Serve Cakesicles
Cakesicles Garnishes
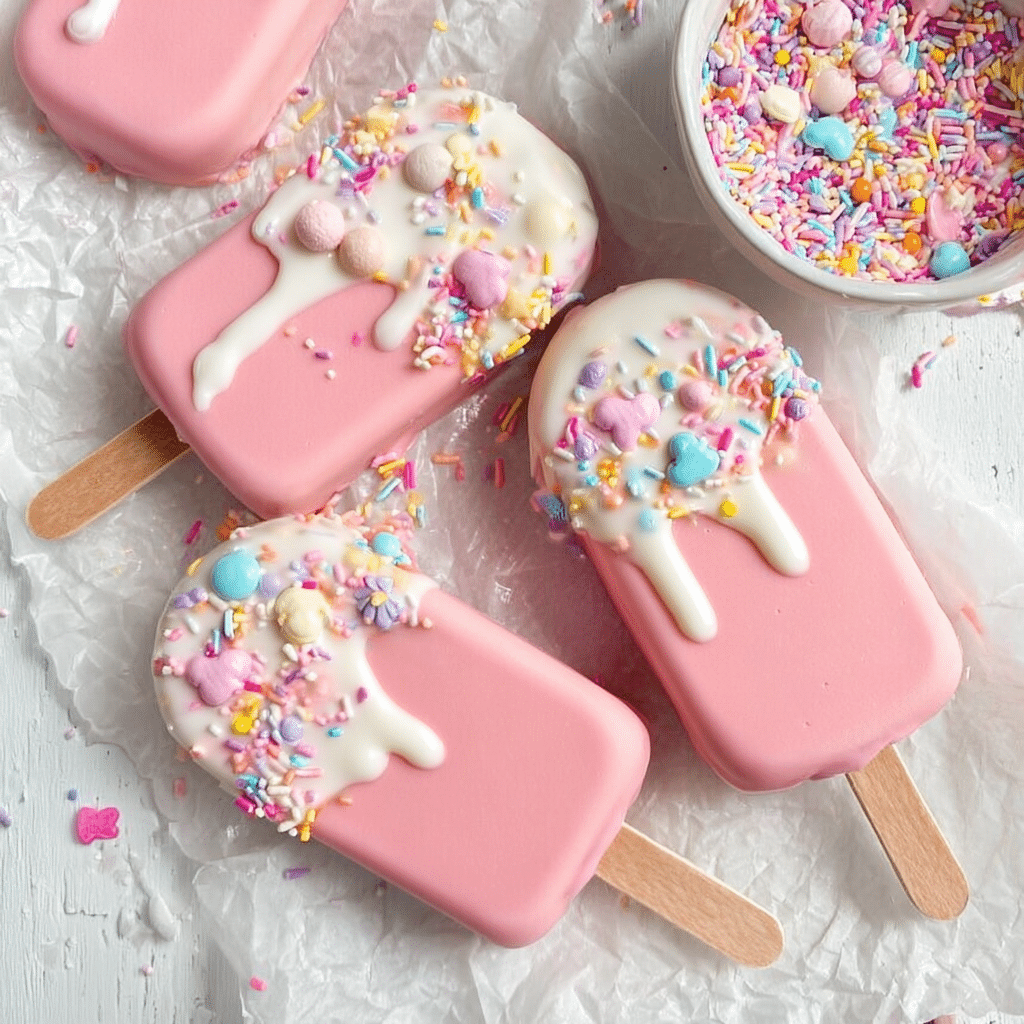
Bring your Cakesicles to life with a final sprinkle of whimsy! After the white almond bark drizzle, go wild with colorful sprinkles, edible glitter, or even tiny candy pearls. For special occasions, try coordinating your decorations to match the theme—think hearts for Valentine’s Day, gold stars for New Year’s, or pastel confetti for baby showers.
Side Dishes
If you’re serving Cakesicles at a party or dessert table, complement their sweetness with lighter bites—like fresh berries, citrus fruit salad, or a platter of cheese and crackers. Hot coffee or a frothy iced latte on the side also make wonderful partners, balancing out each rich, chocolatey bite.
Creative Ways to Present
Show off your beautiful batch by standing each Cakesicle upright in a mug filled with colorful candies, or arrange them in a bouquet-like display using floral foam inside a decorative box. For a summer picnic vibe, lay them in rows on a tray lined with parchment and tuck in a few edible flowers. The individual sticks and bright colors invite everyone to just grab and enjoy!
Make Ahead and Storage
Storing Leftovers
Any leftovers—if you’re lucky enough to have them—can be stored in an airtight container at room temperature for 2 to 3 days. If your kitchen runs warm, consider refrigerating them to keep the coating firm and the brownie interiors fresh.
Freezing
Cakesicles freeze beautifully! Arrange them in a single layer on a parchment-lined baking sheet, freeze until solid, then wrap each Cakesicle individually in plastic wrap. Pop them in a freezer bag or airtight container, and they’ll keep their magic for up to a month. Thaw overnight in the fridge before serving.
Reheating
Cakesicles are best enjoyed at room temperature or straight from the fridge. Since they’re coated in chocolate, avoid microwaving—they’ll melt or become messy. Simply let frozen Cakesicles thaw gently in the refrigerator before unwrapping and serving.
FAQs
Can I make Cakesicles with homemade brownies instead of a mix?
Absolutely! Use your favorite from-scratch brownie recipe for a perfectly customized flavor. Just make sure your brownies are fudgy and not cakey, so they hold together well once crumbled and mixed with frosting.
What if I don’t have a silicone cakesicle mold?
A silicone mold really does make the process easier and gives that classic shape, but you could get creative by using a small rectangular ice pop mold or even pressing brownie mix into a deep rectangular baking dish, cutting bar shapes, and dipping them by hand.
Can I use different colors or flavors for the candy coating?
Definitely! Swap the pink wafers for any color or try flavored candy melts like vanilla, chocolate, or strawberry to match the occasion or your mood. Drizzle with contrasting colors for extra pizzazz.
Why did my chocolate shell crack?
Cracking can happen if the shell is too thick, or if you try to unmold before the Cakesicles are fully set. Take your time, use even layers of coating, and let them chill thoroughly before removing from the molds. If a shell cracks, you can always patch it with a little extra melted chocolate!
Are Cakesicles safe for kids to help make?
Yes! Kids will love mixing the brownie filling, dipping, and decorating. Just watch out for the hot melted candy and always supervise when working with popsicle sticks or sharp tools.
Final Thoughts
I can’t imagine a more delightful treat to whip up for friends, family, or whenever you need a bit of color and sweetness in your day. Cakesicles bring joy from the very first bite (and honestly, from the moment you start decorating), so don’t wait—gather your ingredients and make a batch! Your dessert table will never be the same.
PrintCakesicles Recipe
Cakesicles are a fun and trendy dessert that combines rich, moist brownie with a colorful chocolate coating, shaped like a popsicle. These treats are not only delicious but also visually appealing, making them perfect for parties and special occasions.
- Prep Time: 35 minutes
- Cook Time: 40 minutes
- Total Time: 2 hours 15 minutes
- Yield: 16 cakesicles
- Category: Dessert
- Method: Baking, Freezing
- Cuisine: American
- Diet: Vegetarian
Ingredients
Brownie Base
- 18.3 ounces chewy fudge brownie mix
- ⅔ cup vegetable oil
- 2 large eggs, room temperature
- 3 tablespoons water
- ½ cup milk chocolate frosting
Candy Coating
- 3 cups pink candy melting wafers
- 4 ounces white almond bark
- Candy sprinkles
Instructions
- Preheat the oven: Preheat to 350°F and line a 9×9 baking dish with parchment paper.
- Mix brownie ingredients: Combine brownie mix, oil, eggs, and water in a bowl. Spread in baking dish and bake.
- Cool and break brownies: Let brownies cool, then break into pieces.
- Prepare brownie mixture: Pulse brownies in a food processor and mix with chocolate frosting.
- Melt candy wafers: Melt candy wafers and coat molds with melted candy.
- Fill molds: Insert popsicle sticks and shape brownie mixture into molds. Cover with more melted candy.
- Add almond bark: Melt and apply white almond bark over cakesicles.
- Finish and serve: Decorate with sprinkles and enjoy!
Notes
- Oven temperatures vary, so check your cake early.
- For best results, place popsicle sticks before adding brownie mixture.
- Be patient when removing coated cakesicles to prevent cracking. You can reapply chocolate if needed.
Nutrition
- Serving Size: 1 cakesicle
- Calories: 316 kcal
- Sugar: 32g
- Sodium: 202mg
- Fat: 11g
- Saturated Fat: 5g
- Unsaturated Fat: 6g
- Trans Fat: 0.1g
- Carbohydrates: 50g
- Fiber: 0.4g
- Protein: 3g
- Cholesterol: 23mg


