
I absolutely adore sharing this, my go-to dessert, which I genuinely believe is The Best Banana Pudding Recipe you’ll ever try. It’s creamy, dreamy, and the perfect harmony of sweet bananas, smooth pudding, and those iconic Nilla wafers all layered to perfection. Every time I make it, I get so excited because it’s just irresistibly delicious and surprisingly easy to pull off, making it my favorite for any occasion.
Why You’ll Love This The Best Banana Pudding Recipe
What makes this recipe stand out for me is that gorgeous balance of flavors and textures. The vanilla pudding is silky and smooth, while the cream cheese adds a subtle richness that cuts the sweetness just right. Then there’s the fresh bananas that bring a lovely natural fruitiness, paired with the crunch and slight crumble of the Nilla wafers as they soak up that luscious pudding mixture. It’s like a hug in dessert form, and every spoonful feels like a little celebration.
Another reason I’m so passionate about this recipe is how incredibly simple it is to make. No baking, no complicated steps—just mixing, layering, and chilling. It fits perfectly into my busy lifestyle yet always impresses my family and guests. I serve it at summer barbecues, holiday dinners, and even weeknight treats because it’s totally versatile and always a crowd-pleaser. Each time I whip this up, there’s something about it that just says comfort and joy all at once.
Ingredients You’ll Need

The beauty of The Best Banana Pudding Recipe lies in its simple yet carefully chosen ingredients. Each one plays a crucial role in delivering the creamy texture, sweet flavor, and classic look that makes this dessert so iconic and delicious.
- 8 ounce block cream cheese: Softened for smoothness and a subtle tang that balances sweetness.
- 14 ounce can sweetened condensed milk: Adds the perfect amount of sweetness and creamy body.
- 5 ounce box INSTANT vanilla pudding mix: The star for quick, silky vanilla flavor with no baking required.
- 3 cups milk (2% or higher): Helps set the pudding for that luscious, thick texture.
- 2 teaspoons vanilla extract: Enhances the pudding’s vanilla notes, making every bite pop.
- 8 ounce tub whipped topping (COOL WHIP), thawed: Adds light fluffiness and creams the mixture perfectly.
- 11 ounce box Nilla wafers: Brings that iconic buttery crunch and softens beautifully after chilling.
- 5-7 bananas, peeled and sliced: Use ripe, sweet bananas for natural sweetness and creamy texture.
Directions
Step 1: In a large mixing bowl, use an electric mixer on medium speed to beat the softened cream cheese until it’s silky smooth and fluffy. This step is key for a creamy pudding base without lumps.
Step 2: Add the sweetened condensed milk, instant vanilla pudding mix, milk, and vanilla extract to the cream cheese. Keep mixing patiently for a few minutes until everything is completely combined and smooth — it transforms into a thick and luscious pudding mixture.
Step 3: Gently fold in half of the whipped topping with a spatula to keep the pudding light and airy, blending carefully but thoroughly.
Step 4: Now, the fun part—layering! Start by putting down one-third of the Nilla wafers in the bottom of your trifle dish, large bowl, or 9×13-inch baking dish. Spread them out evenly to form a solid base.
Step 5: Add a single layer of sliced bananas over the wafers, distributing them evenly for balanced flavor in each bite.
Step 6: Pour one-third of the pudding mixture on top of the banana layer, making sure to cover all of the fruit and wafers completely.
Step 7: Repeat this layering process two more times with the remaining wafers, bananas, and pudding mixture, building up those beautiful layers.
Step 8: Finish by spreading the remaining whipped topping evenly across the very top layer.
Step 9: Cover your dish tightly with plastic wrap and refrigerate for at least one to two hours, ideally longer, so the pudding thickens and the wafers soften to that melt-in-your-mouth perfection.
Servings and Timing
This recipe generously serves about 12 people, making it perfect for family gatherings or potlucks. The prep time clocks in at around 25 minutes since there’s no cooking involved, and because it’s a no-bake dessert, the total time is also about 25 minutes of active work. However, you’ll want to let it rest in the fridge for at least one to two hours before serving to achieve the best texture and flavor combination — I often let mine chill a bit longer if I have the time!
How to Serve This The Best Banana Pudding Recipe
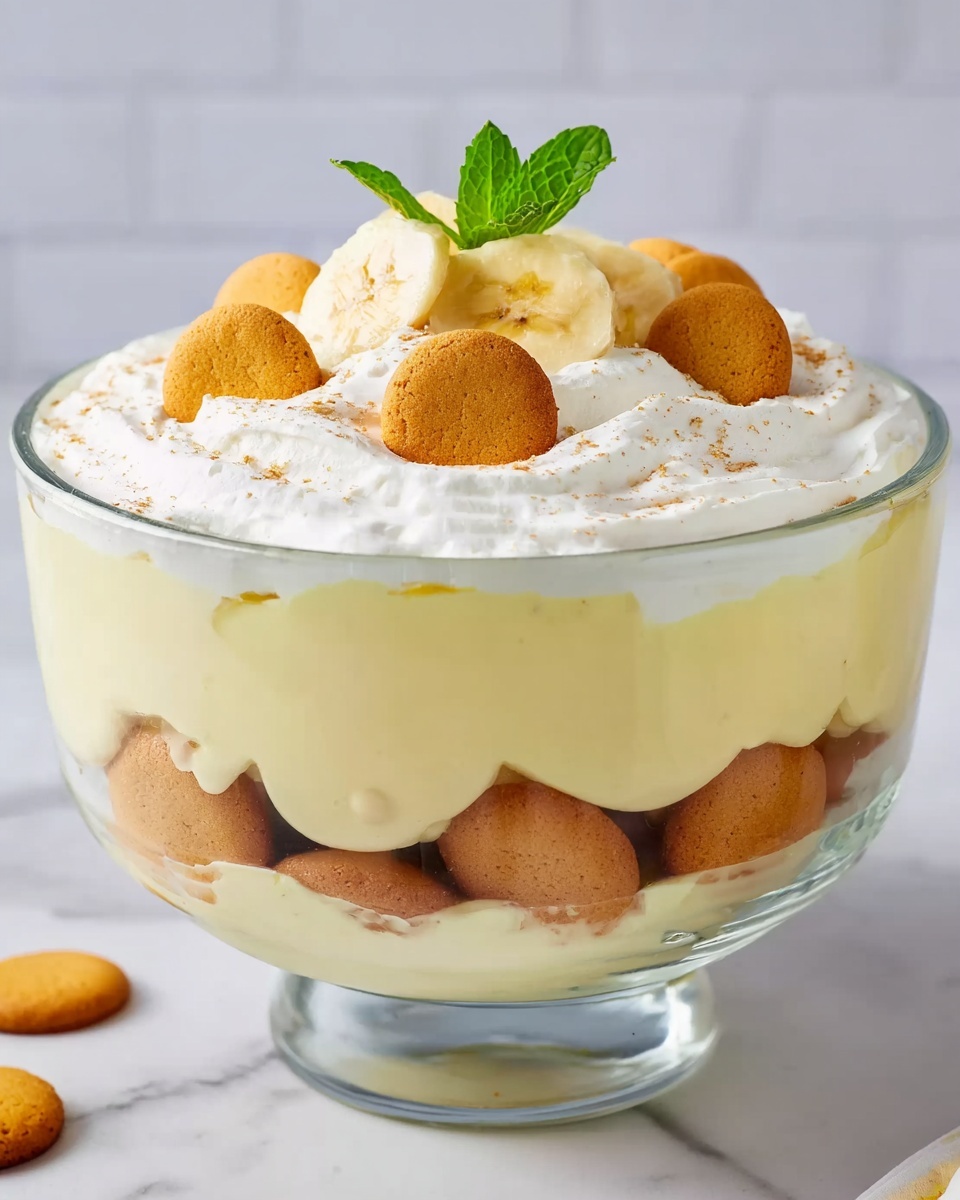
I love to serve this pudding chilled straight from the fridge because the cool creaminess is just so refreshing and comforting. For presentation, I often scoop it into pretty individual dessert glasses or ramekins for a charming touch that makes each serving feel special. Layering with the wafers and bananas visible is beautiful and makes you want to dive right in.
For garnish, I like to sprinkle crushed Nilla wafers or even add a few banana slices and a dollop of whipped cream on top for an extra indulgent finish. A light dusting of cinnamon or nutmeg can add a subtle spice that pairs beautifully with the vanilla notes.
When it comes to accompaniments, I enjoy pairing this pudding with a cup of freshly brewed coffee or a sweet dessert wine like a Moscato. For a non-alcoholic option, a chilled glass of vanilla almond milk or a cold brew iced tea complements the flavors wonderfully. I find this dessert is ideal for family dinners, potlucks, summer parties, or a simple sweet moment on a weeknight — it truly shines anytime you want to bring a little joy to the table.
Variations
I love how adaptable The Best Banana Pudding Recipe is! For a twist, you can swap the vanilla pudding mix with chocolate or banana-flavored pudding to shift the flavor profile. Adding a spoonful of peanut butter into the pudding mixture also creates a decadent peanut butter banana version that’s out of this world.
If you need a gluten-free version, you can substitute the Nilla wafers with gluten-free vanilla cookies or even crisp gluten-free granola for a different texture. For those who prefer a vegan option, I recommend using dairy-free cream cheese alternatives, plant-based milk, and coconut whipped topping — instant pudding mixes with vegan certifications are less common but you can make a homemade vanilla pudding using cornstarch and plant milk.
Another fun change is layering in fresh berries along with the bananas for added vibrancy and a pop of tartness. If you want to change things up entirely, this recipe can also be transformed into parfait-style servings with the same layers served in individual cups for easy entertaining and portion control.
Storage and Reheating
Storing Leftovers
If you have any leftovers (though they rarely last long!), I store the banana pudding in an airtight container or cover the dish tightly with plastic wrap. It keeps beautifully in the refrigerator for up to 3 days. Because of the fresh bananas, I recommend consuming it sooner rather than later for the best texture and flavor.
Freezing
I generally don’t recommend freezing this banana pudding because the texture of the bananas and whipped topping can become watery or grainy after thawing. However, if you must freeze it, layer everything in a freezer-safe container and wrap it tightly with plastic wrap and foil to prevent freezer burn. Consume within 1 month for the best quality, and expect some change in texture upon thawing.
Reheating
This banana pudding is best served chilled and doesn’t require reheating. Heating it can cause the whipped topping to break down and the bananas to become mushy. If you prefer a room temperature dessert, simply let it sit out for 15–20 minutes before serving to soften the chill without compromising texture.
FAQs
Can I make The Best Banana Pudding Recipe ahead of time?
Absolutely! I recommend preparing it the day before serving so it has a chance to chill and the flavors meld beautifully. Just keep it covered in the fridge and it will be ready to wow your guests.
What type of bananas work best in this pudding?
I prefer using ripe but firm bananas. Overripe bananas tend to get mushy quickly and can make the pudding watery. The ripeness should be sweet and aromatic but still hold their shape when sliced.
Can I substitute homemade pudding instead of instant mix?
You can, but be aware that instant pudding mix is convenient and sets faster without cooking. Homemade pudding usually involves cooking on the stove, which changes the texture slightly. If you go homemade, chill it thoroughly before layering for best results.
Is this recipe suitable for kids?
Definitely. This pudding is a favorite among kids because it’s sweet, creamy, and not too rich. Plus, there’s no alcohol or caffeine involved, making it a perfect treat for all ages.
How do I prevent the wafers from getting too soggy?
The wafers will naturally soften as they absorb moisture from the pudding and bananas, which is part of the charm. To avoid them becoming overly mushy, try to serve the pudding within a day or two, and layer the wafers in a way that they’re covered but not sitting in excess liquid.
Conclusion
I’m so excited for you to try making The Best Banana Pudding Recipe because it truly is a heartwarming, easy dessert that never fails to impress. It’s perfect for celebrating special moments or simply enjoying a sweet treat with loved ones. Once you try it, I’m confident it will become a treasured favorite in your dessert rotation just like it has in mine!
PrintThe Best Banana Pudding Recipe

A creamy and delicious no-cook Banana Pudding made with cream cheese, sweetened condensed milk, instant vanilla pudding, fresh bananas, and layers of classic Nilla wafers. This easy dessert is perfect for gatherings and can be prepared ahead of time to chill for a smooth, soft texture.
- Prep Time: 25 minutes
- Cook Time: 0 minutes
- Total Time: 25 minutes
- Yield: 12 servings
- Category: Dessert
- Method: No-Cook
- Cuisine: American
Ingredients
Base Mixture
- 8 ounce block cream cheese, softened to room temperature
- 14 ounce can sweetened condensed milk
- 5 ounce box INSTANT vanilla pudding mix (larger box)
- 3 cups milk (2% or higher)
- 2 teaspoons vanilla extract
- 8 ounce tub whipped topping (COOL WHIP), thawed (divided use)
Layers
- 11 ounce box Nilla wafers (divided use)
- 5–7 bananas, peeled and sliced (divided use)
Instructions
- Prepare Cream Cheese Mixture: In a large bowl, beat the softened cream cheese with an electric mixer on medium speed until smooth and fluffy, ensuring there are no lumps for a creamy base.
- Add Sweetened Condensed Milk and Pudding Mix: Incorporate the sweetened condensed milk, instant vanilla pudding mix, milk, and vanilla extract into the cream cheese. Mix thoroughly until well combined, which may take a few minutes to achieve a smooth consistency.
- Fold in Whipped Topping: Gently fold half of the thawed whipped topping into the pudding mixture to add lightness and creaminess.
- Layer Ingredients: In a trifle dish, large bowl, or 9×13-inch baking dish, create the first layer by spreading one-third of the Nilla wafers evenly on the bottom.
- Add Bananas: Arrange a single layer of sliced bananas on top of the wafers, ensuring they cover the surface evenly.
- Pour Pudding Mixture: Pour one-third of the prepared pudding mixture over the bananas, spreading gently to cover all pieces.
- Repeat Layers: Repeat the layering process two more times: wafers, bananas, then pudding mixture, creating three layers in total.
- Top with Remaining Whipped Topping: Finish by spreading the remaining whipped topping evenly over the top layer for a fluffy and smooth finish.
- Chill: Cover the assembled pudding with plastic wrap and refrigerate for at least 1 to 2 hours. This chilling step helps the pudding thicken and allows the Nilla wafers to soften for the perfect texture.
Notes
- Ensure cream cheese is fully softened to avoid lumps in the pudding.
- Use ripe but firm bananas to prevent them from becoming too mushy after chilling.
- This pudding is best served chilled; refrigerate for at least 1-2 hours or overnight for enhanced flavor.
- For a lighter version, use lower-fat milk and whipped topping, but the texture may be slightly less rich.
- Leftovers should be stored in the refrigerator and consumed within 3 days for best freshness.


