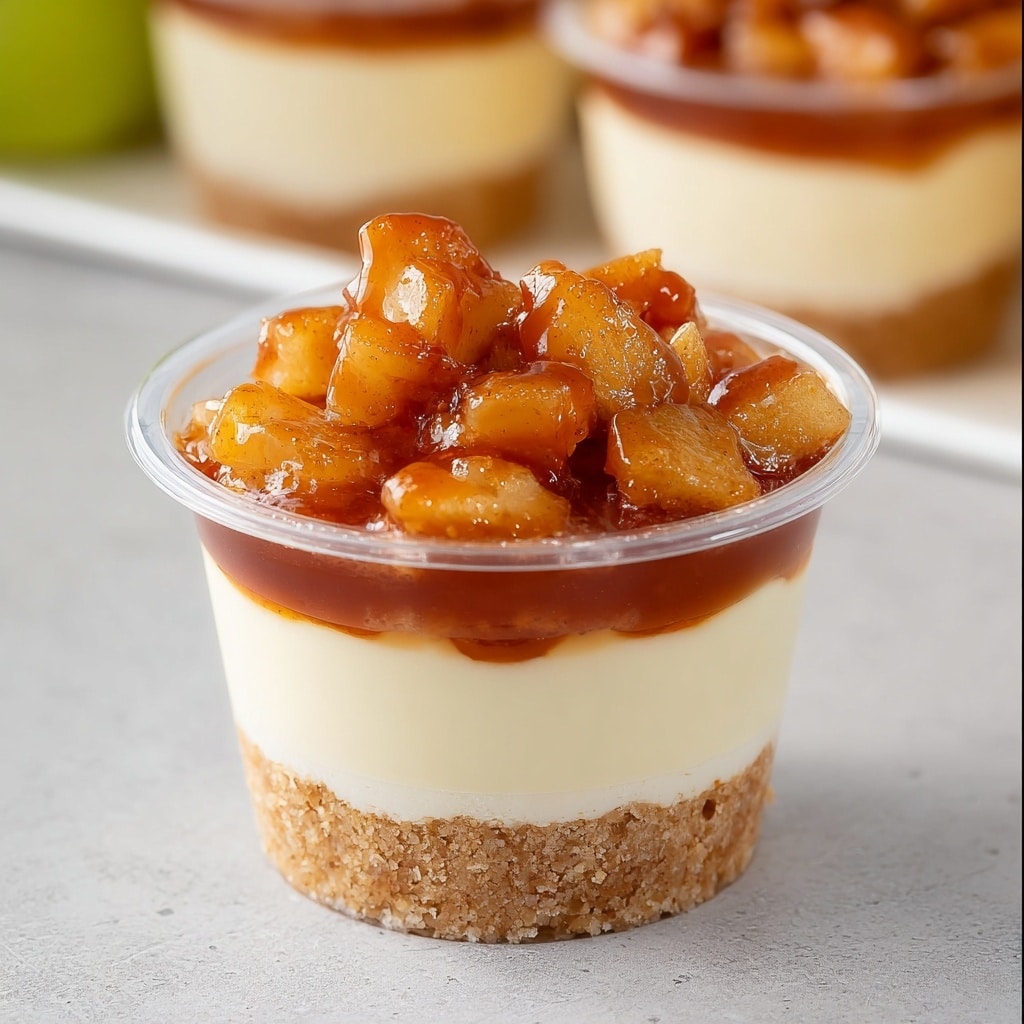
Get ready to fall in love with these Caramel Apple Dessert Cups! This recipe captures everything you adore about a classic caramel apple—tart Granny Smith apples, luscious caramel sauce, and a crunchy vanilla wafer crust—all layered into perfect little cups. They’re dreamy for parties, potlucks, or whenever you want to spoil friends and family with a sweet treat that’s both portable and positively irresistible. Whether you’re channeling cozy autumn vibes or just craving comfort, you’ll love how these cups bring big flavor in a little package.
Ingredients You’ll Need
All it takes is a handful of simple yet standout ingredients to create your Caramel Apple Dessert Cups. Each component has a special job: building decadent layers, enhancing flavor, and adding that touch of nostalgia you crave in a dessert.
- Granny Smith apples: Their tartness keeps the dessert from being overly sweet and adds a bright, fresh contrast to the creamy layers.
- Light brown sugar, packed: This gives the apples a deep, caramelized sweetness that perfectly pairs with the fruit’s natural tang.
- Salted butter: A bit of salt in the butter balances out the sweetness and brings wonderful richness to the apple filling.
- Ground cinnamon: A pinch of this classic spice infuses warmth and a cozy depth in every bite.
- Crushed vanilla wafers: These create a sweet, crunchy base that’s quick, effortless, and full of old-school dessert charm.
- Melted and cooled salted butter: Combines with the wafer crumbs, giving the crust a toasty, buttery flavor.
- Instant vanilla pudding mix: Fast, foolproof, and creamy, pudding forms the silky middle layer that ties everything together.
- Cold whole milk: Ensures the pudding whips up light, smooth, and perfectly set.
- Salted caramel sauce: Divided into the fruit layer and the pudding, this is the magic ingredient that delivers rich, gooey sweetness throughout.
- Cold heavy whipping cream: Adds luscious texture and creaminess when mixed with the pudding, making each bite impossibly light.
How to Make Caramel Apple Dessert Cups
Step 1: Make the Caramel Apple Filling
Begin by adding the diced Granny Smith apples, brown sugar, butter, and cinnamon into a saucepan over medium heat. Stir this mixture frequently for 7 to 9 minutes—you’re looking for those apples to soften and the brown sugar to cook down into a thick, gorgeous sauce like classic apple pie filling. Right at the end, swirl in a bit of salted caramel sauce to elevate the flavors. Let this mixture cool completely before assembling (speed things up by chilling it in the fridge).
Step 2: Prepare the Vanilla Wafer Crust
In a mixing bowl, combine the crushed vanilla wafers with the melted and cooled salted butter. Use a spoon to make sure every crumb is coated; this will ensure every bite of the crust is perfectly tender and buttery. Next, scoop about two teaspoons into each mini cup and press down gently to form a sturdy, delicious base. Set your cups on a tray for easy assembling.
Step 3: Whip Up the Caramel Pudding Layer
Pour the cold milk and instant vanilla pudding mix into a medium bowl. Whisk (or use a hand mixer) just until the pudding begins to thicken, which should only take a couple of minutes. Blend in the remaining salted caramel sauce for that signature flavor, then beat in the heavy cream. Keep mixing until the pudding is super thick and holds its shape—this creaminess is the heart of the Caramel Apple Dessert Cups!
Step 4: Layer the Cups
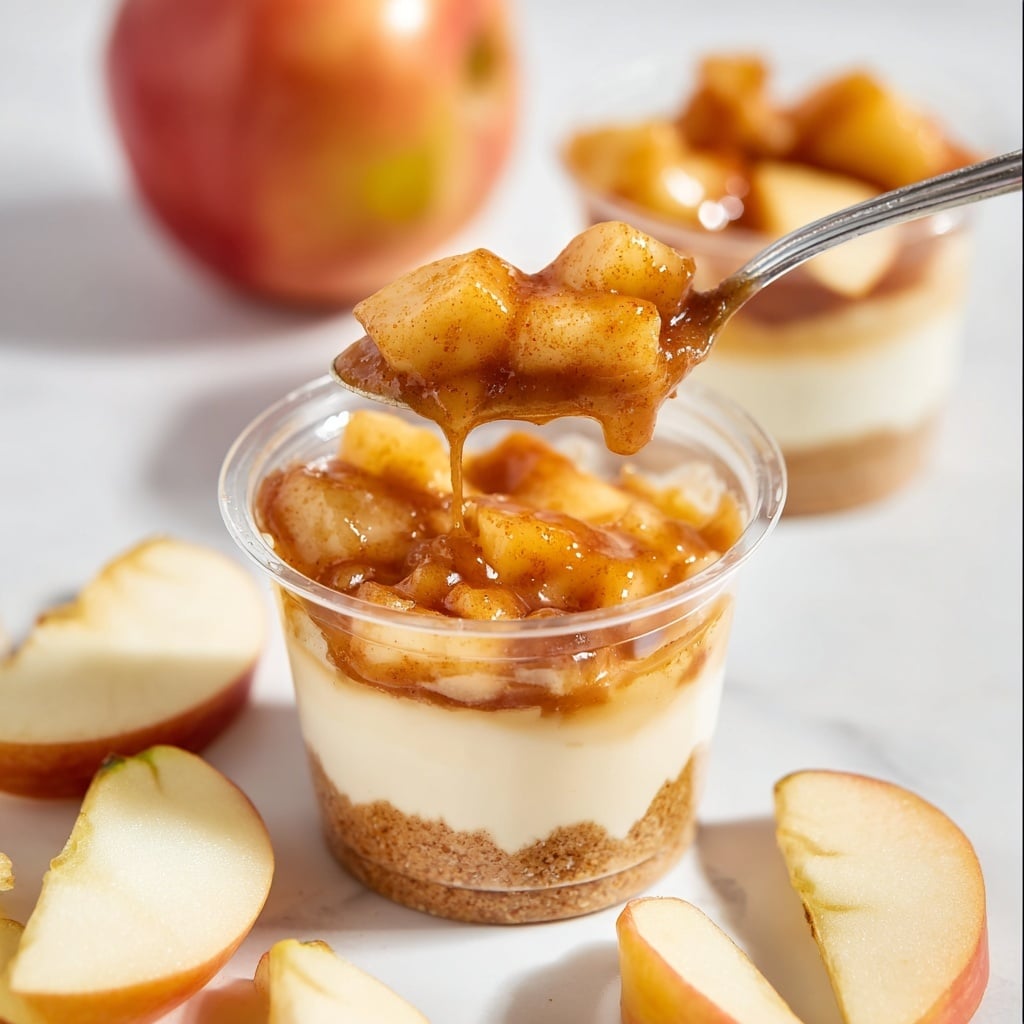
Transfer the thickened caramel pudding to a piping bag or a zip-top bag with the corner snipped off. Pipe a generous layer over the wafer crusts, filling each cup about two-thirds of the way. Spoon on the cooled caramel apple mixture, making sure each cup gets a nice, hefty scoop. The combination of creamy pudding and tender apples is irresistible and makes these dessert cups truly special.
Step 5: Chill and Serve
Seal your Caramel Apple Dessert Cups with lids and pop them in the fridge until you’re ready to serve. Chill time lets the layers meld and makes serving at parties a total breeze. When it’s time, simply pull out the cups and watch everyone’s eyes light up with joy!
How to Serve Caramel Apple Dessert Cups
Garnishes
A finishing touch makes every difference! Try a swirl of whipped cream, an extra drizzle of caramel sauce on top, or a light sprinkle of cinnamon for an elegant finish. If you’re feeling playful, crushed vanilla wafers or thin apple slices can add crunch and color.
Side Dishes
While Caramel Apple Dessert Cups are show-stoppers on their own, they pair beautifully with a mug of hot spiced cider, a scoop of vanilla bean ice cream, or even a steaming cup of coffee. Set out a platter of assorted cookies or fresh fruit for a crowd-friendly dessert spread.
Creative Ways to Present
Presentation is part of the fun! Serve the cups in pretty jars for a rustic vibe, or pack them into small clear plastic cups with decorative spoons for a grab-and-go party favorite. For seasonal flair, add colorful ribbons or printable labels—these Caramel Apple Dessert Cups double as edible party favors.
Make Ahead and Storage
Storing Leftovers
Leftovers are a happy bonus! Store any extra Caramel Apple Dessert Cups tightly covered in the refrigerator, where they’ll stay fresh and delicious for up to three days. The crust will soften slightly but the layers meld beautifully, making the flavor even more cozy.
Freezing
Freezing isn’t recommended for these dessert cups, as the pudding and apple layers can become watery and the texture changes after thawing. For best results, enjoy them freshly made or within a couple of days of assembling.
Reheating
There’s no need to reheat this dessert—Caramel Apple Dessert Cups are best served chilled straight from the fridge. If you accidentally left them out for a while, just pop them back in to cool before serving.
FAQs
Can I use a different type of apple for the filling?
Absolutely! While Granny Smith apples bring a tangy punch, you can swap them for Honeycrisp, Fuji, or Gala if you prefer a sweeter filling. Just know that the overall flavor and sweetness will change a bit, but they’ll still be delicious.
Can I make Caramel Apple Dessert Cups ahead of time?
Yes, you can prep these dessert cups a day in advance. Assemble completely and store them in the refrigerator until serving time; just add any garnishes right before serving for the freshest look and taste.
Is it necessary to use instant vanilla pudding mix or can I make homemade pudding?
You can use homemade vanilla pudding if you’d like—it will make the middle layer extra special! Just be sure it’s thick and chilled before assembling so the layers hold up well in the cups.
Can I make a gluten-free version?
Definitely! Replace the vanilla wafers with your favorite gluten-free cookies or graham crackers to suit your needs. All the other ingredients are naturally gluten-free, so the swap is easy and just as tasty.
What’s the best way to crush vanilla wafers?
Place the wafers in a zip-top bag and use a rolling pin or a heavy glass to gently crush them. Aim for a mix of crumbs and small pieces—this gives your Caramel Apple Dessert Cups a lovely texture in every bite.
Final Thoughts
I hope you adore these Caramel Apple Dessert Cups as much as I do! They deliver all the cozy flavors of a homemade apple dessert in every fun, portable cup. Share them at your next gathering or treat yourself whenever you need a little indulgence. Trust me, they’re guaranteed to disappear fast!
PrintCaramel Apple Dessert Cups Recipe
Indulge in the perfect blend of tart Granny Smith apples, creamy pudding, and decadent caramel sauce with these delightful Caramel Apple Dessert Cups. Easy to make and portable, they are ideal for satisfying any sweet tooth.
- Prep Time: 30 minutes
- Cook Time: 10 minutes
- Total Time: 1 hour 10 minutes
- Yield: 28
- Category: Dessert
- Method: Baking
- Cuisine: American
- Diet: Vegetarian
Ingredients
For the Caramel Apples:
- 3 cups Granny Smith apples (peeled, cored, and finely diced)
- ⅓ cup light brown sugar, packed
- 3 tablespoons salted butter
- 1 teaspoon ground cinnamon
- ¾ cup salted caramel sauce, divided ¼ cup and ½ cup
For the Crumb Crust:
- 2 cups crushed vanilla wafers
- ¼ cup salted butter, melted and cooled
For the Pudding Filling:
- 3.4 ounce instant vanilla pudding mix
- 1 ¼ cup cold whole milk
- 1 cup cold heavy whipping cream
Instructions
- Caramel Apples: In a saucepan, cook diced apples, brown sugar, butter, and cinnamon until softened. Stir in ¼ cup caramel sauce. Cool.
- Crumb Crust: Combine crushed wafers and melted butter. Press into cups.
- Pudding Filling: Mix pudding with milk until thickened. Add ½ cup caramel sauce and cream. Pipe into cups.
- Add cooked apples on top. Refrigerate until serving.
Notes
- Peel apples with a vegetable peeler for convenience.
- Cool cooked apples in the fridge if short on time, but watch for condensation.
- Place portion cups on a tray for easy transport while assembling layers.
- If using a Ziploc bag for piping, start with a small hole and enlarge if needed.
Nutrition
- Serving Size: 1 dessert cup
- Calories: 140 kcal
- Sugar: 13g
- Sodium: 104mg
- Fat: 8g
- Saturated Fat: 4g
- Unsaturated Fat: 3g
- Trans Fat: 0.1g
- Carbohydrates: 18g
- Fiber: 0.5g
- Protein: 1g
- Cholesterol: 19mg

