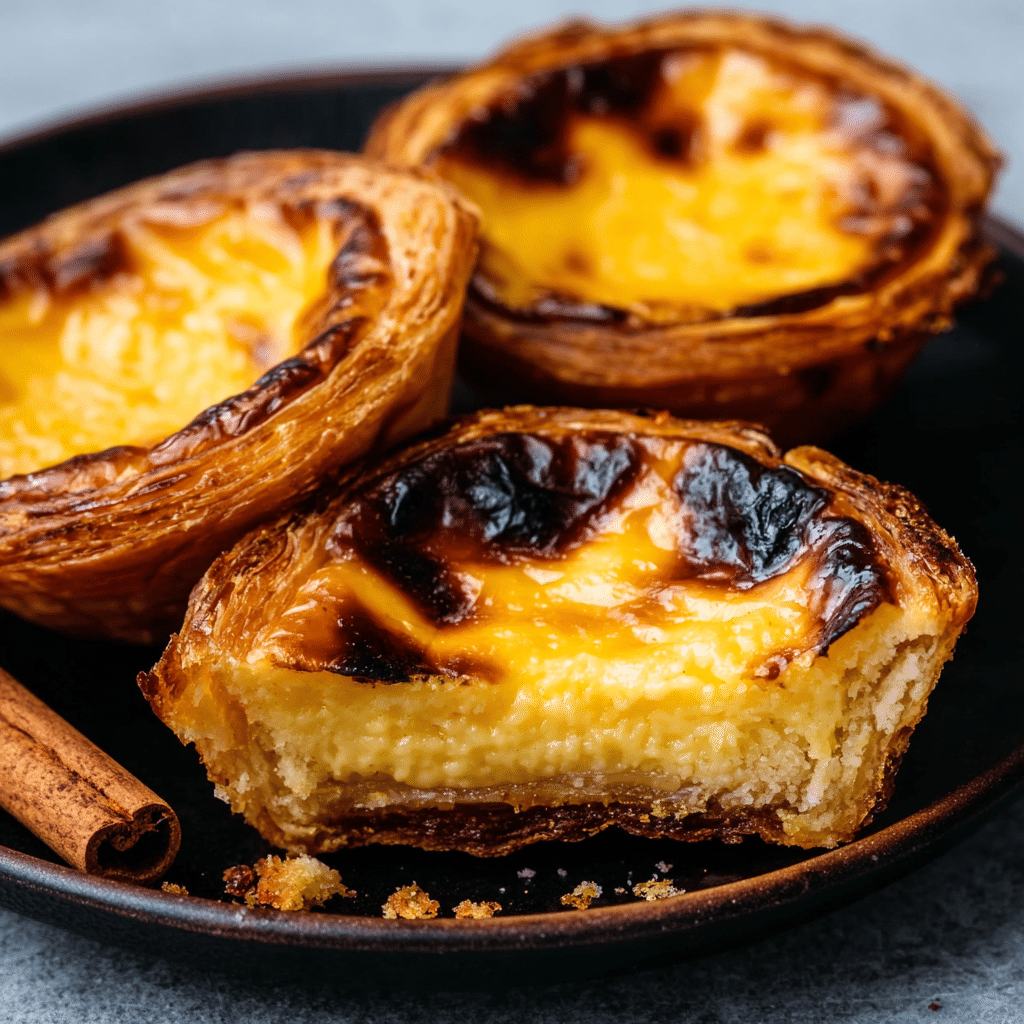
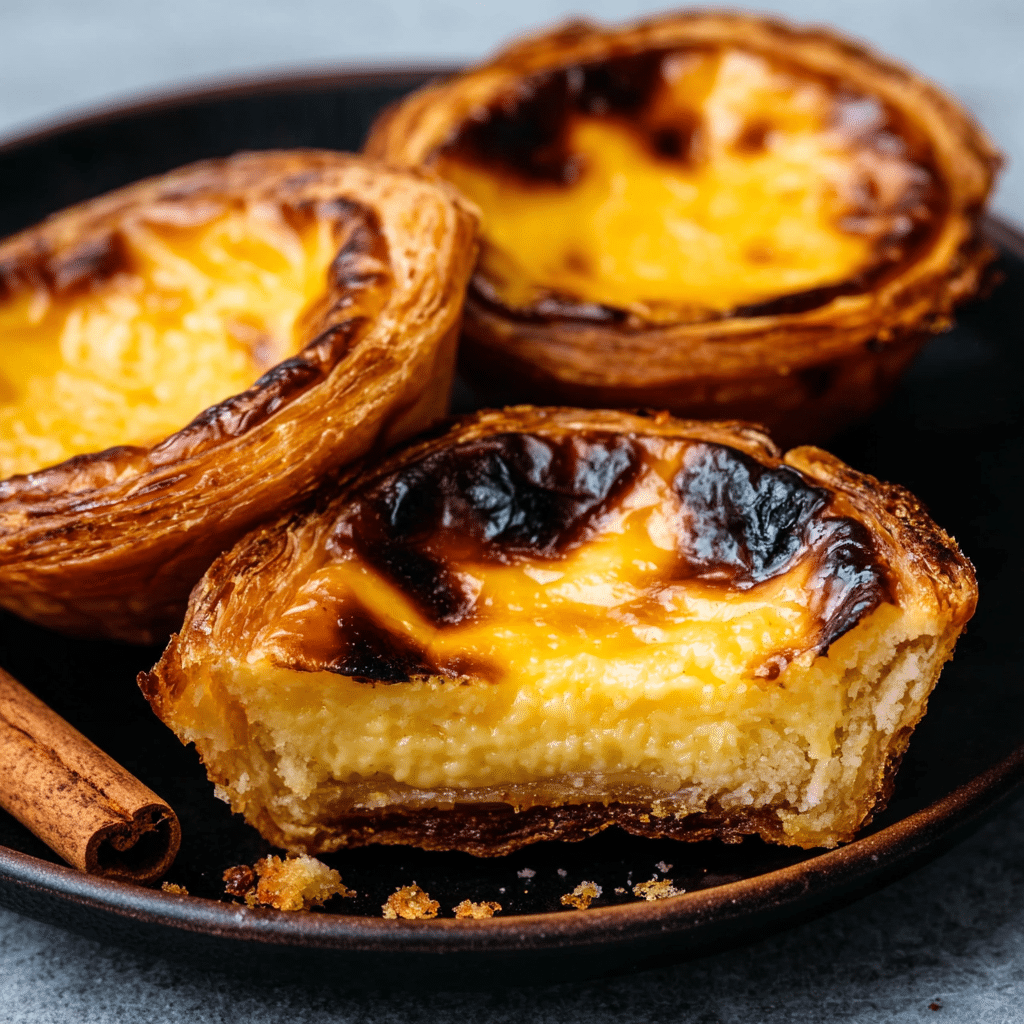
If there’s one pastry that captures the sunshine, vibrancy, and delicious traditions of Portugal in every bite, it’s the iconic Pastel de Nata (Custard Tarts). With impossibly flaky puff pastry and a creamy, citrus-scented custard filling, these little beauties quickly steal the show at any brunch, tea, or dessert table. The slight char on top is not a flaw, but a badge of honor—proof that you’re enjoying these tarts just as they do on the bustling streets of Lisbon. Whether you’re sharing them with family or treating yourself to an afternoon pick-me-up, Pastel de Nata (Custard Tarts) simply never disappoint.
Ingredients You’ll Need
The greatest magic of Pastel de Nata (Custard Tarts) is how a short ingredient list transforms into something so memorable. Every component plays a starring role, from the richness of egg yolks to the aromatic kick of lemon and cinnamon. Here’s what you’ll need—and why it matters.
- Frozen puff pastry: The secret behind that famously crisp, golden shell—using store-bought makes life simple without sacrificing flavor.
- Flour for dusting: Just a light sprinkle keeps the dough from sticking as you roll and shape it.
- Granulated sugar: Essential for a custard that’s not too sweet, but just right—caramelizes beautifully in the oven.
- All-purpose flour: Thickens the custard, giving it just enough structure to set up silky-smooth.
- Whole milk: Adds unmistakable creaminess—don’t skimp and use low-fat here!
- Cinnamon stick: Infuses a subtle warmth into the custard, evoking those classic Portuguese flavors.
- Lemon peel: Use just the bright yellow zest for a lift of citrusy aroma—skip the pith to avoid bitterness.
- Egg yolks: Key to the ultra-rich filling; the more vibrant the yolks, the prettier (and tastier) the final tarts.
- Ground cinnamon and powdered sugar (optional): Just a dusting on top transforms them into bakery-worthy treats.
How to Make Pastel de Nata (Custard Tarts)
Step 1: Roll and Shape the Puff Pastry
Begin by gently rolling out your thawed puff pastry on a floured surface until it’s smooth and thin. Next, roll the rectangle up tightly from the short side into a neat little log—that’s how you create those signature flaky spiral layers that make Pastel de Nata (Custard Tarts) so irresistible. Slice your pastry log into 12 even pieces, then pop each one into a muffin tin, cut-side down. With your thumbs, work from the center outward to press and shape that dough into perfect little cups. Chill the whole tray while you move onto the next step—the dough relaxes, and you get a better, cleaner bake.
Step 2: Make the Custard Base
Now for the creamy heart of these tarts! In a saucepan, whisk your sugar and flour together, then add a splash of the milk to make a lump-free paste. Stir in the rest of the milk, along with the cinnamon stick and lemon peel. Over medium heat, keep whisking until the mixture just begins to thicken and simmer—those warming aromas will start to fill your kitchen. Take the pan off the heat and let it steep for a good ten minutes, allowing every bit of cinnamon and citrus zest to infuse.
Step 3: Incorporate the Egg Yolks
While your milk mixture is steeping, whisk the egg yolks in a separate bowl. Remove the cinnamon stick and lemon peel from your saucepan so they don’t overpower the custard. Then, slowly whisk the warm milk mixture into the eggs, adding just a little at first to avoid scrambling. This step is crucial for a seamless, velvety filling that makes Pastel de Nata (Custard Tarts) stand out.
Step 4: Strain and Preheat
For the silkiest texture, strain your custard through a fine mesh sieve, catching any stray lumps or bits of zest. Let the filling cool slightly as you preheat your oven nice and hot—500°F is ideal. A blazing oven is the secret to those browned, blistered tops, and the delicate layers of pastry that shatter when you bite in.
Step 5: Fill and Bake
Pour the custard into your pastry cups, filling each about 3/4 of the way full. Slide the muffin tin onto an upper rack and bake for 12 to 15 minutes. Watch as the custard puffs and the tops turn golden and spotty—some blackened spots are absolutely traditional. Trust the process (and your nose) for perfect Pastel de Nata (Custard Tarts) every time.
Step 6: Cool and Enjoy
Let the tarts rest in the tin for just five minutes, then gently transfer them to a wire rack. This little break helps both the pastry and filling set just enough, making them easier to handle (but still perfectly warm and inviting).
How to Serve Pastel de Nata (Custard Tarts)
Garnishes
A classic Pastel de Nata (Custard Tarts) truly shines with a dusting of powdered sugar and a sprinkle of ground cinnamon right before serving. The cinnamon amplifies those cozy notes baked into the custard, while powdered sugar adds a delicate sweetness. For serious flair, try adding some finely grated lemon zest or even a sprinkle of coarse sea salt to balance the flavors.
Side Dishes
Pastel de Nata (Custard Tarts) are perfect with nothing more than a rich espresso or a small glass of port wine if you’re feeling decadent. For brunches and gatherings, set them alongside a platter of fresh fruit—think berries or citrus segments—or a simple mixed green salad to keep things fresh and light. The contrast turns a simple tart into the highlight of any meal.
Creative Ways to Present
Stack several tarts on a rustic cake stand, or tuck them into colorful napkins for a charming, bakery-style look. For a special event, serve Pastel de Nata (Custard Tarts) in decorative muffin liners or arrange them on a platter with individual handwritten tags. You can even turn them into a show-stopping dessert board with bowls of honey, whipped cream, or flavored sugars for dipping.
Make Ahead and Storage
Storing Leftovers
If you somehow have leftover Pastel de Nata (Custard Tarts), transfer them to an airtight container once completely cool. They’ll keep well at room temperature for up to one day or can be refrigerated for two to three days. Keep them in a single layer if you can, to protect that crisp, flaky pastry from getting soggy.
Freezing
To freeze, let the tarts cool completely, then place them on a baking sheet in the freezer for about an hour—this keeps them from sticking together. Once solid, wrap each tart individually in plastic wrap and store in a zip-top bag or airtight container. They’re best enjoyed within a month, and can go straight from freezer to oven for a quick reheat.
Reheating
Want to revive that fresh-baked magic? Reheat Pastel de Nata (Custard Tarts) in a 375°F (190°C) oven for about 5-8 minutes, straight from the fridge or freezer. They emerge crisp and warm, just as they should be. Avoid the microwave for reheating—while it works in a pinch, you’ll miss out on the signature crunch.
FAQs
Why is there some black spotting on the tops after baking?
Those caramelized, blistered spots are the mark of an authentic Pastel de Nata (Custard Tarts). They come from the high oven heat and add a hint of toasty, burnt sugar flavor, similar to créme brulée. Embrace them—they’re part of the classic look and taste!
Can I make these tarts without a muffin tin?
Absolutely! If you have small tartlet pans or even sturdy ramekins, you can shape and bake Pastel de Nata (Custard Tarts) just as easily. The muffins tin simply makes things effortless, but don’t let equipment stop you.
Is it necessary to strain the custard?
Yes! Straining ensures your custard is silky smooth, removing any bits of cooked egg or zest. For the signature creamy texture of authentic Pastel de Nata (Custard Tarts), don’t skip this step.
Can I use store-bought custard or pre-made pastry shells?
While convenience is tempting, store-bought custard and pastry won’t quite capture the texture and flavor of freshly made Pastel de Nata (Custard Tarts). Puff pastry from the freezer section, though, is a smart shortcut that keeps things manageable at home.
Why did my puff pastry shrink or become tough?
Overworking the dough or skipping the chill can make pastry shrink and lose its lightness. Make sure to handle the dough gently and always chill the shaped cups before baking; this keeps the layers crisp and flaky every time.
Final Thoughts
If you’re dreaming of travel or just craving a little sunshine on your plate, Pastel de Nata (Custard Tarts) are the perfect answer. With each bite, you’ll taste a bit of tradition—and believe me, they’re fun and rewarding to make. Give these tarts a try, share them with friends, and watch them vanish in a matter of minutes!
PrintPastel de Nata (Custard Tarts) Recipe
Learn how to make delicious Portuguese Custard Tarts, known as Pastel de Nata, with a flaky pastry crust and a creamy custard filling. These tarts are a perfect blend of sweetness and warmth, sure to impress anyone who tries them.
- Prep Time: 30 minutes
- Cook Time: 15 minutes
- Total Time: 45 minutes
- Yield: 12 tarts
- Category: Dessert
- Method: Baking
- Cuisine: Portuguese
- Diet: Vegetarian
Ingredients
For the pastry:
- 1 sheet frozen puff pastry, thawed
- Flour for dusting
For the custard filling:
- 3/4 cup (150g) granulated sugar
- 1/3 cup (40g) all-purpose flour
- 1 1/4 cups (300ml) whole milk
- 1 cinnamon stick
- Peel from 1 lemon (use a vegetable peeler to avoid the bitter white pith)
- 6 large egg yolks
Serving:
- Ground cinnamon and powdered sugar for dusting (optional)
Instructions
- Roll out the pastry: Roll out the puff pastry into a thin rectangle on a floured surface. Roll it up tightly, slice into 12 pieces, and press into muffin tin cups.
- Make the custard: Whisk sugar, flour, and milk in a saucepan. Add cinnamon and lemon peel, simmer until thickened. Whisk warm milk into egg yolks.
- Bake the tarts: Fill pastry cups with custard and bake at 500°F (260°C) until puffed and browned.
- Cool and serve: Let tarts cool in the tin before transferring to a wire rack.
Nutrition
- Serving Size: 1 tart
- Calories: 250
- Sugar: 15g
- Sodium: 100mg
- Fat: 12g
- Saturated Fat: 5g
- Unsaturated Fat: 6g
- Trans Fat: 0g
- Carbohydrates: 30g
- Fiber: 1g
- Protein: 5g
- Cholesterol: 130mg


