
I absolutely love how this Pull-Apart Pie Recipe transforms the classic pie experience into a fun, shareable feast that everyone at the table can enjoy together. It’s like having individual mini pies that you just pull apart with your hands, bursting with layers of sweet, fruity fillings all nestled inside golden, flaky crusts. I find this recipe absolutely delightful because it combines variety and convenience in a way that makes dessert time feel extra special and interactive.
Why You’ll Love This Pull-Apart Pie Recipe
What makes this Pull-Apart Pie Recipe so irresistible to me is the incredible flavor profile. You get that perfect balance of buttery, flaky dough with the juicy richness of multiple fruit fillings—apple, blueberry, cherry, and a touch of cranberry sauce—all mingling together in the same bite. Each mini pie pocket has a slightly different taste, which keeps every pull fresh and exciting rather than predictable. The mix of tart and sweet with textures from smooth filling to crisp crust just hits the spot every time.
Another reason I’m so enthusiastic about this recipe is how easy and forgiving it is. Using store-bought pie dough and fillings cuts down prep time significantly, but if you prefer homemade, it’s just as delicious. Plus, the assembly is straightforward—cutting rounds, filling, pinching, and baking—making it perfect for busy weeknights or casual gatherings. I often whip this up for holidays or family dinners because it’s both impressive to serve and super cozy to eat. The communal, shareable style really brings people together around the table, and that’s something I absolutely cherish.
Ingredients You’ll Need
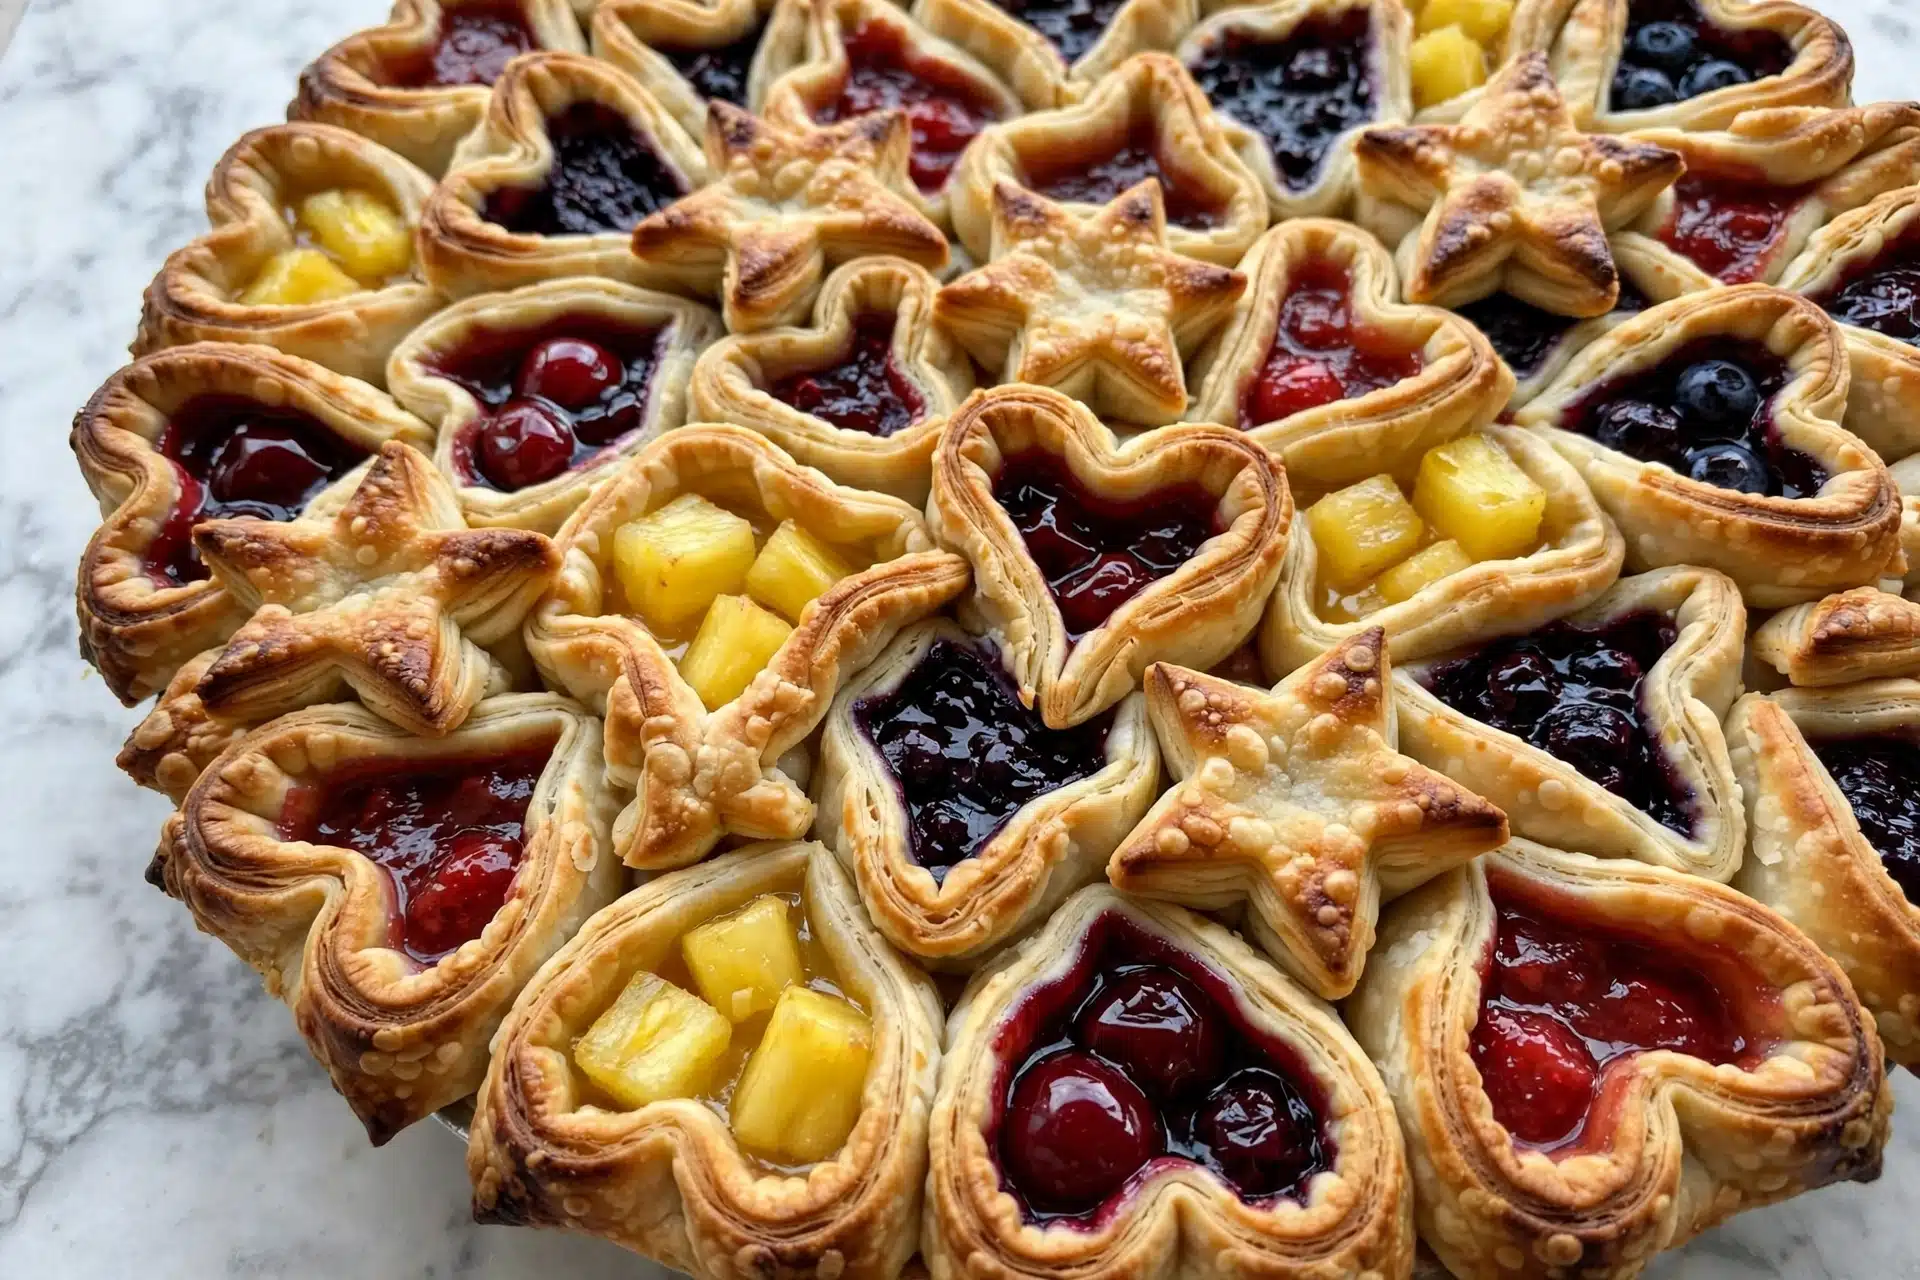
The ingredients for this Pull-Apart Pie Recipe are wonderfully simple, yet each one plays an important role in the final dish’s taste and texture. The different pie fillings offer a beautiful palette of flavors and colors, while the pie dough creates that irresistible flaky foundation.
- Cooking spray: Essential for greasing your pie plate to prevent sticking and to help the crust crisp evenly.
- All-purpose flour: Just a little for dusting your work surface so the dough doesn’t stick as you roll it out.
- Pie dough: You can use a store-bought package or homemade dough; the key is to have it at room temperature for easy handling and perfect flakiness.
- Large egg: Beaten with a splash of water, this egg wash seals each little pie round and gives the crust that beautiful golden shine.
- Apple pie filling: Sweet, tender apples bring classic warmth and texture to the mix.
- Blueberry pie filling: Bursting with juicy berries and a deep purple hue, adding a lovely contrast.
- Cherry pie filling: Delivers a tangy, vibrant flavor that makes your taste buds dance.
- Cranberry sauce: Adds a tart touch and a festive color boost that rounds out the fruit ensemble wonderfully.
- 2 3/4″ round cookie cutter: The perfect size to create individual pull-apart pieces easy to handle and enjoy.
Directions
Step 1: Set your oven rack in the center position and preheat the oven to 375°. Lightly grease a 9-inch shallow pie plate with cooking spray to ensure your pie pieces won’t stick.
Step 2: On a lightly floured surface, roll out one piece of pie dough into approximately a 12-inch circle. Using the 2 3/4-inch round cookie cutter, cut out as many dough rounds as possible from the circle. Repeat this process with the second piece of dough.
Step 3: In a small bowl, beat the large egg with a splash of water to create your egg wash. Brush the edges of each dough round with this wash to help them seal nicely once filled.
Step 4: Place a small spoonful of your choice of pie filling right in the center of each dough round. Then pinch the dough edges together opposite each other, leaving the center of the round open to show a peek of filling inside.
Step 5: Gently arrange the filled dough rounds into your prepared pie plate, spacing them apart so they’re close but not packed tightly—they’ll puff and expand as they bake.
Step 6: Bake the pie in the preheated oven for 40 to 45 minutes. You’re looking for a crust that is a gorgeous golden brown and bubbling, fragrant fillings peeking through. After baking, let it cool in the dish for about 10 minutes to set.
Servings and Timing
This Pull-Apart Pie Recipe yields about 8 servings, which is perfect for sharing with family or friends. Prep time clocks in at around 15 to 20 minutes, mostly spent rolling dough and filling rounds. The cook time is approximately 40 to 45 minutes, and be sure to allow an additional 10 minutes for cooling so the fillings thicken slightly and the crust firms up just right. In total, you’re looking at just about 1 hour from start to finish.
How to Serve This Pull-Apart Pie Recipe
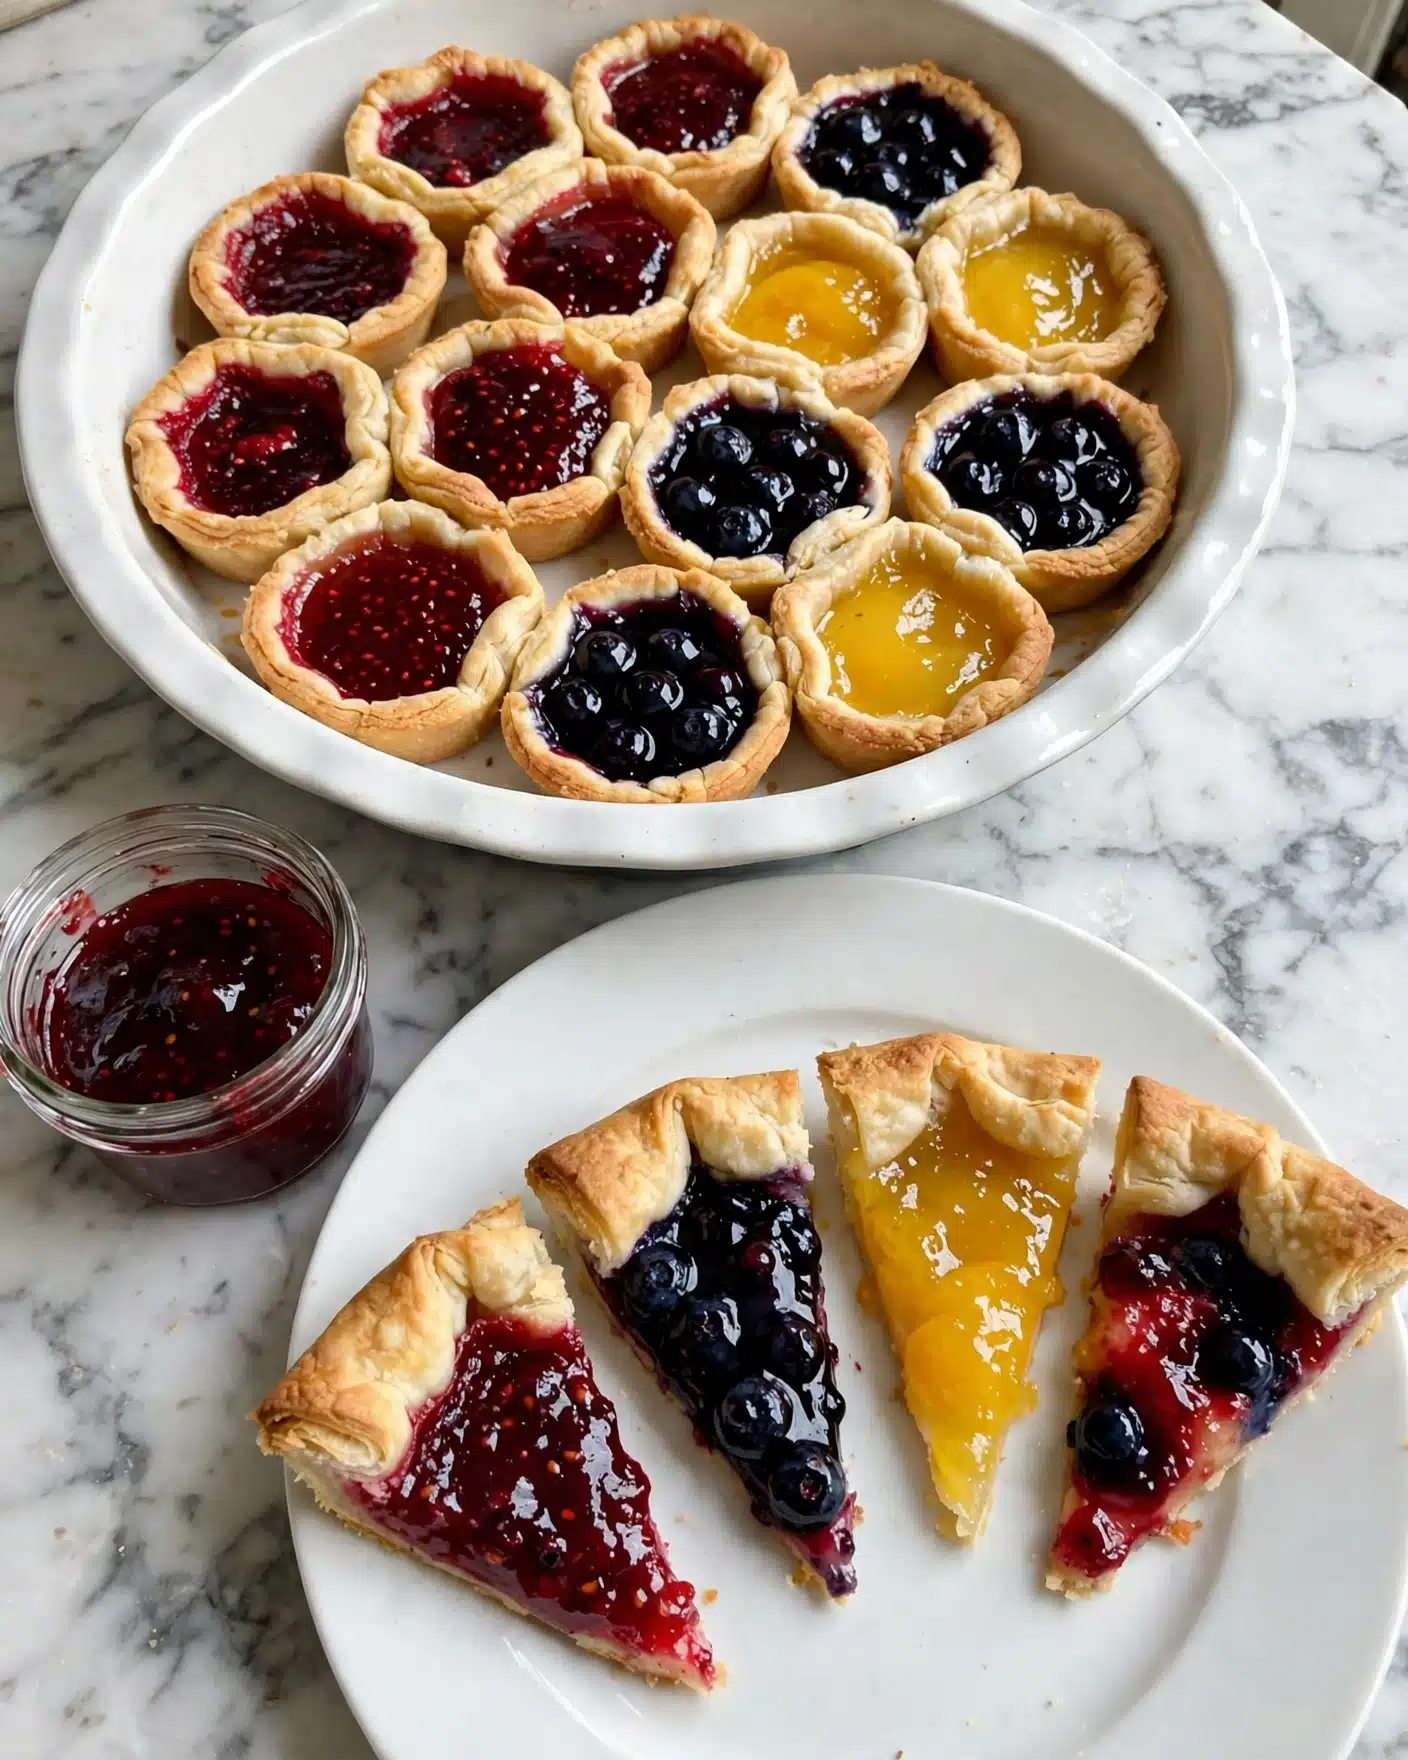
When serving this Pull-Apart Pie Recipe, I love to keep things casual and fun. It’s perfect to serve warm or at room temperature, so you can let guests grab a piece whenever they like. Adding a scoop of vanilla ice cream or a dollop of whipped cream on the side always feels extra indulgent and elevates the fruity fillings beautifully. For a little extra sparkle, I sometimes garnish with fresh mint leaves or a sprinkle of powdered sugar over the top just before serving.
I find this pie works wonderfully alongside a simple cup of coffee or tea for a cozy afternoon treat. If you’re serving it at a party or holiday meal, pairing it with a light sparkling wine or a crisp white like Riesling enhances the sweet-and-tart notes splendidly. This recipe also shines at brunches or potlucks because it’s easy to portion out and share around the table.
For plating, I suggest serving each guest 2 or 3 pull-apart rounds on a small dessert plate. This gives the experience of tasting the different fruit fillings without feeling overwhelmed. The rustic, homemade look of the pie also means you don’t have to worry about perfect slices—just pull, share, and savor every bite!
Variations
I love how versatile this Pull-Apart Pie Recipe is, and I’ve played around with a bunch of variations to suit different tastes and dietary needs. For instance, swapping out pie fillings is easy—try pear cinnamon or peach filling in place of one of the fruit options for a new twist. Sometimes I mix up spices too, adding a pinch of nutmeg or ginger to one filling for extra warmth.
If you’re gluten-free, I highly recommend using your favorite gluten-free pie dough to keep the flaky texture intact without the wheat. For a vegan version, you can replace the egg wash with a little agave nectar diluted in water for a similar glossy finish—just be mindful that it might brown a bit differently. I’ve also experimented with using puff pastry in place of traditional pie dough for a lighter, flakier crust that bakes up beautifully in this style.
Another fun idea is to bake this Pull-Apart Pie Recipe in muffin tins instead of a pie plate to create perfectly individual portions. This method makes it easy to grab and go for packed lunches or picnics. No matter what changes you make, this recipe’s adaptable spirit makes it a joy to personalize.
Storage and Reheating
Storing Leftovers
If you have any leftover pull-apart pieces, store them in an airtight container at room temperature for up to 2 days, or in the refrigerator for up to 4 days. I like using a shallow container lined with parchment paper between layers to keep the crust crisp and prevent the pieces from sticking together.
Freezing
This recipe freezes well, which is great if you want to prepare ahead of time. Arrange the cooled pull-apart rounds on a baking sheet in a single layer and freeze until solid, about 1-2 hours. Then transfer them to a freezer-safe bag or container and store for up to 3 months. To enjoy, thaw in the refrigerator overnight before reheating.
Reheating
To bring leftover pie rounds back to life, I recommend reheating in a preheated oven at 350° F for about 8 to 10 minutes. This method helps restore the flaky crust and warm filling perfectly. Avoid microwaving if possible, as it tends to make the crust soggy and chewy. A quick oven reheat rewards you with that fresh-baked texture and flavor.
FAQs
Can I use homemade pie fillings instead of store-bought?
Absolutely! Homemade pie fillings work wonderfully in this Pull-Apart Pie Recipe and bring a fresh, natural flavor that can elevate the dish even more. Just make sure your fillings aren’t too runny to avoid soggy crusts—thick or slightly cooked fillings hold up best.
What if I don’t have a 2 3/4-inch cookie cutter?
If you don’t have the exact size cookie cutter, you can use any round cutter or even a glass with a similar diameter. The key is to have rounds that are manageable for pulling apart without being too big or too small.
Can I prepare this pie ahead of time?
You sure can! You can assemble the pie rounds and keep them covered in the fridge for a few hours before baking. This is great for prepping in advance for parties or busy days. Just pop it in the oven when ready and bake as directed.
What if my pie fillings are very sweet?
If your pie fillings are overly sweet, balancing them out with a touch of fresh lemon juice or zest before filling the dough rounds can add a nice brightness. You could also reduce the amount of sugar in homemade dough if making from scratch.
Is this recipe suitable for kids?
Definitely! Kids love the interactive nature of pulling apart their own little pies. Plus, the fruity fillings and flaky crust are usually a big hit with younger eaters. Just be sure the pies have cooled enough to avoid burning little fingers.
Conclusion
I truly hope you give this Pull-Apart Pie Recipe a try because it’s such a joyful way to enjoy a classic dessert with a twist. It’s easy, delicious, and guaranteed to get your friends and family smiling as they gather round to pull apart and share. To me, there’s nothing quite like the warmth of fresh-baked fruit-filled pockets and the happiness they bring to any table. Enjoy every bite!
PrintPull-Apart Pie Recipe
A delightful Pull-Apart Pie featuring a medley of fruit fillings enclosed in flaky, golden pie dough rounds, baked to bubbly perfection. This easy-to-make dessert combines apple, blueberry, cherry, and cranberry flavors in a fun, shareable pie perfect for gatherings.
- Prep Time: 20 minutes
- Cook Time: 45 minutes
- Total Time: 1 hour 5 minutes
- Yield: 8 servings
- Category: Dessert
- Method: Baking
- Cuisine: American
Ingredients
Pie Dough
- 1 package store-bought or 2 batches homemade pie dough, room temperature
Fillings
- 1/2 cup store-bought apple pie filling
- 1/2 cup store-bought blueberry pie filling
- 1/2 cup store-bought cherry pie filling
- 1/2 cup store-bought cranberry sauce
Other
- Cooking spray
- All-purpose flour, for dusting
- 1 large egg
Instructions
- Preheat and Prepare Pan: Arrange a rack in the center of the oven and preheat to 375°F (190°C). Grease a 9-inch shallow pie plate with cooking spray to ensure the pie doesn’t stick during baking.
- Roll and Cut Dough: On a lightly floured surface, roll out one batch of pie dough into a 12-inch circle. Use a 2 3/4 inch round cookie cutter to cut out dough rounds. Repeat rolling and cutting with the remaining dough to create enough rounds for layering.
- Assemble Pie Rounds: In a small bowl, beat one large egg with a splash of water to make an egg wash. Lightly brush the edges of each dough round with the egg wash. Add a small spoonful of any of the pie fillings (apple, blueberry, cherry, or cranberry) into the center of each round. Pinch the dough at the opposite edges, leaving the center open to allow steam to escape and filling to bubble through.
- Arrange in Pie Plate: Arrange the filled dough rounds in the prepared pie plate, spacing them loosely so the rounds don’t tightly pack. This helps create the pull-apart effect once baked.
- Bake the Pie: Place the pie in the preheated oven and bake for 40 to 45 minutes, or until the crust turns golden brown and the filling is bubbling. This ensures a crisp, flaky crust and well-heated, juicy fillings.
- Cool and Serve: Allow the pull-apart pie to cool for 10 minutes before serving to let the filling set slightly and make it easier to pull apart.
Notes
- Use a variety of pie fillings to create a colorful and flavorful pull-apart pie.
- Egg wash helps seal the dough edges and adds a beautiful golden color to the crust.
- Do not over-pack the dough rounds in the pie plate to maintain the pull-apart texture.
- Let the pie cool slightly to avoid burning from hot filling when pulling apart.
- Homemade pie dough adds a fresh, flaky texture, but store-bought dough works well for convenience.


