
I can’t wait to share this Easy Butterbeer Fudge Recipe with you because it perfectly captures all the cozy, rich flavors I love in a sweet treat. From the creamy butterscotch base to the luscious swirls of white chocolate, it’s like a magical little bite of buttery bliss that melts in your mouth. Whether you’re a Harry Potter fan or just in the mood for something decadently smooth and easy to make, this fudge hits all the right notes for me every time.
Why You’ll Love This Easy Butterbeer Fudge Recipe
When I first made this fudge, I was blown away by how beautifully the flavors came together. The butterscotch gives it that warm, caramel-like sweetness, while the white chocolate swirl adds a delicate richness that balances perfectly. I love how the tiny marshmallow bits on top provide a playful texture contrast without overpowering the creamy base. Each bite feels like a little celebration of buttery, sugary comfort.
What makes me really adore this Easy Butterbeer Fudge Recipe is how straightforward it is to prepare. Seriously, it’s one of those recipes where you feel like a wizard in the kitchen with just a few simple ingredients and basic steps, but you end up with something truly special. I often make this for holiday gatherings or as a delightful surprise for my friends and family. Because it needs to chill for a few hours, it’s also a relaxed, no-rush kind of treat that’s perfect for those days when you want to prep something ahead and enjoy the smiles later.
Ingredients You’ll Need
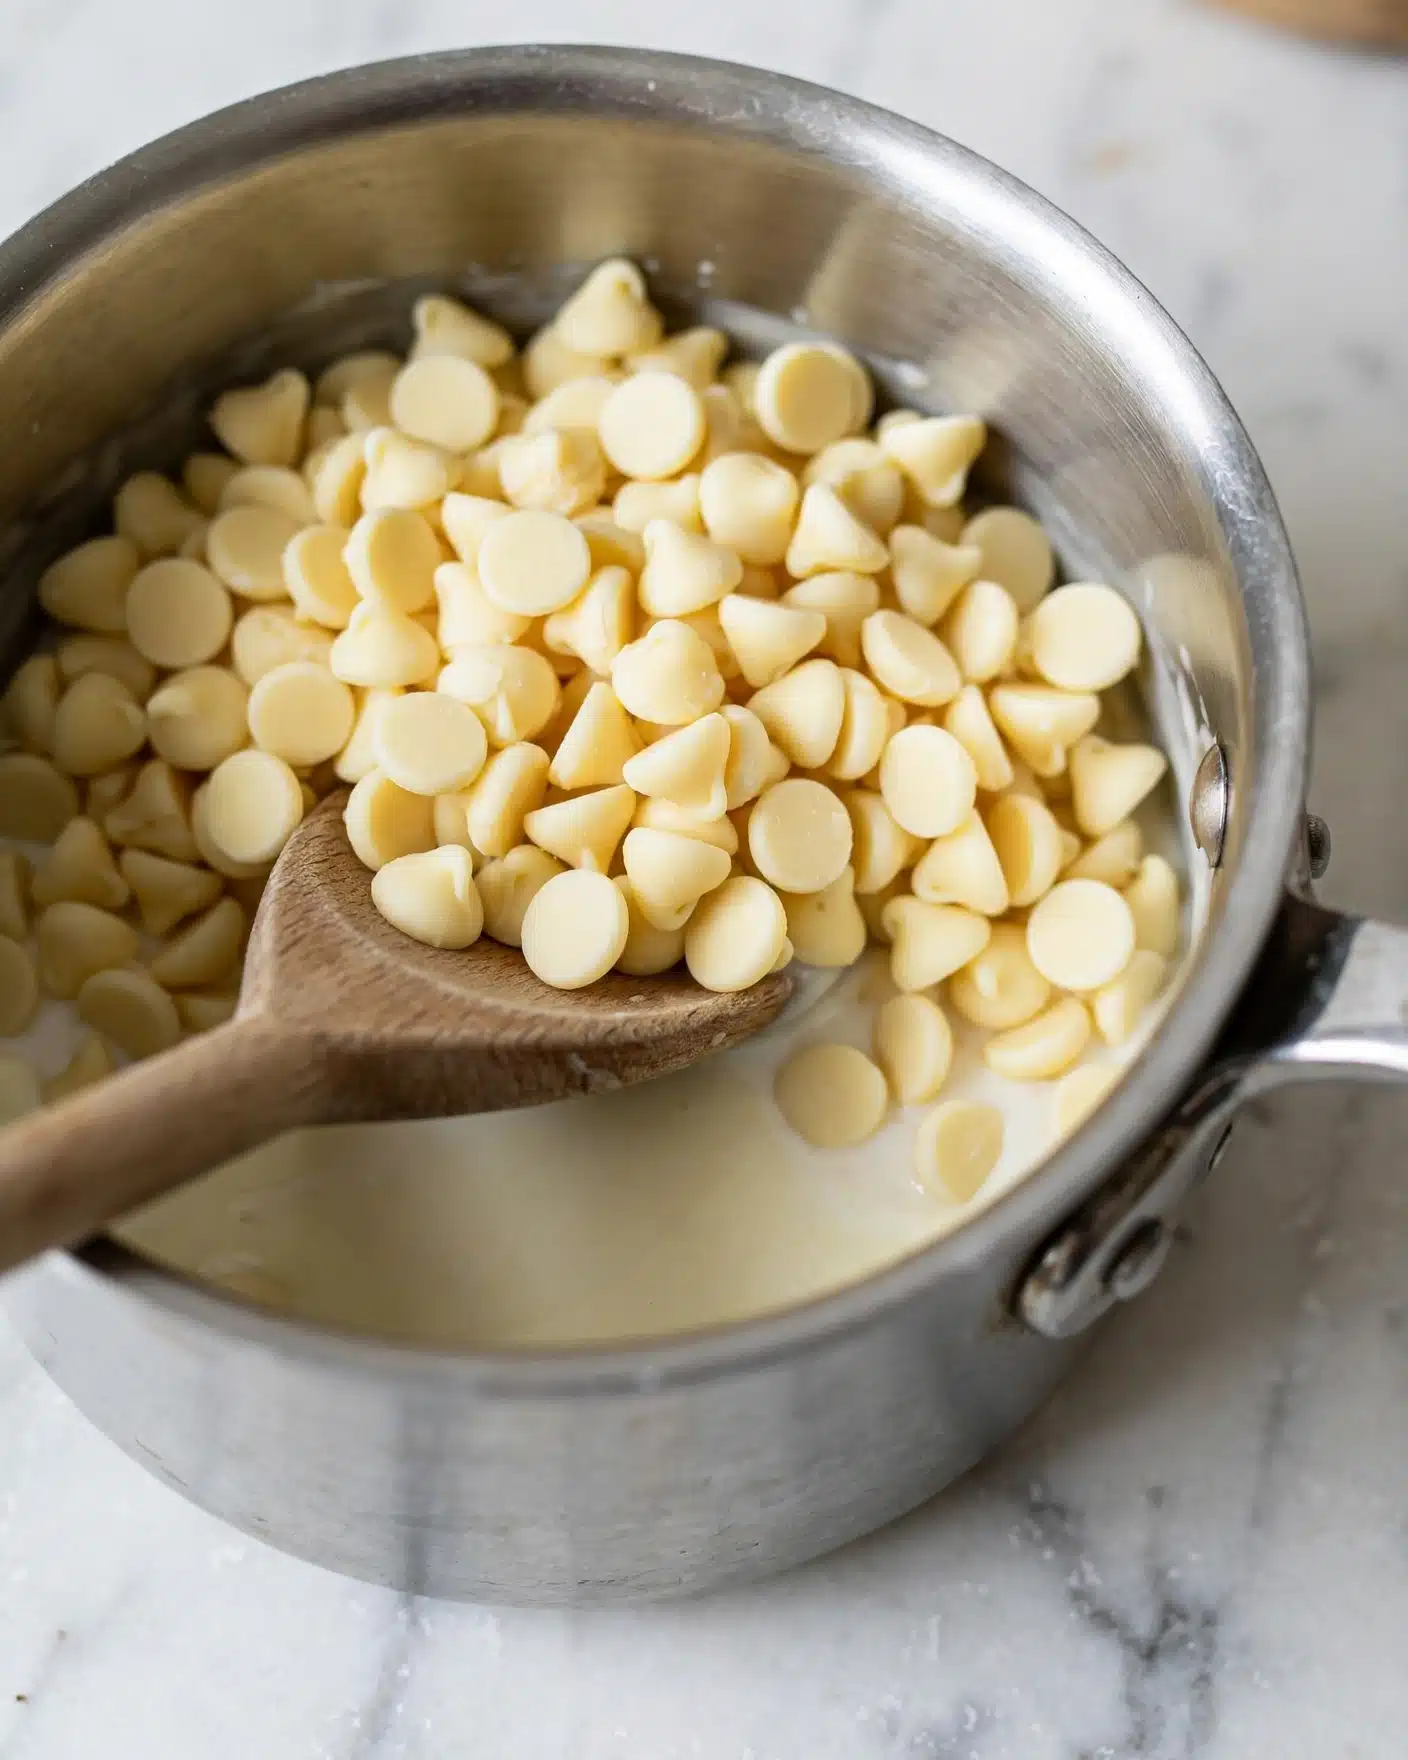
The ingredients for this fudge are wonderfully simple but absolutely essential. Each one contributes a unique touch to the final texture and flavor, making the fudge creamy, sweet, and irresistibly smooth.
- Butter (2 tbsp.): Adds richness and helps create that silky texture in the butterscotch layer.
- Sweetened condensed milk (1 14-oz. can + 1/3 cup): The secret to creamy sweetness and the base that holds the fudge together perfectly.
- Butterscotch chips (3 cups): Provides the signature butterscotch flavor that defines this fudge.
- Pure vanilla extract (1/2 tsp.): Enhances and rounds out the flavor with a warm, fragrant note.
- White chocolate chips (1 cup): Adds a smooth, sweet swirl that contrasts beautifully with the butterscotch.
- Marshmallow bits (1 cup, optional): For a fun, chewy topping that adds extra texture and whimsy.
Directions
Step 1: First, line an 8-inch by 8-inch pan with aluminum foil and spray it lightly with cooking spray. This ensures your fudge won’t stick and makes cleanup a breeze.
Step 2: To make the butterscotch layer, melt the butter in a medium saucepan over medium-low heat. Once melted, stir in the 14-ounce can of sweetened condensed milk and the butterscotch chips. Keep stirring gently until all the chips have melted and the mixture is smooth and fully combined. This usually takes around 5 to 7 minutes—don’t rush, as gentle heat is key to avoiding scorching.
Step 3: Pour the warm butterscotch mixture evenly into your prepared pan, smoothing out the surface with a spatula. This will be your fudge’s base layer.
Step 4: For the white chocolate swirl, heat the remaining sweetened condensed milk, vanilla extract, and white chocolate chips in a small saucepan over medium-low heat. Stir constantly until the white chocolate has melted completely and the mixture is smooth. Remove it from the heat right away to prevent it from thickening too much.
Step 5: Drizzle the white chocolate mixture over the butterscotch base. Then, using a butter knife, gently swirl the two layers together in pretty, random patterns. If you’re feeling playful, don’t hesitate to make interesting designs that will catch the eye once the fudge is sliced.
Step 6: Scatter marshmallow bits over the top of the fudge, pressing them lightly with your hands so they stick. This step is optional but trust me, those little pops of sweetness are worth it.
Step 7: Finally, refrigerate the fudge for at least 4 hours or until firm. Once set, lift it out of the pan using the foil edges and cut it into 12 equal-sized squares. Then it’s ready to enjoy!
Servings and Timing
This Easy Butterbeer Fudge Recipe makes about 12 generous servings, perfect for sharing with friends or saving a few pieces for yourself (which I always do). Prep time is roughly 15 minutes because the melting and mixing go quickly with gentle heat. Cooking the layers combined only takes about 10 to 15 minutes. Don’t forget to factor in the 4 hours of chilling time in the refrigerator to let the fudge fully set. Overall, from start to finish, you’re looking at just over 4 hours, but the actual hands-on time is minimal.
How to Serve This Easy Butterbeer Fudge Recipe
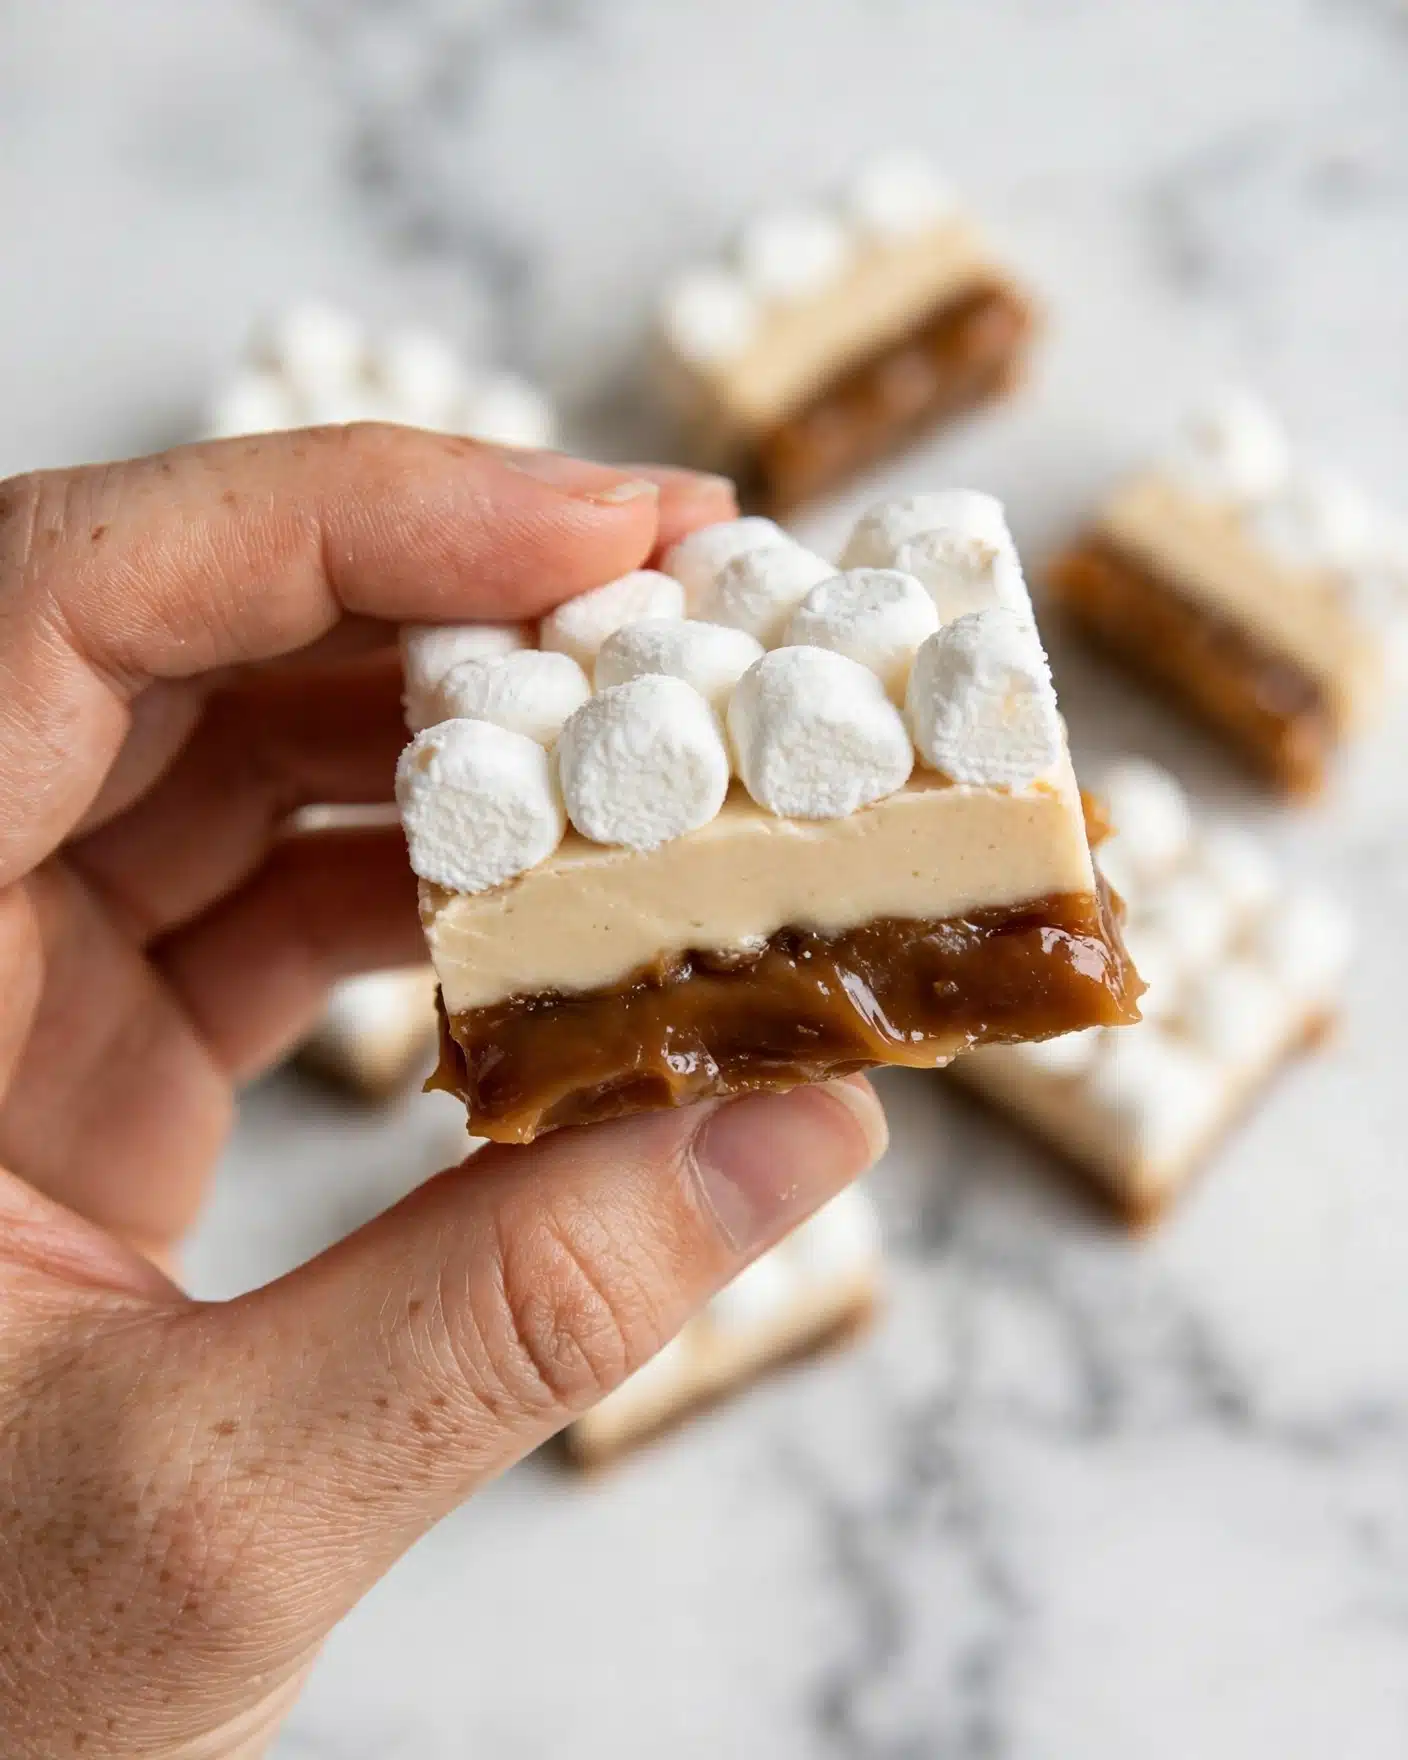
When it comes to serving this fudge, I love to keep things simple but thoughtful. Room temperature is my favorite because it lets the fudge maintain that perfect creamy texture without being too soft or too hard. I usually cut the fudge into neat squares, about 1.5 inches each, making them perfectly bite-size for sharing at parties or enjoying as a sweet snack.
This fudge pairs wonderfully with a cozy cup of hot tea or coffee to balance the sweetness. For festive occasions, I like to serve it alongside a chilled mug of cream soda or even a salted caramel cocktail, highlighting the buttery notes. Garnishing the serving plate with a few extra marshmallow bits or a dusting of cinnamon adds a fun touch that never goes unnoticed.
For holidays or family gatherings, I’ve found that presenting the fudge on a rustic wooden board or a decorative plate enhances its appeal. You can even wrap individual pieces in pretty wax paper if you’re handing them out as little gifts. No matter how you serve it, this Easy Butterbeer Fudge Recipe always brings a smile to everyone’s face.
Variations
I love experimenting with different twists on this fudge to keep it exciting. If you prefer a dairy-free or vegan version, swapping out butter for coconut oil and using vegan white chocolate chips can work beautifully. Sweetened condensed coconut milk is a great alternative to regular condensed milk and keeps that luscious, creamy texture.
You can also try adding a pinch of sea salt on top before chilling to create a salted butterbeer fudge that adds a delightful contrast to the sweetness. For a fun flavor change, mixing in some crushed toffee bits or a hint of cinnamon can give the fudge a warm, spiced flair I adore during colder months.
If you’re feeling adventurous, using flavored white chocolate like caramel or blondie chips can add new dimensions of taste without complicating the process. I’ve even stirred in a teaspoon of rum extract once for an indulgent grown-up version that was an absolute hit.
Storage and Reheating
Storing Leftovers
Storing leftover fudge is easy and keeps it fresh for several days. I store my fudge in an airtight container lined with parchment paper to prevent sticking. It keeps beautifully at room temperature for up to five days. You can also keep it in the fridge, especially if you prefer firmer fudge, where it will last up to two weeks. Just make sure it’s sealed well to avoid absorbing any fridge odors.
Freezing
This fudge freezes quite well if you want to make it ahead or save some for later treats. I wrap each piece individually in plastic wrap and place them in a freezer-safe container or bag. Properly stored, the fudge will keep for up to three months. When you’re ready to enjoy, just thaw it overnight in the refrigerator, then bring it to room temperature before serving to restore that creamy texture.
Reheating
Since fudge is best enjoyed at room temperature or slightly chilled, reheating isn’t usually necessary. However, if you want to soften it a little, I recommend placing the fudge in a warm spot or letting it sit at room temperature for about 30 minutes. Avoid microwaving it directly as this can cause the fudge to become grainy or melt unevenly, ruining the texture.
FAQs
Can I use different types of chips in this recipe?
Absolutely! While butterscotch and white chocolate chips are classic here, you can substitute with caramel chips, peanut butter chips, or even milk chocolate chips to create new flavor profiles. Just keep in mind that the flavor and sweetness may shift, so adjust toppings and swirls as you like.
Is it necessary to use sweetened condensed milk?
Yes, sweetened condensed milk is crucial for this fudge’s creamy, dense texture. Using it provides both sweetness and the right consistency that other liquids or creams won’t replicate. There are vegan and dairy-free brands available if you’re looking for alternatives.
Can I skip the marshmallow bits? What else can I use for toppings?
You can definitely omit the marshmallow bits if you prefer, or substitute with crushed nuts, toffee pieces, or even a sprinkle of sea salt. These add interesting textures and flavors that complement the fudge nicely.
How do I know when the fudge is fully set?
The fudge is ready when it feels firm to the touch and holds its shape well after chilling for at least 4 hours. If it still feels soft or sticky, give it a bit more time in the refrigerator before cutting.
Can I make this fudge ahead of time for a party?
Yes, this fudge is perfect for making ahead! Prepare it a day or two in advance, refrigerate until firm, and keep it stored in an airtight container. This way, you can focus on other preparations and serve a delicious sweet treat when guests arrive.
Conclusion
I hope you’ve enjoyed learning about my favorite Easy Butterbeer Fudge Recipe as much as I love making and sharing it. It’s a wonderfully indulgent treat that feels both special and simple to whip up. Whether for cozy nights, festive celebrations, or just because, this fudge brings a little magic and a lot of buttery goodness to any occasion. Give it a try—I promise it will become one of your go-to sweet delights!
PrintEasy Butterbeer Fudge Recipe
This Easy Butterbeer Fudge recipe combines rich butterscotch and creamy white chocolate to create a decadent treat inspired by the beloved Butterbeer flavor. With a simple two-layer method, this fudge is perfect for Harry Potter fans or anyone craving a sweet, buttery dessert with a delightful swirl and optional marshmallow topping.
- Prep Time: 15 minutes
- Cook Time: 10 minutes
- Total Time: 4 hours 25 minutes
- Yield: 12 servings
- Category: Dessert
- Method: Stovetop
- Cuisine: American
Ingredients
Butterscotch Layer
- 2 tbsp butter
- 1 (14 oz) can sweetened condensed milk
- 3 cups butterscotch chips
White Chocolate Swirl
- 1/3 cup sweetened condensed milk
- 1/2 tsp pure vanilla extract
- 1 cup white chocolate chips
Topping (Optional)
- 1 cup marshmallow bits
Instructions
- Prepare the pan: Line an 8″-by-8″ baking pan with aluminum foil, then spray the foil lightly with cooking spray to prevent sticking. Set aside.
- Make the butterscotch layer: In a medium saucepan over medium-low heat, melt the butter. Add the 14 oz can of sweetened condensed milk along with the butterscotch chips. Stir continuously until the chips have fully melted and the mixture is smooth and fully combined. Pour this butterscotch mixture into the prepared pan, spreading evenly.
- Create the white chocolate swirl: In a separate small saucepan over medium-low heat, combine 1/3 cup sweetened condensed milk, vanilla extract, and white chocolate chips. Stir constantly until the white chocolate chips have melted and the mixture is smooth. Remove from heat. Drizzle this white chocolate mixture evenly over the butterscotch layer in the pan.
- Swirl the layers: Using a butter knife, gently swirl the white chocolate layer into the butterscotch fudge to create a marbled effect while maintaining distinct flavors.
- Add marshmallow topping (optional): Sprinkle marshmallow bits evenly on top of the fudge, then press them lightly by hand into the surface to help them stick.
- Chill to set: Refrigerate the fudge for at least 4 hours, or until fully set and firm enough to slice.
- Serve: Once set, lift the fudge out of the pan using the foil edges, cut into 12 equal pieces, and serve.
Notes
- The marshmallow bits are optional but add a nice texture and sweetness contrast.
- Use a gentle swirling motion with the knife to avoid mixing the layers completely; you want a marbled look.
- Be sure to keep the heat low enough while melting to prevent burning the chocolate.
- Store fudge wrapped tightly in the refrigerator for up to 1 week.
- For easier cutting, dip your knife in hot water and wipe dry before slicing each time.


