
I absolutely love making these Chocolate Peanut Butter Protein Bars Recipe whenever I need a quick, nutritious snack that feels indulgent but fuels my body right. The perfect blend of creamy peanut butter, rich vanilla protein powder, and just the right touch of honey makes these bars taste like dessert, yet they keep me energized throughout the day. Plus, they’re no-bake and come together so fast that I’m always amazed at how delicious something so simple can be!
Why You’ll Love This Chocolate Peanut Butter Protein Bars Recipe
What really gets me excited about this recipe is the fantastic balance of flavors and textures. The smooth, nutty peanut butter coupled with the subtle sweetness of honey and the warm vanilla notes from the protein powder create a bar that tastes like a peanut butter cup but with none of the guilt. The little crunch from chia seeds adds an unexpected bit of texture that makes each bite totally satisfying.
Another reason I keep coming back to these bars is how easy they are to prepare. Honestly, if I have 15 minutes, I can whip up a batch that lasts me the whole week. No baking required means less clean-up, and the chilling time means I can multitask while they set. I find these bars perfect for anything from a quick post-workout snack to a sweet but healthy treat at a picnic or even a lunchbox surprise for friends or family.
Ingredients You’ll Need
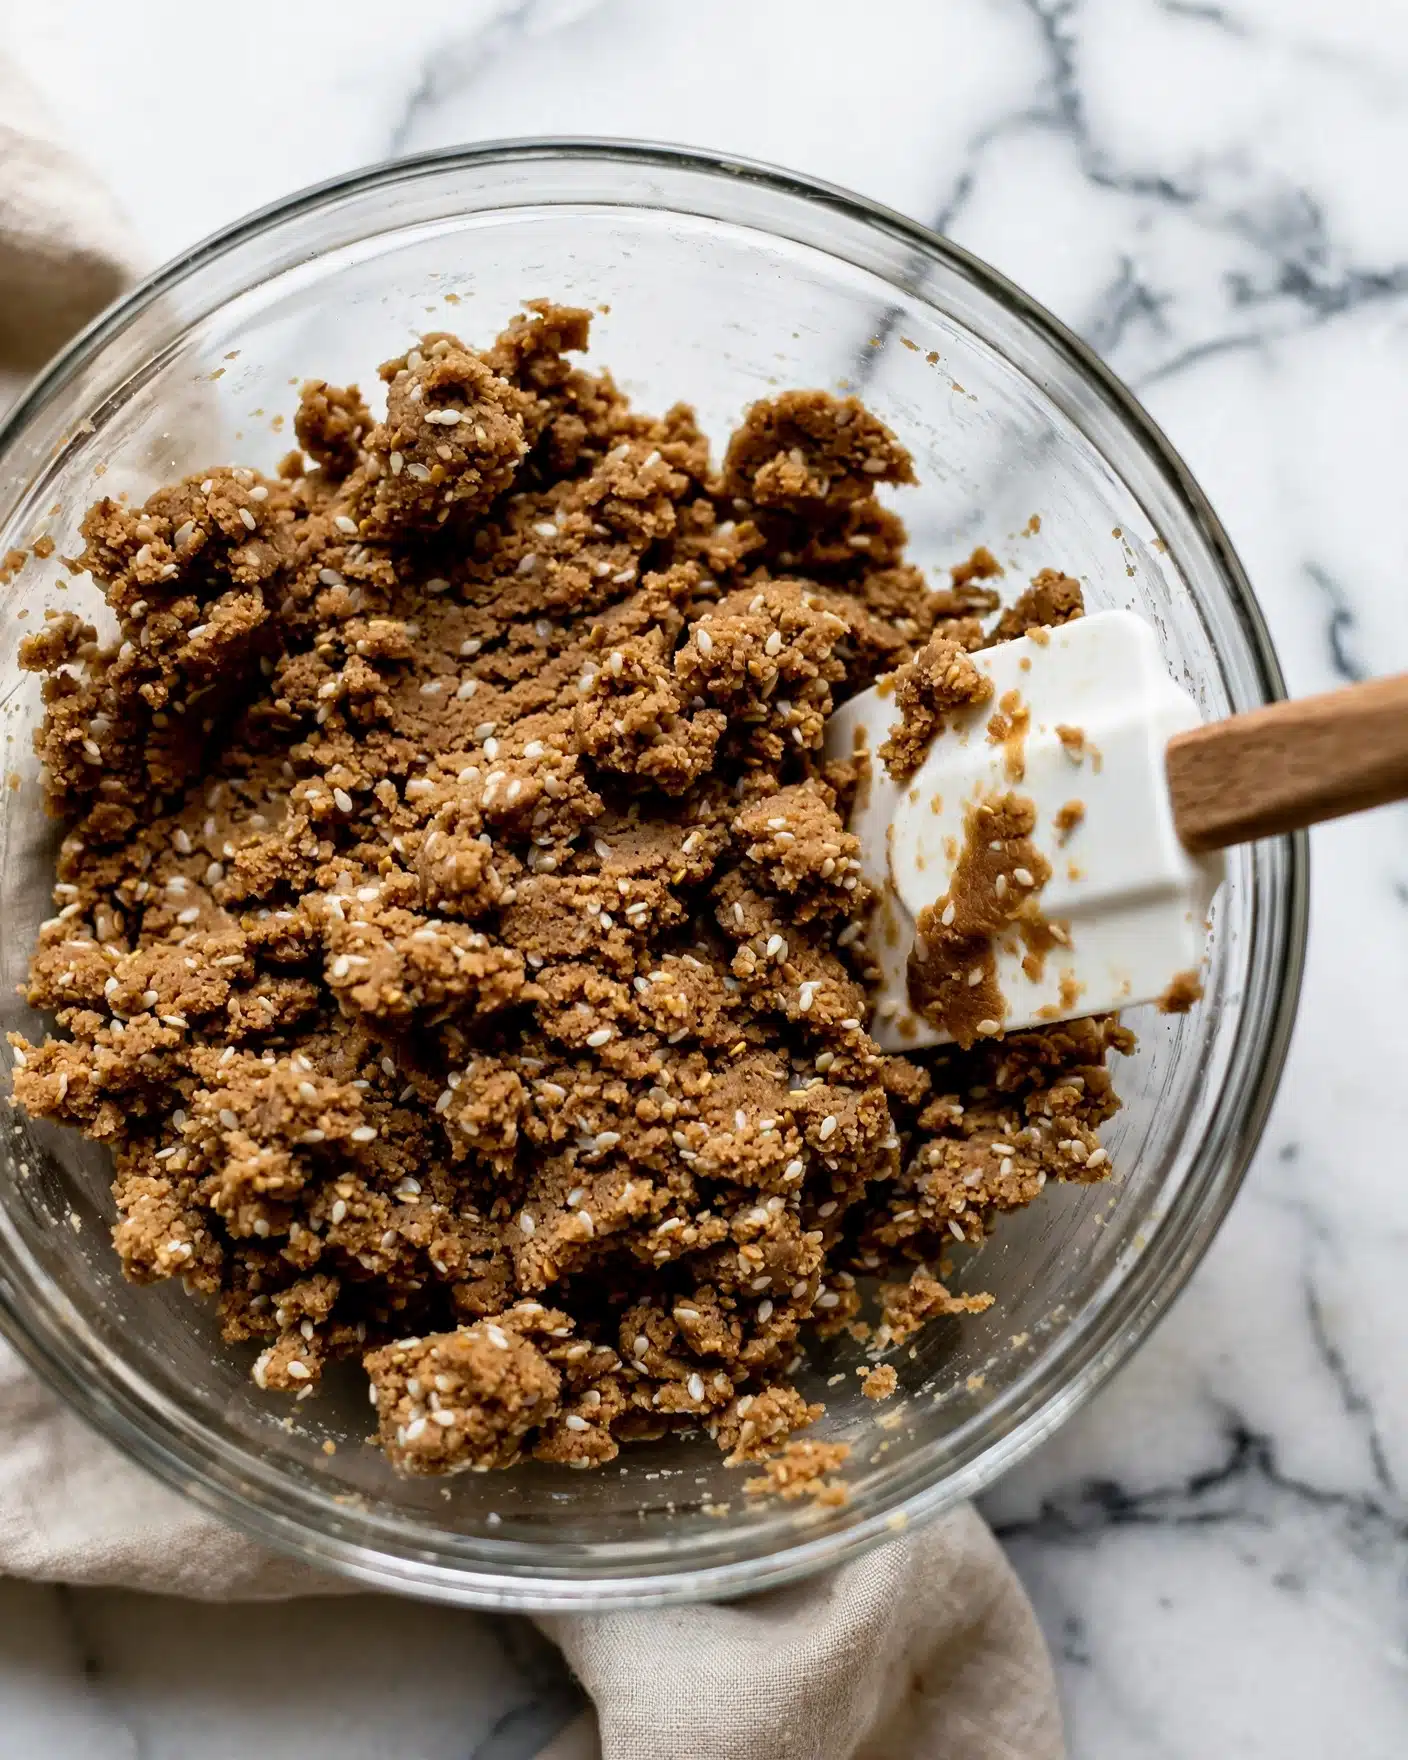
The ingredients here are straightforward but essential, each bringing something special to the table: flavor, texture, or just that perfect nutritional boost. Together, they create bars that are not only tasty but also packed with protein and good-for-you elements.
- Peanut butter: I use creamy peanut butter for the rich, nutty base that binds everything deliciously.
- Vanilla protein powder: It adds that lovely vanilla flavor and packs in protein, making these bars great for muscle recovery.
- Coconut flour: This helps give the bars structure while keeping them gluten-free and low-carb.
- Chia seeds: They contribute a pleasant crunch and are loaded with fiber and omega-3s.
- Honey or maple syrup: Just enough natural sweetness to balance the flavors without overpowering.
- Vanilla extract: It enhances the overall flavor, giving a warm and comforting aroma.
- Sea salt: A pinch to deepen and round out the flavors perfectly.
- Chocolate chips: Melting these on top creates the perfect chocolate finish that I always look forward to.
- Coconut oil: This helps smooth out the melted chocolate for a luscious drizzle.
Directions
Step 1: In a medium bowl, mix the peanut butter, vanilla protein powder, chia seeds, honey, and vanilla extract together until it’s well combined and creamy.
Step 2: Add 4 tablespoons of coconut flour to the mixture and stir well. The dough should feel thick and pliable, about the consistency of play-dough. If it still feels sticky, add more coconut flour one teaspoon at a time until it’s firm but still easy to press.
Step 3: Line a loaf pan with parchment paper to make sure the bars don’t stick, then transfer the dough into the pan. Use your hands or a spatula to flatten it evenly to about half an inch thick.
Step 4: For a perfectly flat surface, place another loaf pan on top and press down gently, or use the bottom of a measuring cup to press the dough evenly. This step really helps the bars hold their shape.
Step 5: Pop the pan into the fridge or freezer for at least 10 minutes to let the bars firm up before adding the chocolate topping.
Step 6: While the bars chill, melt the chocolate chips and coconut oil in short bursts in the microwave, stirring frequently until smooth and glossy.
Step 7: Drizzle the melted chocolate evenly over the firmed-up bars, then return the pan to the fridge or freezer for an additional 15 to 20 minutes, allowing the chocolate to set fully.
Step 8: Once the bars are completely chilled and the chocolate has hardened, remove from the pan using the parchment paper and slice them into your favorite-sized bars.
Servings and Timing
This recipe makes between 6 to 12 bars depending on the size you prefer – I usually go for about 8 generous bars to balance portion size and indulgence. Prep time is a quick 15 minutes, while chilling takes about 15 to 20 minutes, bringing the total time to roughly 30 to 35 minutes. No bake time needed, which is why this recipe is such a lifesaver when I’m short on time but still want a wholesome treat!
How to Serve This Chocolate Peanut Butter Protein Bars Recipe
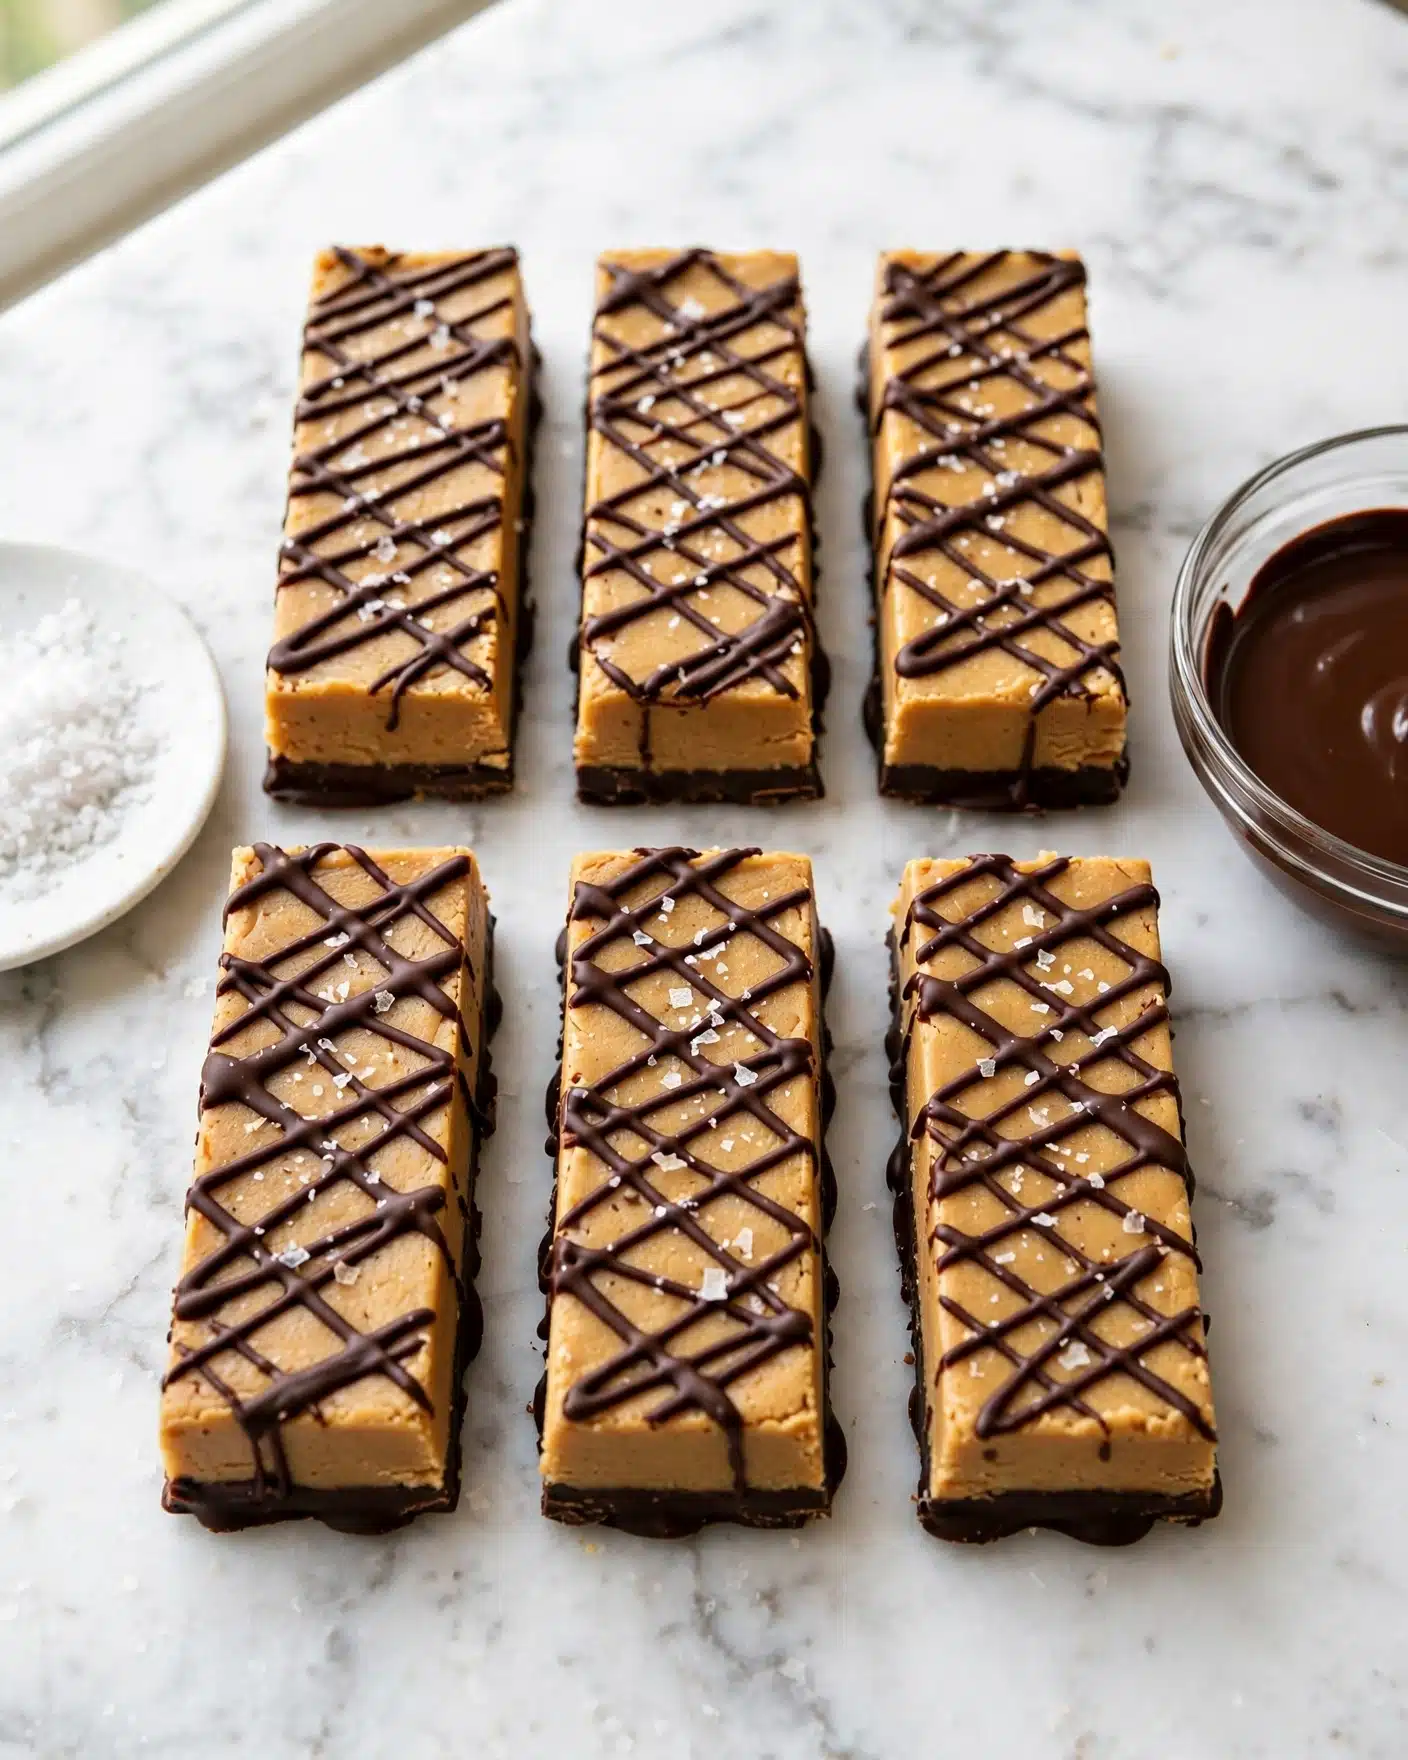
When it comes to serving, I love enjoying these bars chilled straight from the fridge for that nice firm texture and cool burst against the rich chocolate and peanut butter. They’re perfect as a grab-and-go breakfast or an afternoon pick-me-up with a cup of coffee or tea. For a little extra flair, I sometimes sprinkle a few sea salt flakes or chopped peanuts on top before serving to add texture and elevate the presentation.
These bars also pair wonderfully with fresh fruit like sliced bananas or berries which helps balance the richness and provides a refreshing touch. If I’m serving them at a party, I cut them into bite-sized squares and arrange them beautifully on a platter with a drizzle of extra melted chocolate for guests to enjoy easily.
For drinks, I find a cold glass of almond milk or a vanilla-flavored iced latte perfectly complements the peanut butter and chocolate flavors without overpowering them. In colder months, a warm chai latte or even a cocoa pairs beautifully and turns snack time into a cozy little celebration. No matter the occasion, these bars always feel like a treat that’s worth savoring!
Variations
One of the things I love about this Chocolate Peanut Butter Protein Bars Recipe is how easy it is to personalize. If you’re not a fan of peanut butter, almond or cashew butter work just as well and give the bars a slightly different but equally delicious profile. For diet preferences, switching to a vegan protein powder and using maple syrup instead of honey keeps the bars both vegan-friendly and sweet.
If you want to change things up flavor-wise, I sometimes add a pinch of cinnamon or a teaspoon of espresso powder to the mix for a subtle twist. Swapping chocolate chips for cacao nibs adds a lovely crunch and a less sweet chocolate flavor, which I find really sophisticated. For those who prefer baking, you can bake the mixture at 350°F (175°C) for about 10-12 minutes to create a chewier, cakier bar experience, though I personally adore them no-bake!
Finally, feel free to experiment with add-ins like shredded coconut, chopped nuts, or even dried fruit to suit your taste. Just keep an eye on the texture so the bars stay pliable and easy to slice.
Storage and Reheating
Storing Leftovers
I always store these bars in an airtight container in the fridge to keep them fresh and firm. They’ll stay great for up to 2 weeks, making them the perfect meal prep snack that lasts. Using a glass container with a tight seal helps prevent any fridge odors from affecting the bars, and lining the layers with parchment paper keeps them from sticking together.
Freezing
This recipe freezes beautifully! I wrap individual bars in parchment paper and place them in a freezer-safe container or zip-top bag, where they’ll keep well for up to 3 months or longer. When I want one, I just take it out and let it thaw in the fridge or on the counter for about 10-15 minutes for a soft but still cool texture that feels freshly made.
Reheating
Because these bars are best enjoyed chilled, I usually don’t heat them up. If you want to soften them quickly, a few seconds in the microwave can do the trick, but be careful not to overheat or they can get oily or lose their firmness. Instead, letting them sit at room temperature for 10 minutes is my preferred way to enjoy a slightly softer, more melt-in-your-mouth texture without compromising flavor.
FAQs
Can I use a different type of nut butter?
Absolutely! This recipe is very forgiving and works well with almond butter, cashew butter, or even sunflower seed butter if you want to avoid nuts. Just use the same quantity and adjust the mix with coconut flour if needed to get the right consistency.
Is this recipe gluten-free?
Yes, these bars are naturally gluten-free thanks to the use of coconut flour instead of traditional wheat flour. Just be sure your protein powder is certified gluten-free if that’s a concern.
Can I make these bars vegan?
Yes, to make this recipe vegan, swap the honey for maple syrup or agave nectar and use a plant-based vanilla protein powder. The rest of the ingredients are already plant-based, so it’s an easy adjustment.
How long do these bars last without refrigeration?
Because these bars contain coconut flour and peanut butter, they firm up best in the fridge or freezer. At room temperature, they may become too soft and sticky within a day, so I recommend storing them chilled for the best texture and longevity.
Can I make these bars ahead of time for meal prep?
Definitely! These bars are perfect for meal prep since they keep well in the fridge and freezer. You can make them in advance and portion them out for the week to grab-and-go whenever hunger strikes.
Conclusion
I can’t wait for you to try this Chocolate Peanut Butter Protein Bars Recipe because it’s truly become one of my favorite snacks to make and share. It’s easy, nutritious, and tastes like a treat every single time. Whether you’re fueling up post-workout, packing snacks for the week, or just craving something sweet but healthy, these bars never disappoint. Give it a go—you’ll probably find yourself making them again and again like I do!
PrintChocolate Peanut Butter Protein Bars Recipe

Delicious no-bake chocolate peanut butter protein bars made with vanilla protein powder, coconut flour, chia seeds, and honey. These low-sugar bars have the perfect balance of creamy peanut butter and rich chocolate, making them taste like a peanut butter cup. Ideal for a healthy snack, these bars are easy to prepare and can be stored in the fridge or freezer for convenient enjoyment throughout the week.
- Prep Time: 15 minutes
- Cook Time: 0 minutes
- Total Time: 30 minutes
- Yield: 6-12 bars
- Category: Appetizers & Snacks
- Method: No-Cook
- Cuisine: American
- Diet: Low Sugar
Ingredients
Base Ingredients
- 1 cup (256 grams) peanut butter
- ½ cup (45 grams) HUM Nutrition Core Strength vanilla protein powder
- 5–6 tablespoons coconut flour
- 3 tablespoons chia seeds
- 2 tablespoons honey or maple syrup
- ½ teaspoon vanilla extract
- Pinch of sea salt
Topping
- 2–3 tablespoons chocolate chips
- ¼ teaspoon coconut oil
Instructions
- Mix the base ingredients: In a medium bowl, combine the peanut butter, vanilla protein powder, chia seeds, honey, and vanilla extract. Stir until smooth and well incorporated.
- Add coconut flour: Add 4 tablespoons of coconut flour to the mixture and mix well. The dough should become thick and pliable, similar to play-dough. If the mixture is still sticky, add additional coconut flour 1 teaspoon at a time until the desired thick consistency is achieved.
- Prepare the pan and shape the bars: Line a loaf pan with parchment paper. Transfer the dough into the pan and flatten it evenly to about ½ inch thickness. To flatten the top firmly, place a second loaf pan or the bottom of a measuring cup on the dough and press down.
- Chill the dough: Refrigerate or freeze the dough for 10 minutes to firm up.
- Melt chocolate topping: While the bars chill, melt the chocolate chips together with the coconut oil in the microwave using short intervals and stirring until smooth.
- Apply chocolate coating: Drizzle the melted chocolate evenly over the chilled bars.
- Final chilling: Place the bars back in the fridge or freezer for 15-20 minutes to fully set the chocolate coating.
- Slice and store: Once set, slice the bars into 6 to 12 pieces as preferred. Store in an airtight container in the fridge for up to 2 weeks or freeze for up to 3 months. Enjoy chilled for the best texture.
Notes
- The dough consistency is key: adding more coconut flour makes firmer bars suitable for room temperature, while less results in softer bars best kept chilled.
- You can substitute honey with maple syrup for a vegan-friendly option.
- To melt chocolate without burning, microwave in 20-second increments, stirring after each.
- Bars taste freshest when eaten straight from the fridge or freezer as they soften at room temperature.
- Store leftover bars in airtight containers to preserve freshness and texture.


