
I absolutely love sharing this Spooky Cheesecake Bars Recipe because it perfectly combines festive fun with rich, creamy indulgence. These bars have become a personal favorite in my household, especially when Halloween rolls around. The vibrant orange and black swirls not only look stunning but also hint at the luscious cheesecake flavor beneath. Every bite melts in your mouth, delivering a smooth texture and a hint of sweetness that feels just right. I find this recipe to be a delightful treat that friends and family always ask me to bring back each year.
Why You’ll Love This Spooky Cheesecake Bars Recipe
What makes this Spooky Cheesecake Bars Recipe so special to me is how the flavors come together in perfect harmony. The chocolate cookie crust adds a deep, slightly crunchy contrast to the creamy, tangy cheesecake filling. I adore how the orange and black colors swirl through the cheesecake, giving a playful yet elegant touch that’s perfect for a spooky occasion without compromising taste. The balance of sweet and slightly tart notes keeps everyone coming back for more, and the visual wow-factor makes it such a memorable dessert.
Beyond flavor, I love how straightforward this recipe is to prepare. It doesn’t require any complicated steps or fancy equipment, which is great because I want to focus on enjoying the process without stress. The steps feel simple enough for a novice baker but still satisfying for someone who loves a good baking project. Plus, it’s ideal for Halloween parties, potlucks, or even an indulgent family dessert after a cozy autumn dinner. This recipe stands out because it combines festive presentation with homely flavors that everyone appreciates.
Ingredients You’ll Need
All the ingredients in this Spooky Cheesecake Bars Recipe are easy to find and simple pantry staples. Each one plays a key role: the cookies create a sturdy base, the cream cheese adds that classic cheesecake richness, and the food coloring brings the bars to life with Halloween vibes.
- Chocolate sandwich cookies: These form the crumbly, chocolatey crust that holds everything together and adds a delightful crunch.
- Sugar: Used in both the crust and filling to provide balanced sweetness without overpowering the cream cheese.
- Butter (melted): Combines with cookie crumbs to create a firm yet tender base for the cheesecake.
- Cream cheese (softened): The star of the show, delivering the luscious and creamy texture that cheesecake lovers crave.
- Sour cream: Adds tanginess and smoothness to the filling, enhancing its richness and helping with the perfect set.
- Eggs: Bind the cheesecake filling and contribute to the smoothness while providing structure when baked.
- Vanilla extract: Infuses the filling with a warm, fragrant depth of flavor that complements the cream cheese beautifully.
- Salt: A pinch to balance the sweetness and enhance all other flavors perfectly.
- Orange and black food coloring: Essential for creating the fun, festive swirls that make these cheesecake bars so eye-catching.
Directions
Step 1: Preheat your oven to 325 degrees Fahrenheit and place a large pan of water on the bottom rack to create a moist baking environment. This helps prevent cracks and keeps the cheesecake extra creamy.
Step 2: Next, pulse the chocolate sandwich cookies in a food processor until they become fine crumbs. If you don’t have one, no worries at all! Place cookies in a sealed zip-top bag and gently crush them with a rolling pin or heavy pan until finely ground.
Step 3: Combine the cookie crumbs, melted butter, and 1/3 cup sugar in a bowl. Mix well until the crumbs are evenly coated. Press this mixture firmly into the bottom and up the sides of a 9 x 13-inch baking pan lined with parchment paper. Set aside while preparing the filling.
Step 4: In a large mixing bowl, beat the softened cream cheese until completely smooth and fluffy. Add 3/4 cup sugar and salt, mixing well between additions. Incorporate eggs one at a time, beating just until each is fully mixed in before adding the next. Then stir in sour cream and vanilla extract until the filling is silky and uniform.
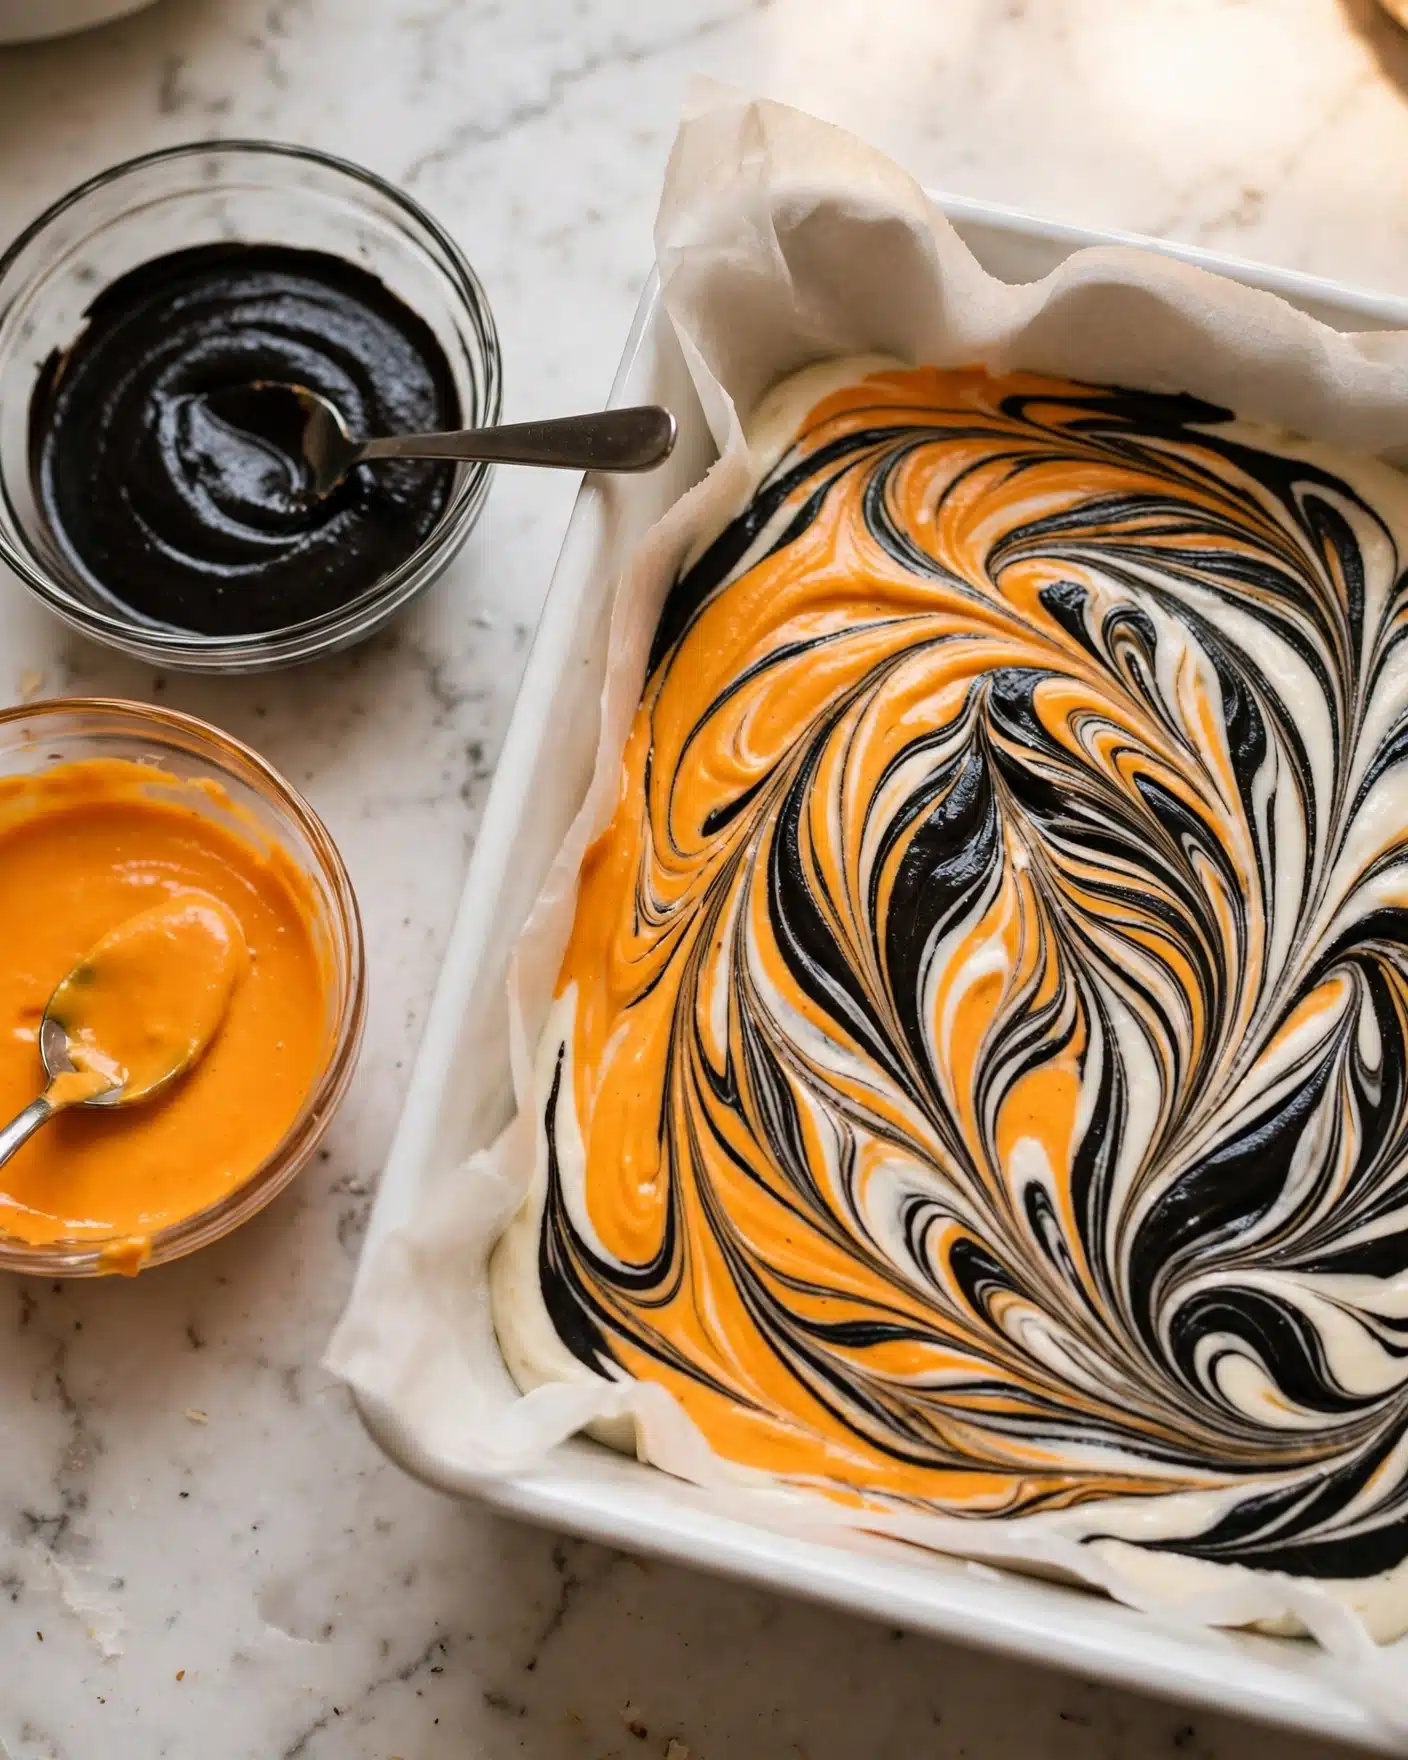
Step 5: Divide about 1 1/3 cups of the cheesecake filling evenly into two separate small bowls. Add orange food coloring to one and black to the other, stirring each until the color is fully blended. Leave the remaining filling plain (white) for the base.
Step 6: Pour the white cheesecake filling evenly onto the prepared cookie crust, smoothing it out with a spatula. Then, alternate spoonfuls of the black and orange cheesecake fillings in thin stripes down the length of the pan. Gently swirl the colors into the white base using the back of a knife or a chopstick to create a mesmerizing marbled effect. The more swirls, the more dramatic the design!
Step 7: Bake the cheesecake bars for 50 to 55 minutes, until the center looks set but still slightly jiggles when you gently shake the pan. After baking, turn off the oven and crack the door open, letting the cheesecake rest inside the warm oven for one hour to cool gradually and prevent cracking.
Step 8: Remove from the oven and refrigerate overnight to allow the bars to fully set. The next day, lift the cheesecake out using the parchment paper and cut into 16 squares. Serve chilled and enjoy!
Servings and Timing
This Spooky Cheesecake Bars Recipe yields approximately 16 servings, making it perfect for sharing at any gathering. Prep time is about 20 minutes, while baking takes roughly 50 to 55 minutes. Don’t forget to factor in the one-hour resting time in the oven plus the overnight refrigeration to achieve the best results. So, the total time from start to ready-to-serve is around 12 hours, mostly hands-off, giving you plenty of time to prepare for your party or event.
How to Serve This Spooky Cheesecake Bars Recipe
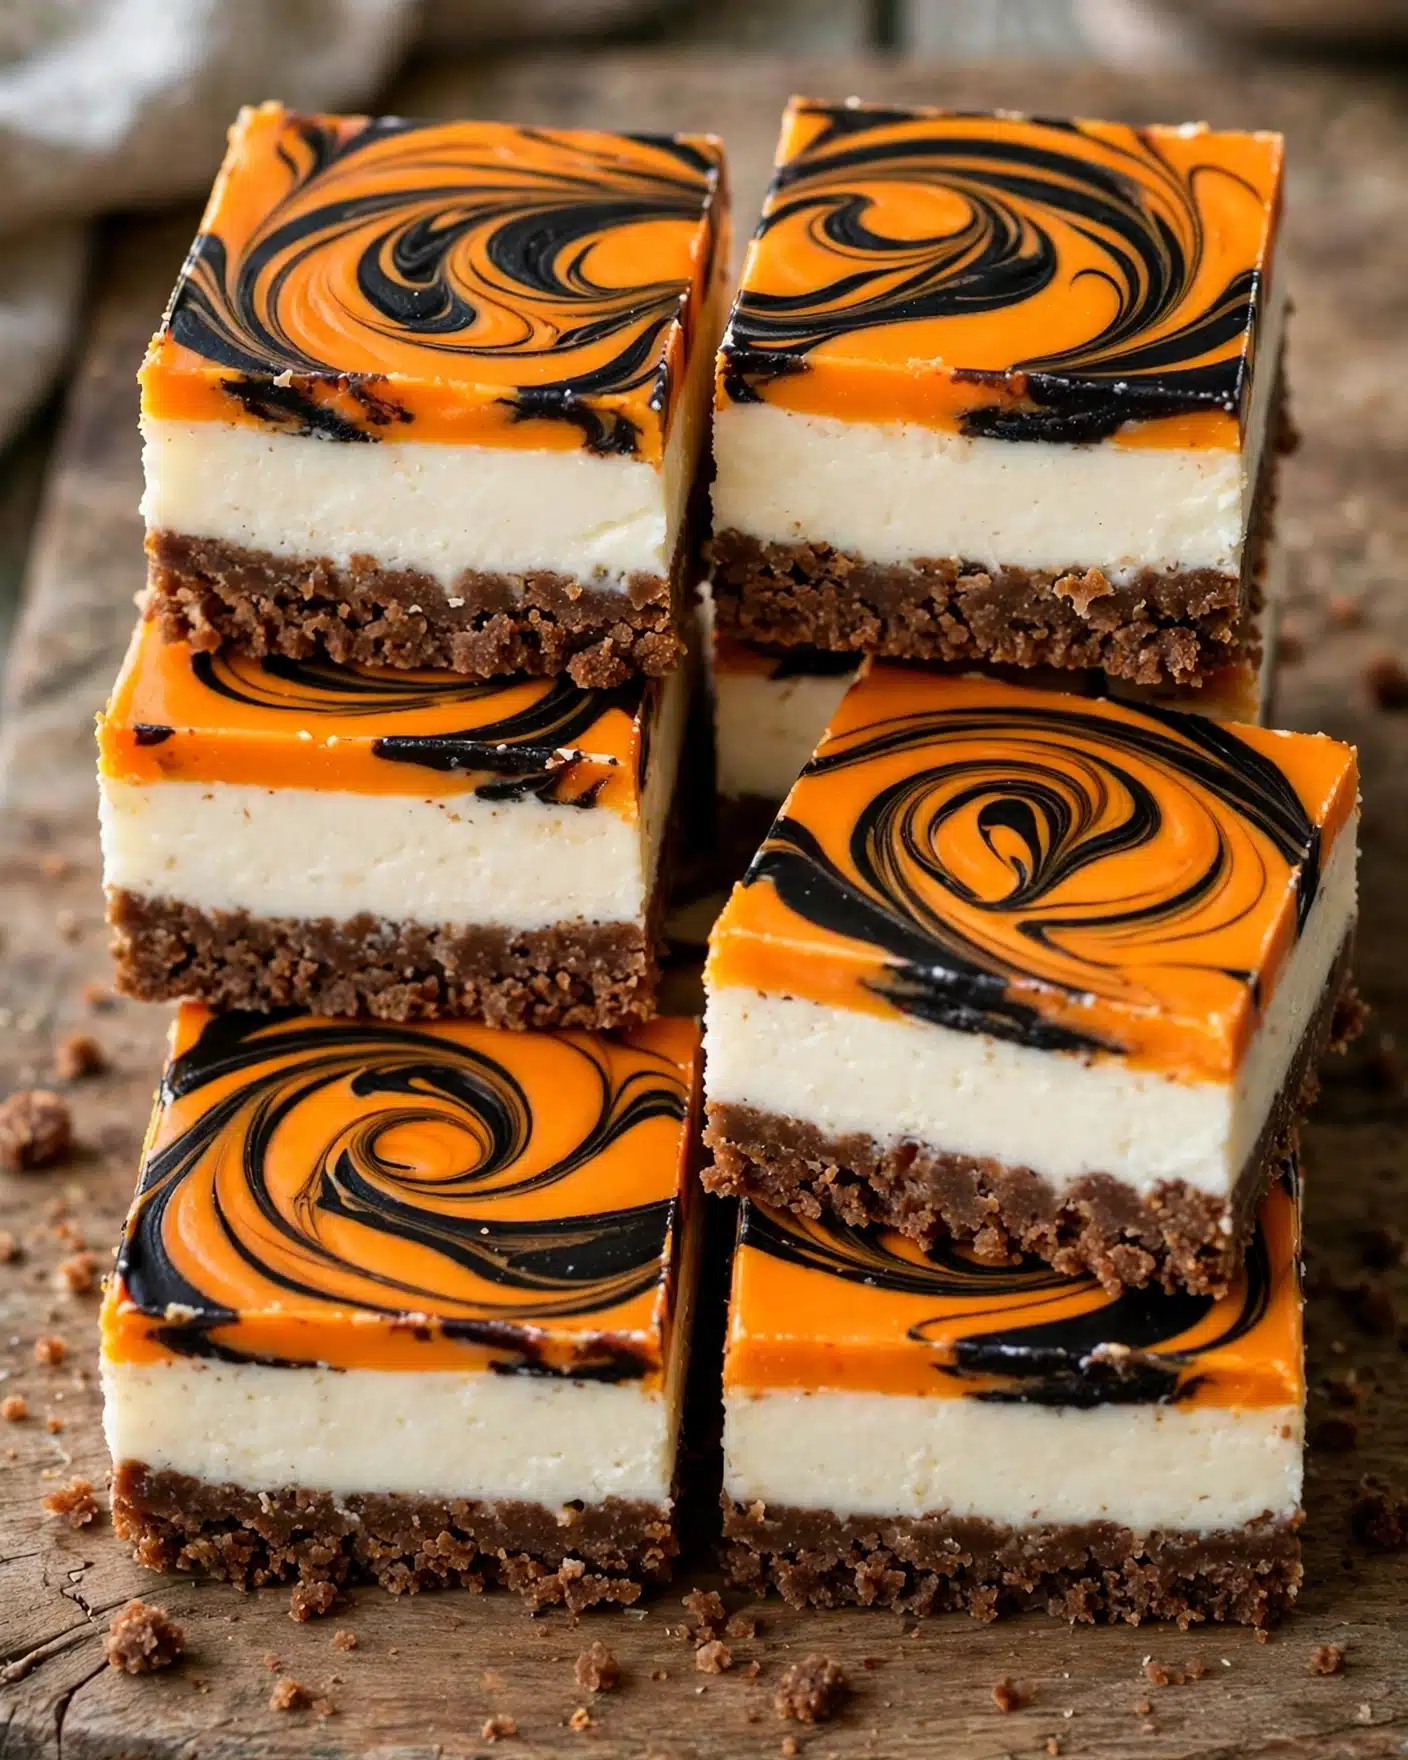
When it comes to serving, I love offering these cheesecake bars chilled straight from the fridge. Their creamy texture and beautiful swirls shine best when they’re cool and firm. You can plate them simply on a decorative Halloween platter, or elevate presentation by adding festive garnishes like edible glitter, mini candy pumpkins, or a drizzle of chocolate or caramel sauce.
For a perfect accompaniment, I like pairing these bars with a cup of rich coffee or a hot spiced apple cider, which complements the cheesecake’s sweetness and adds cozy autumn vibes. If you want an adult twist, a glass of sweet red wine or an orange-flavored cocktail truly brings the whole experience together. These bars are ideal for Halloween parties, family dinners, or any fall celebration — really, any time you want to add a bit of fun and flavor to your dessert table.
When cutting and plating, I suggest modest squares so guests can savor the richness without feeling overwhelmed. Adding a small dollop of whipped cream with a sprinkle of cinnamon or nutmeg can also level up the presentation and taste delightfully. Don’t hesitate to get creative with themed plates or props to make your spooky dessert display even more festive!
Variations
I’ve played around with this recipe quite a bit and found some fun ways to switch it up depending on your tastes or dietary preferences. For example, if you want to lighten things up, swapping standard cream cheese for a blend of cream cheese and ricotta adds a lighter, fluffier texture. You could also experiment with different cookie crusts like ginger snaps or graham crackers to bring new flavor dimensions to the base.
If you or your guests have dietary restrictions, this recipe is adaptable. Using a gluten-free cookie brand makes it suitable for gluten-sensitive friends. For a vegan version, try vegan cream cheese alternatives and an egg substitute like flax eggs; just keep in mind this might slightly change the texture and baking time. To keep things festive but low effort, you could also skip the colored swirls and simply top with themed sprinkles or edible decorations.
For a unique twist, consider adding pumpkin puree and cinnamon to the cream cheese filling for a seasonal pumpkin cheesecake bar variation. Or try baking individual mini cheesecake bars in a muffin tin for portion control and cute presentation. No matter how you adjust it, this Spooky Cheesecake Bars Recipe is a crowd-pleaser that encourages creativity.
Storage and Reheating
Storing Leftovers
I recommend storing any leftover cheesecake bars in an airtight container in the refrigerator. I usually keep mine in a glass container with a secure lid or wrapped tightly with plastic wrap to avoid drying out. Stored this way, they stay fresh and creamy for up to 4 to 5 days, which is perfect if you want to enjoy them across a few days without losing quality.
Freezing
You absolutely can freeze these bars if you want to prep in advance or save extras for later. I suggest cutting the cheesecake into individual squares, then placing them on a parchment-lined baking sheet to freeze for a few hours until firm. After that, transfer bars into a freezer-safe container or zip-top bag with parchment layers between each piece to prevent sticking. They keep well frozen for up to 2 months. When you’re ready to eat, thaw them overnight in the fridge.
Reheating
Since these are best served chilled, I don’t usually recommend reheating Spooky Cheesecake Bars. If you prefer a slightly softer texture, letting them sit at room temperature for 15–20 minutes before serving works wonders. Avoid microwaving because that can cause the texture to become grainy or overly soft, ruining the creamy cheesecake consistency that makes these bars so delicious.
FAQs
Can I make these cheesecake bars ahead of time?
Yes! In fact, I recommend making them a day ahead. The overnight chill helps the cheesecake set perfectly, making slicing and serving much easier. Plus, the flavors have time to meld wonderfully, making them taste even better.
What if I don’t have black food coloring? Can I substitute it?
If you don’t have black food coloring, you can use a very dark purple or a dark chocolate mixture to achieve a similar spooky effect. Just mix cocoa powder into a small portion of the filling for natural color and flavor.
How do I prevent cracks in my cheesecake bars?
Adding the pan of water to your oven during baking creates steam, which helps prevent cracking. Also, letting the bars cool slowly in the oven after baking prevents sudden temperature changes that cause cracks, giving you smooth, picture-perfect bars.
Can I use regular vanilla extract or does it have to be pure vanilla?
Regular vanilla extract works fine if that’s what you have on hand. Pure vanilla extract just has a bit more depth of flavor, but either will contribute lovely flavor to your cheesecake filling.
Is it necessary to use sour cream?
The sour cream adds that subtle tang and creaminess that balances the richness of the cream cheese. If you don’t have it, you could substitute an equal amount of Greek yogurt, but it may change the texture slightly.
Conclusion
I can’t wait for you to try this Spooky Cheesecake Bars Recipe and make it your own for the next Halloween celebration or fall gathering. It’s such a joy to create something that tastes amazing and looks like a festive masterpiece simultaneously. Whether you’re serving it at a party or enjoying a slice quietly at home, these cheesecake bars are sure to delight your taste buds and bring smiles all around. Trust me, once you make them, you’ll be hooked just like I am!
PrintSpooky Cheesecake Bars Recipe
These Spooky Cheesecake Bars are a festive and delicious Halloween treat featuring a chocolate cookie crust and swirled orange and black cheesecake filling. Perfect for parties, these creamy bars combine classic cheesecake flavors with a fun, seasonal twist that’s visually striking and delightfully rich.
- Prep Time: 20 minutes
- Cook Time: 55 minutes
- Total Time: 1 hour 15 minutes active + overnight chilling
- Yield: 16 servings
- Category: Dessert
- Method: Baking
- Cuisine: American
Ingredients
Crust
- 20 – 25 chocolate sandwich cookies
- 1/3 cup sugar
- 2 tablespoons butter (melted)
Filling
- 3 (8 ounce) packages cream cheese (softened)
- 3/4 cup sour cream
- 3/4 cup sugar
- 3 large eggs
- 2 teaspoons vanilla extract
- 1/2 teaspoon salt
- Orange food coloring
- Black food coloring
Instructions
- Preheat Oven and Prepare Water Bath: Start by preheating your oven to 325 degrees Fahrenheit. Place a large pan of water on the bottom oven rack to create a water bath, which helps bake the cheesecake evenly and prevents cracking.
- Make the Cookie Crust: Pulse chocolate sandwich cookies in a food processor until finely crushed. If you don’t have a food processor, put the cookies in a zip-top bag, remove excess air, seal, and crush with a heavy object until crumbs form. Combine cookie crumbs, melted butter, and sugar in a mixing bowl until well mixed. Press this mixture firmly and evenly onto the bottom and sides of a 9 x 13 inch baking pan lined with parchment paper to form the crust.
- Prepare Cheesecake Filling: In a large bowl, beat softened cream cheese until creamy. Add sugar and salt, mixing well. Add eggs one at a time, beating after each addition to fully incorporate. Mix in sour cream and vanilla extract until smooth and creamy.
- Divide and Color Filling: Remove 1 1/3 cups of the cheesecake filling into two separate small bowls. Add orange food coloring to one bowl and black food coloring to the other, mixing each thoroughly to tint the batter.
- Assemble the Bars: Pour the remaining white cheesecake filling evenly over the prepared cookie crust, smoothing the surface. Using a spoon, drizzle alternating lines of the black and orange colored fillings down the length of the white filling. Swirl the colors gently with a knife or chopstick to create a beautiful marbled effect.
- Bake and Cool: Bake the cheesecake bars in the oven for 50-55 minutes until the center is set but not jiggly. After baking, turn off the oven, open the oven door slightly, and let the bars cool inside the oven for one hour to prevent cracking. Then remove from the oven.
- Chill and Serve: Refrigerate the cheesecake bars overnight to fully set. When ready to serve, lift the bars out of the pan using the parchment paper, cut into squares, and enjoy your spooky Halloween dessert!
Notes
- Using a water bath is essential for preventing cheesecake cracks and ensuring a smooth texture.
- If you don’t have food coloring, you can use natural coloring alternatives like pumpkin puree for orange or activated charcoal for black.
- Make sure the cream cheese is softened to room temperature for a smooth filling.
- Press the crust firmly to avoid crumbling when slicing the bars.
- Overbaking can lead to dry cheesecake; check for slight firmness and a non-wobbly center.
- Overnight refrigeration helps the cheesecake bars to set perfectly and enhances flavor.


