
I absolutely adore sharing this Monster Peanut Butter Cookie Bars Recipe with you because it’s one of those desserts that captures the ultimate cookie bar experience in every bite. These bars are packed with rich peanut butter flavor, melty chocolate chips, and playful gooey peanut butter cups, all coming together in a soft, perfectly chewy base that feels like a giant, fun cookie hug. I always get excited baking these—they’re surprisingly easy to make, but the look on everyone’s face when they see those googly eyes staring back at them? Priceless. It’s a treat that’s as delightful to eat as it is to share, perfect for parties, after-school snacks, or just a cozy night in.
Why You’ll Love This Monster Peanut Butter Cookie Bars Recipe
From the moment I dug into this Monster Peanut Butter Cookie Bars Recipe, I knew I was onto something special. The balance of flavors fascinates me—the buttery richness mixed with brown and granulated sugars gives the bars a deep, caramelized sweetness, while the peanut butter cups add that slightly salty, creamy hit that keeps you reaching for more. The semi-sweet chocolate chips melt ever so slightly inside the chewy cookie dough, giving that perfect chocolate swirl that complements peanut butter so well. Every bite feels super satisfying, but not overwhelming in sweetness, which I really appreciate.
What I love most is how easy this recipe comes together without sacrificing any of the fun or flavor. You don’t need fancy gadgets or ingredients, just good staples and a bit of patience to let everything cool properly. I find they’re perfect for nearly any occasion—whether it’s a birthday bash, Halloween treat, or a casual weekend get-together. The whimsical googly eyes pressed on top? They bring a playful twist that always gets smiles and conversations started. Honestly, these bars stand out because they’re both comforting and uniquely festive, which makes me want to keep them in my baking rotation year-round.
Ingredients You’ll Need
All the ingredients in this recipe are simple pantry staples, but each one plays a crucial role in making these bars irresistibly soft, flavorful, and fun. The balance of leavening agents ensures the right texture, and the candy embellishments add both style and whimsy.
- Butter (3/4 Cup, Softened): This gives the bars rich flavor and a tender crumb, so make sure it’s softened for easy mixing.
- Granulated Sugar (3/4 Cup): Adds sweetness and helps the cookie bars brown beautifully during baking.
- Brown Sugar (3/4 Cup): Adds moisture and a lovely depth of caramel flavor, perfect for chewy texture.
- Egg (1 Whole) and Egg Yolk (1): These bind everything together and create a luscious, soft consistency.
- Pure Vanilla Extract (1 tsp): A tiny amount packs a huge flavor punch, enhancing all the other ingredients.
- All Purpose Flour (1 1/2 Cups): The base of the dough, providing structure without heaviness.
- Baking Powder (1/2 tsp) and Baking Soda (1/4 tsp): These leavening agents work together to give a slight rise and a perfect texture.
- Kosher Salt (1/4 tsp): Balances sweetness and heightens flavor complexity.
- Semi-Sweet Chocolate Chips (1 Cup): Adds melty chocolate pockets for that perfect sweet-savory contrast.
- Reese’s Peanut Butter Frankincups (8 cups): These are pressed on top after baking for peanut buttery surprise and character.
- Candy Googly Eyes: The whimsical finishing touch that makes these bars truly unforgettable and fun to serve.
Directions
Step 1: Preheat your oven to 350 degrees Fahrenheit—this temperature bakes the bars evenly, giving you golden edges and a soft center.
Step 2: Line a 9×13-inch baking dish with parchment paper. This makes cleanup a breeze and helps you lift the bars out easily once they’re cool.
Step 3: In a stand mixer, cream together the softened butter, brown sugar, and granulated sugar until you get a light, fluffy texture—this usually takes around 2-3 minutes and is key for that perfect base.
Step 4: Blend in the whole egg, egg yolk, and vanilla extract thoroughly so the batter is smooth and well combined.
Step 5: In a separate medium bowl, whisk together the all-purpose flour, baking powder, baking soda, and kosher salt to evenly distribute the leavening agents.
Step 6: Slowly pour the flour mixture into the mixer on low speed to avoid flour clouds, then mix on medium-low speed just until it’s incorporated—you don’t want to overmix here.
Step 7: Add in the semi-sweet chocolate chips and mix briefly to evenly distribute.
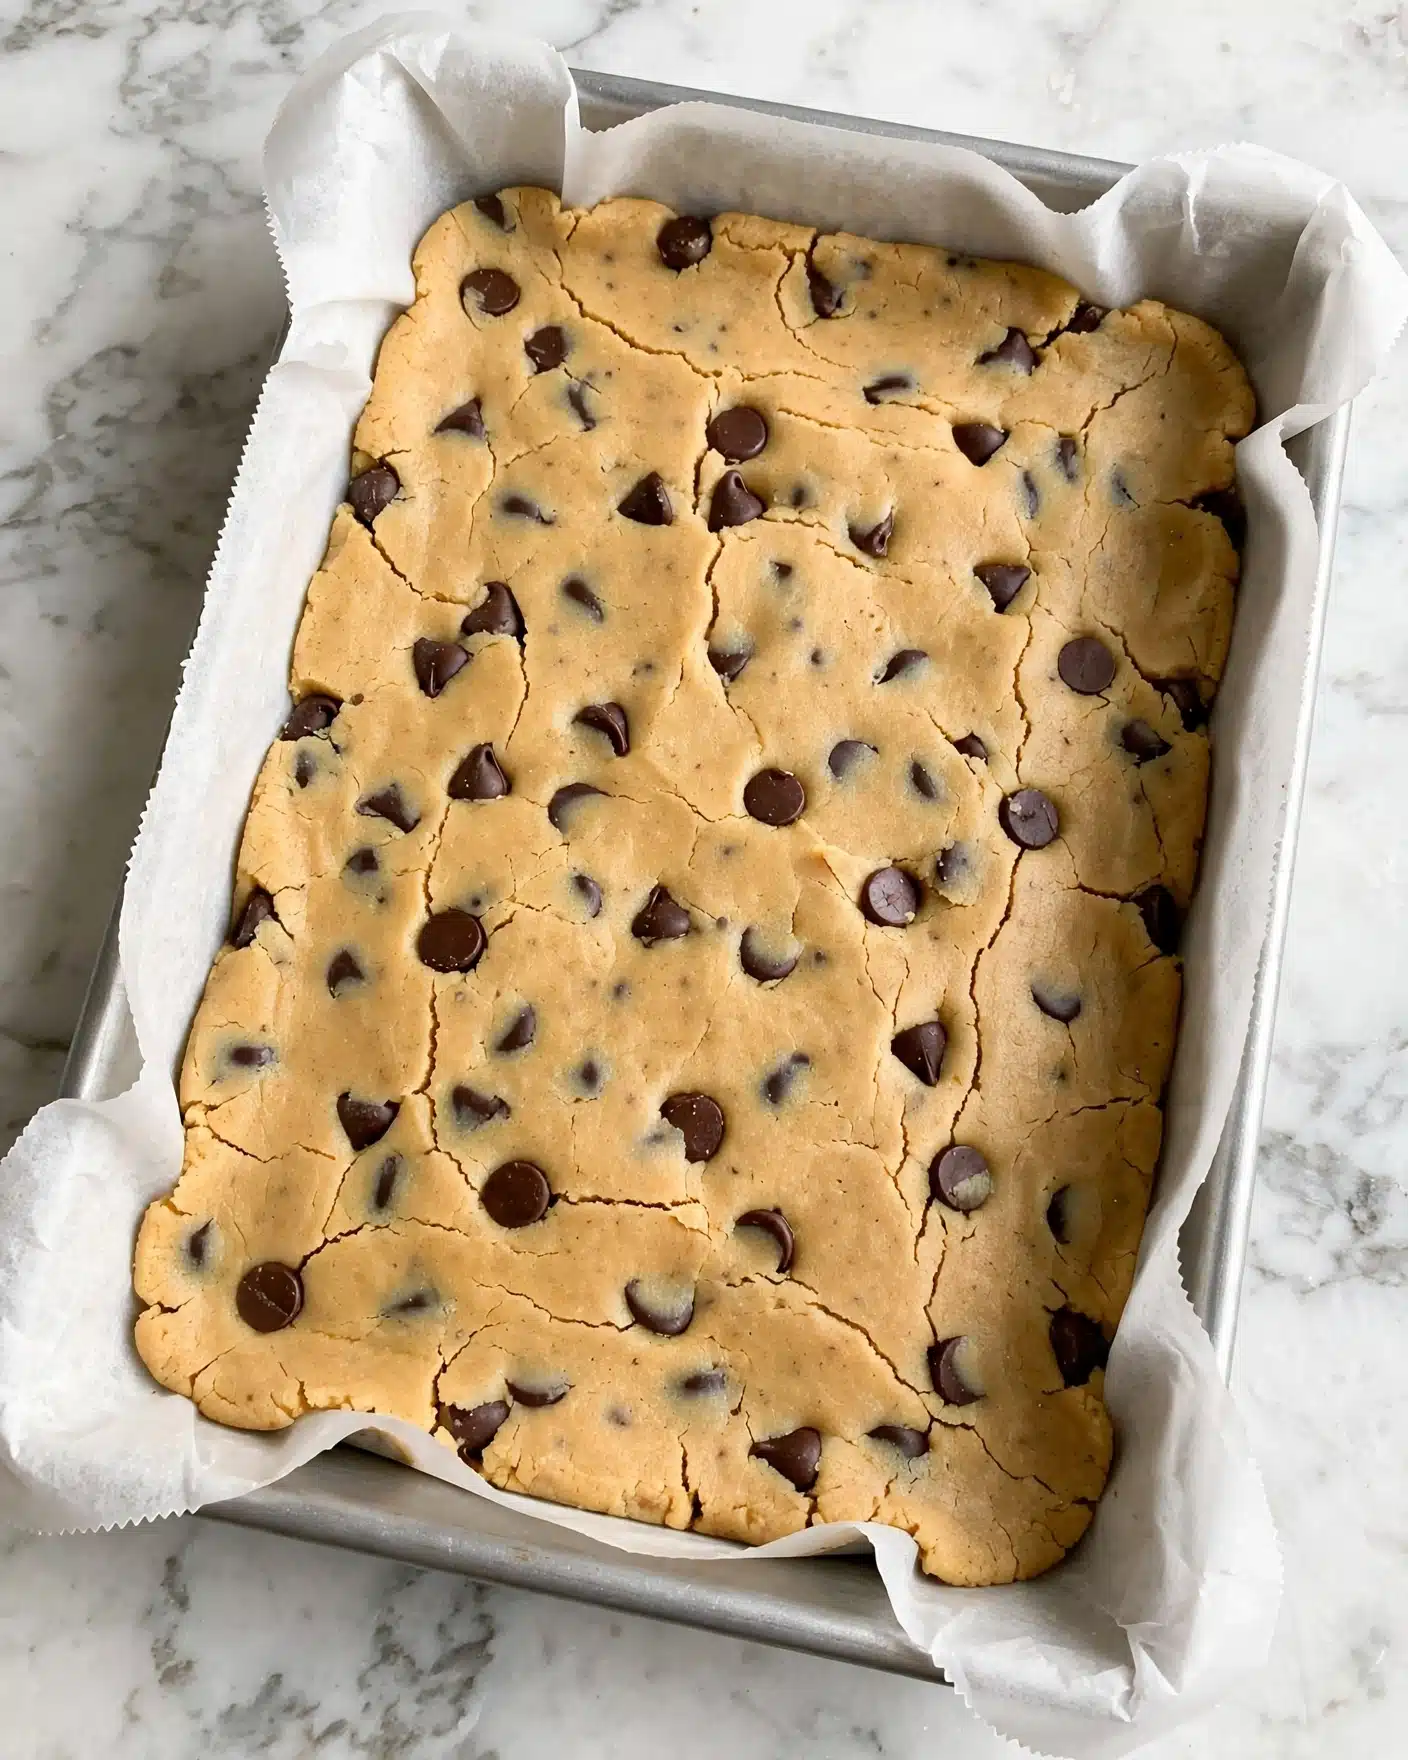
Step 8: Press the cookie dough firmly and evenly onto the bottom of the parchment-lined baking dish. Use a spatula or your fingertips to smooth the surface.
Step 9: Bake in your preheated oven for 25 to 30 minutes, or until the edges turn a light golden brown and the center looks set but still soft. Avoid overbaking to keep the bars chewy.
Step 10: Remove the pan from the oven and immediately press the Reese’s Peanut Butter Frankincups into the cookie bars upside down, so the green bottom side is visible. Just press gently—don’t push too hard or you’ll disturb the base.
Step 11: Dot candy googly eyes playfully across the top of the bars and on the peanut butter cups for that signature monster look.
Step 12: Let your cookie bars cool completely in the pan for about 1 hour so they set perfectly and hold their shape.
Step 13: When cool, lift the bars out using the parchment paper edges, place on a cutting board, and slice carefully into 12 generous bars with a sharp knife.
Step 14: Serve and watch everyone’s faces light up with joy from the fun design and the delicious taste!
Servings and Timing
This Monster Peanut Butter Cookie Bars Recipe yields 12 generous servings, making it ideal for sharing at gatherings or as a treat to savor over several days. Preparation time is about 15 minutes, mostly to mix the ingredients and press the dough into the pan. Baking takes 25 to 30 minutes, and an essential 1 hour of cooling time ensures the bars firm up just right for clean slicing. Altogether, you’re looking at roughly 1 hour and 45 minutes from start to finish, but trust me, the wait is worth every minute.
How to Serve This Monster Peanut Butter Cookie Bars Recipe
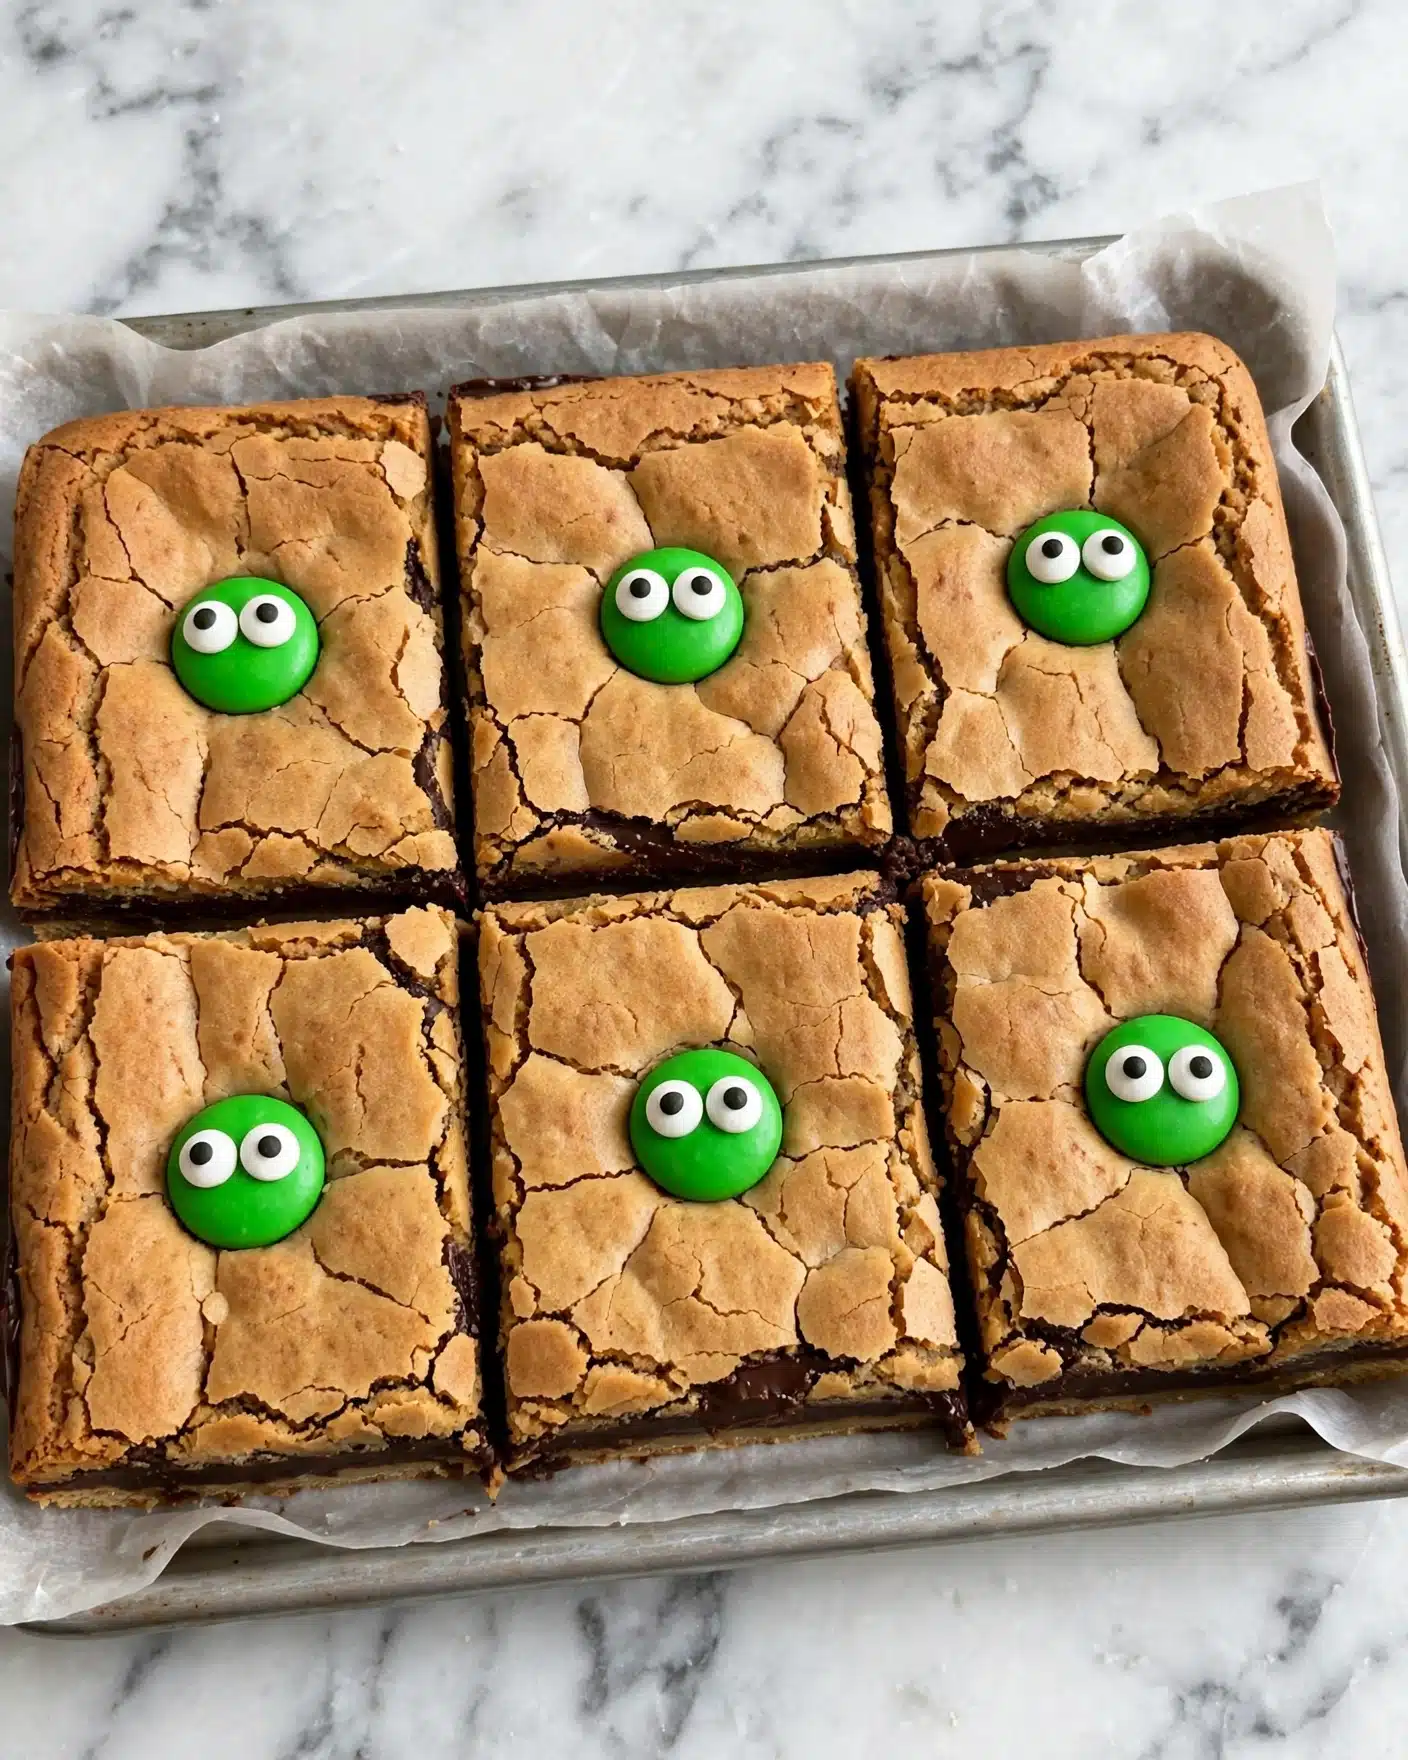
When I serve these bars, I like to let them shine as the main dessert. Their rich and chunky texture means one bar is usually enough to satisfy even the biggest sweet tooth! For presentation, placing them on a festive platter with a few extra candy googly eyes scattered around keeps the playful monster theme alive, which always makes guests smile. If you want to elevate them a bit, a light dusting of powdered sugar or a drizzle of melted chocolate adds a pretty finishing touch.
I find these bars pair beautifully with a cold glass of milk, which complements the peanut butter and chocolate without overpowering it. For grown-up gatherings, a creamy coffee or even a nutty bourbon cocktail can be fantastic—they enhance the flavors without masking the cookie’s character. Serve them at room temperature so you get that perfect chewy texture and the peanut butter cups remain slightly soft but intact.
These bars are wonderful for family dinners, casual parties, or even holiday themed events thanks to their quirky eyeballs and monster vibe. Since they hold together well, you can also pack individual bars for on-the-go snacks or lunchbox surprises. No matter how you serve them, they never fail to brighten up the table and the mood!
Variations
I love switching things up with this Monster Peanut Butter Cookie Bars Recipe, which makes it so versatile. If you want to swap the semi-sweet chocolate chips, try white chocolate or butterscotch chips for a different but equally delicious flavor twist. For peanut butter fans, adding chopped roasted peanuts on top before baking adds an extra layer of crunch.
If you’re catering to dietary needs, this recipe adapts well. For a gluten-free version, substitute the all-purpose flour with a 1-to-1 gluten-free baking flour blend—I’ve done this with great success, just watch the bars closely as baking time might vary slightly. Vegan adaptations are possible too by using vegan butter and egg replacers like flax egg; just expect a slightly different texture but still plenty of flavor.
Feeling adventurous? Try baking the dough in muffin tins for monster peanut butter cookie cups, or swirl in some peanut butter before baking to take the peanut flavor to the next level. Whether you keep it classic or experiment, these bars are remarkably forgiving and fun to customize!
Storage and Reheating
Storing Leftovers
After enjoying your Monster Peanut Butter Cookie Bars, store any leftovers in an airtight container at room temperature. I like using a sturdy plastic or glass container with a tight lid to keep moisture out and maintain freshness. These bars will stay delicious for about 4 to 5 days, and storing them properly keeps that soft-chewy texture intact.
Freezing
These cookie bars freeze really well, which is great if you want to make a batch ahead of time. To freeze, wrap the cooled bars tightly in plastic wrap, then place them in a freezer-safe zip-top bag or container. They can keep for up to 3 months this way. When you’re ready to enjoy, thaw them overnight in the fridge or for a couple of hours at room temperature. The peanut butter cups remain deliciously creamy after freezing, too.
Reheating
If you want to warm up a bar, I recommend a quick zap in the microwave for about 10 to 15 seconds, which revives that fresh-baked softness without melting the candy decorations too much. Avoid reheating in the oven for too long, as that can dry out the edges. A warm bar paired with a cold glass of milk is an irresistible combo in my book!
FAQs
Can I use natural peanut butter in this recipe?
Natural peanut butter can be used, but because it has a higher oil content and less sugar, the bars might be slightly softer and less sweet. I recommend stirring it well before measuring and possibly reducing any added fats slightly. The flavor will be more pronounced and less sweet, which some peanut butter lovers prefer.
Do I have to use Reese’s Peanut Butter Frankincups, or can I substitute something else?
While the Reese’s Frankincups add a fun monster twist and a great peanut butter punch, you can certainly swap them for regular Reese’s peanut butter cups or even chopped peanut butter candy bars if you prefer. Just press them gently into the bars after baking as directed.
Is it possible to make this recipe without eggs?
Yes! You can replace the egg and egg yolk with vegan egg substitutes like flax eggs (1 tablespoon ground flaxseed mixed with 3 tablespoons water per egg), which I’ve tried successfully. This might change the texture slightly, making it a bit more crumbly, but the flavor still shines through.
Can I add nuts or other mix-ins?
Absolutely! Chopped toasted peanuts, walnuts, or even pretzel bits add great texture and a tasty contrast to the soft dough. Just fold them in with the chocolate chips before pressing the dough into the pan.
How do I know when the cookie bars are perfectly baked?
Look for lightly golden brown edges and a center that looks set but not dry. The bars will firm up more as they cool, so avoid overbaking to keep that chewy texture. A toothpick inserted in the center should come out with just a few moist crumbs.
Conclusion
Making this Monster Peanut Butter Cookie Bars Recipe is one of my favorite baking adventures, full of fun details and seriously delicious results. Whether you’re after a playful dessert for your next party or a comforting peanut butter treat, these bars deliver every time. I hope you enjoy making and sharing them as much as I do—happy baking and even happier eating!
PrintMonster Peanut Butter Cookie Bars Recipe
These Monster Peanut Butter Cookie Bars are a fun and delicious treat combining classic peanut butter cups, gooey chocolate chips, and whimsical candy googly eyes. Perfect for parties or dessert, these bars offer a soft, chewy texture with a rich peanut butter and chocolate flavor.
- Prep Time: 15 minutes
- Cook Time: 30 minutes
- Total Time: 1 hour 45 minutes
- Yield: 12 servings
- Category: Dessert
- Method: Baking
- Cuisine: American
Ingredients
Cookie Dough
- 3/4 Cup Butter (Softened)
- 3/4 Cup Granulated Sugar
- 3/4 Cup Brown Sugar
- 1 Whole Egg
- 1 Egg Yolk
- 1 tsp Pure Vanilla Extract
- 1 1/2 Cups All Purpose Flour
- 1/2 tsp Baking Powder
- 1/4 tsp Baking Soda
- 1/4 tsp Kosher Salt
- 1 Cup Semi-Sweet Chocolate Chips
Topping
- 8 Reese’s Peanut Butter Frankincups
- Candy Googley Eyes
Instructions
- Preheat Oven: Preheat your oven to 350 degrees Fahrenheit to get it ready for baking the cookie bars.
- Prepare Baking Dish: Line a 9×13-inch baking dish with parchment paper to prevent sticking and make removal easier.
- Cream Butter and Sugars: In a stand mixer, cream together the softened butter, brown sugar, and granulated sugar until light and fluffy for a smooth dough base.
- Add Eggs and Vanilla: Blend in the whole egg, egg yolk, and pure vanilla extract thoroughly into the creamed mixture.
- Combine Dry Ingredients: In a separate medium bowl, whisk together all-purpose flour, baking powder, baking soda, and kosher salt to evenly distribute the leavening agents and salt.
- Incorporate Dry Ingredients: With the mixer on low speed, slowly pour in the flour mixture into the wet ingredients to avoid flour flying and to ensure even mixing.
- Mix Until Just Combined: Increase to medium-low speed and mix just until the flour is incorporated to prevent overmixing and tough cookie bars.
- Add Chocolate Chips: Fold in the semi-sweet chocolate chips to distribute them evenly throughout the dough.
- Spread Dough in Pan: Press the cookie dough evenly into the bottom of the prepared parchment-lined baking dish for uniform thickness.
- Bake: Bake in the preheated oven for 25-30 minutes, or until the edges are lightly golden and the center is fully set but still soft.
- Add Peanut Butter Cups: Remove from the oven and quickly press the Reese’s Peanut Butter Frankincups gently and randomly into the warm cookie bars with the green side facing up for visual appeal.
- Apply Candy Eyes: Dot the candy googly eyes over the cookie bars and on top of the peanut butter cups to create a fun monster look.
- Cool: Let the cookie bars cool completely in the pan for about 1 hour to set properly before slicing.
- Remove from Pan: Carefully lift the cooled cookie bars out of the pan using the parchment paper for easy removal without breaking.
- Slice: Using a sharp knife, cut the cookie slab into 12 equal bars for serving.
- Serve: Enjoy the delicious Monster Peanut Butter Cookie Bars as a delightful treat for any occasion.
Notes
- Make sure the butter is properly softened to ensure smooth creaming for the best texture.
- Do not overmix the dough after adding flour to avoid tough cookie bars.
- Press the peanut butter cups into the bars immediately after baking while still warm so they adhere well.
- Allow the bars to cool completely before cutting to ensure clean slices.
- Store leftover bars in an airtight container at room temperature for up to 3 days or refrigerate for up to a week.


