
I absolutely love making and sharing this Mexican Stuffed Peppers Recipe whenever I want a comforting meal that’s bursting with flavor and color. For me, it’s the perfect balance of savory, spicy, and fresh all wrapped up in a wholesome bell pepper. I enjoy the satisfying textures from the tender roasted peppers and the hearty, well-seasoned beef and rice filling. It’s one of those recipes that feels like a warm hug on a plate, perfect for family dinners or impressing friends with something a little different yet incredibly delicious.
Why You’ll Love This Mexican Stuffed Peppers Recipe
What really draws me to this Mexican Stuffed Peppers Recipe is the fantastic blend of spices that give the filling such a rich, vibrant taste without being overpowering. The cumin, coriander, cayenne, and oregano come together in perfect harmony to add depth, while the hints of garlic and onion brighten things up. When paired with the juicy, slightly sweet capsicum and melty mozzarella cheese, every bite feels perfectly balanced and totally satisfying. That contrast of textures and fresh notes keeps me coming back for more, and I know you’ll feel the same.
Another reason I’m so enthusiastic about making this dish is how approachable it is. Despite sounding impressive, it doesn’t take a culinary degree or hours of hands-on time to prepare. You can have delicious, home-cooked stuffed peppers ready for the oven in under 30 minutes, then just let them bake while you tidy up or prepare a simple salad. It’s a fantastic option for weeknights, casual get-togethers, or even a festive occasion when you want to serve something a little special but not stressful. Honestly, I think anyone who tries this recipe will find it as enjoyable and straightforward as I do.
Ingredients You’ll Need

The ingredients in this Mexican Stuffed Peppers Recipe are wonderfully simple but each one plays a key role in crafting that classic, comforting flavor. From the colorful capsicums to the spices and fresh toppings, these components come together beautifully to deliver a feast for your taste buds.
- 5 capsicum / peppers (large, about 12cm/4.5″ tall): These act as edible vessels, bringing vibrant color and sweetness to the dish.
- 1 tbsp olive oil: Used for sautéing the onions and garlic, adding richness and depth.
- 1 onion (chopped): Provides aromatics and a little sweetness.
- 3 garlic cloves (minced): Adds an essential punch of flavor.
- 350g (12oz) ground beef (lean): The hearty protein base that makes this meal filling and satisfying.
- 1/4 cup tomato paste: Offers a tangy, concentrated tomato flavor that ties the filling together.
- 1 1/4 cups chicken broth/stock (low sodium): Keeps the rice moist and infuses extra savory notes.
- 1/2 cup long or medium grain rice (uncooked): Adds texture and bulk to the filling.
- 1 cup corn kernels: A sweet, crisp contrast to the rich filling.
- 1 cup green onions (finely sliced): Freshens up the mix with subtle sharpness.
- 1 1/2 cups mozzarella (shredded): Melts beautifully on top for cheesy indulgence.
- 1/2 cup water: Poured into the baking dish to keep peppers moist during cooking.
- 1/2 tsp cayenne pepper: Adds a gentle kick of heat.
- 1 tbsp dried oregano: Lends an earthy, herbal note.
- 2 tsp cumin: Gives that nutty warmth classic to Mexican cuisine.
- 2 tsp coriander: Bright and citrusy flavor that lifts the dish.
- 1.5 tsp onion powder: Boosts onion flavor without extra chopping.
- 3/4 tsp salt: To perfectly balance all the tastes.
- Guacamole: For a creamy, zesty accompaniment.
- Sour cream: Adds a cool, tangy contrast.
- 1 tbsp fresh coriander/cilantro (finely chopped): For fresh garnish and aromatic finish.
Directions
Step 1: Preheat your oven to 180C (350F) so it’s ready when your peppers are stuffed and waiting.
Step 2: Carefully prepare the peppers. Using a small sharp knife, cut around the tops at a downwards 45 degree angle, then remove the tops and empty out all the seeds. If the bottoms of the peppers aren’t quite flat, gently slice a tiny bit off so they can sit upright without tipping over. I like to be cautious here – you want to avoid making holes in the bottom.
Step 3: Arrange the hollowed peppers snugly in a baking dish. They should stand upright without needing extra support because that’s how you’ll bake them.
Step 4: Heat the olive oil in a large skillet over high heat. Add the chopped onion and minced garlic, cooking for about 2 minutes until fragrant and just starting to soften.
Step 5: Add the ground beef to the skillet, breaking it up as you cook. Keep stirring until all the pink has turned to a lovely browned color. This step ensures your beef is perfectly cooked and crumbly.
Step 6: Sprinkle in the cayenne, oregano, cumin, coriander, onion powder, and salt. Stir these spices thoroughly through the beef mixture to coat it well for that signature Mexican flavor.
Step 7: Add the tomato paste and cook it with the meat for about 1 minute to deepen the flavor and meld it all together.
Step 8: Now it’s time for the rice, corn, and chicken broth. Stir everything so the rice is evenly distributed and the mixture begins to simmer. Place a lid on the pan and lower the heat to medium-low.
Step 9: Let the filling cook for 13 to 15 minutes, keeping an eye on it. The rice should be just cooked through, and the mixture still slightly loose—not thickened into a heavy paste. This makes the filling moist and tender inside the peppers.
Step 10: Stir in the finely sliced green onions for a fresh texture boost just before filling the peppers.
Step 11: Spoon half of the filling into the prepared peppers, then sprinkle half the mozzarella cheese over the filling in each pepper.
Step 12: Add the remaining beef and rice filling on top, filling each pepper to the brim. Place the pepper tops back on to keep everything cozy inside.
Step 13: Pour 1/2 cup of water into the bottom of the baking dish. This will create steam that helps cook the peppers gently without drying them out.
Step 14: Cover the entire dish tightly with aluminum foil and bake for 45 minutes. This steams the peppers and finishes cooking the filling wonderfully.
Step 15: Remove the foil and the tops of the peppers. Sprinkle the remaining cheese evenly on top, then return to the oven for another 5 to 10 minutes, just until the cheese melts and bubbles a bit.
Step 16: Serve them hot with a dollop of sour cream and your favorite guacamole. Don’t forget a sprinkle of fresh coriander for that final fragrant touch.
Servings and Timing
This Mexican Stuffed Peppers Recipe makes about 5 generous servings — perfect for a family meal or small dinner party. Prep time usually takes me around 20 to 25 minutes, mostly spent chopping and filling the peppers. The baking is around 50 minutes, including the covered and uncovered stages, so total time from start to finish is about 1 hour and 15 minutes. There’s no separate resting time needed, but I like to let mine cool for 5 minutes after baking to make them easier to handle and let flavors settle.
How to Serve This Mexican Stuffed Peppers Recipe
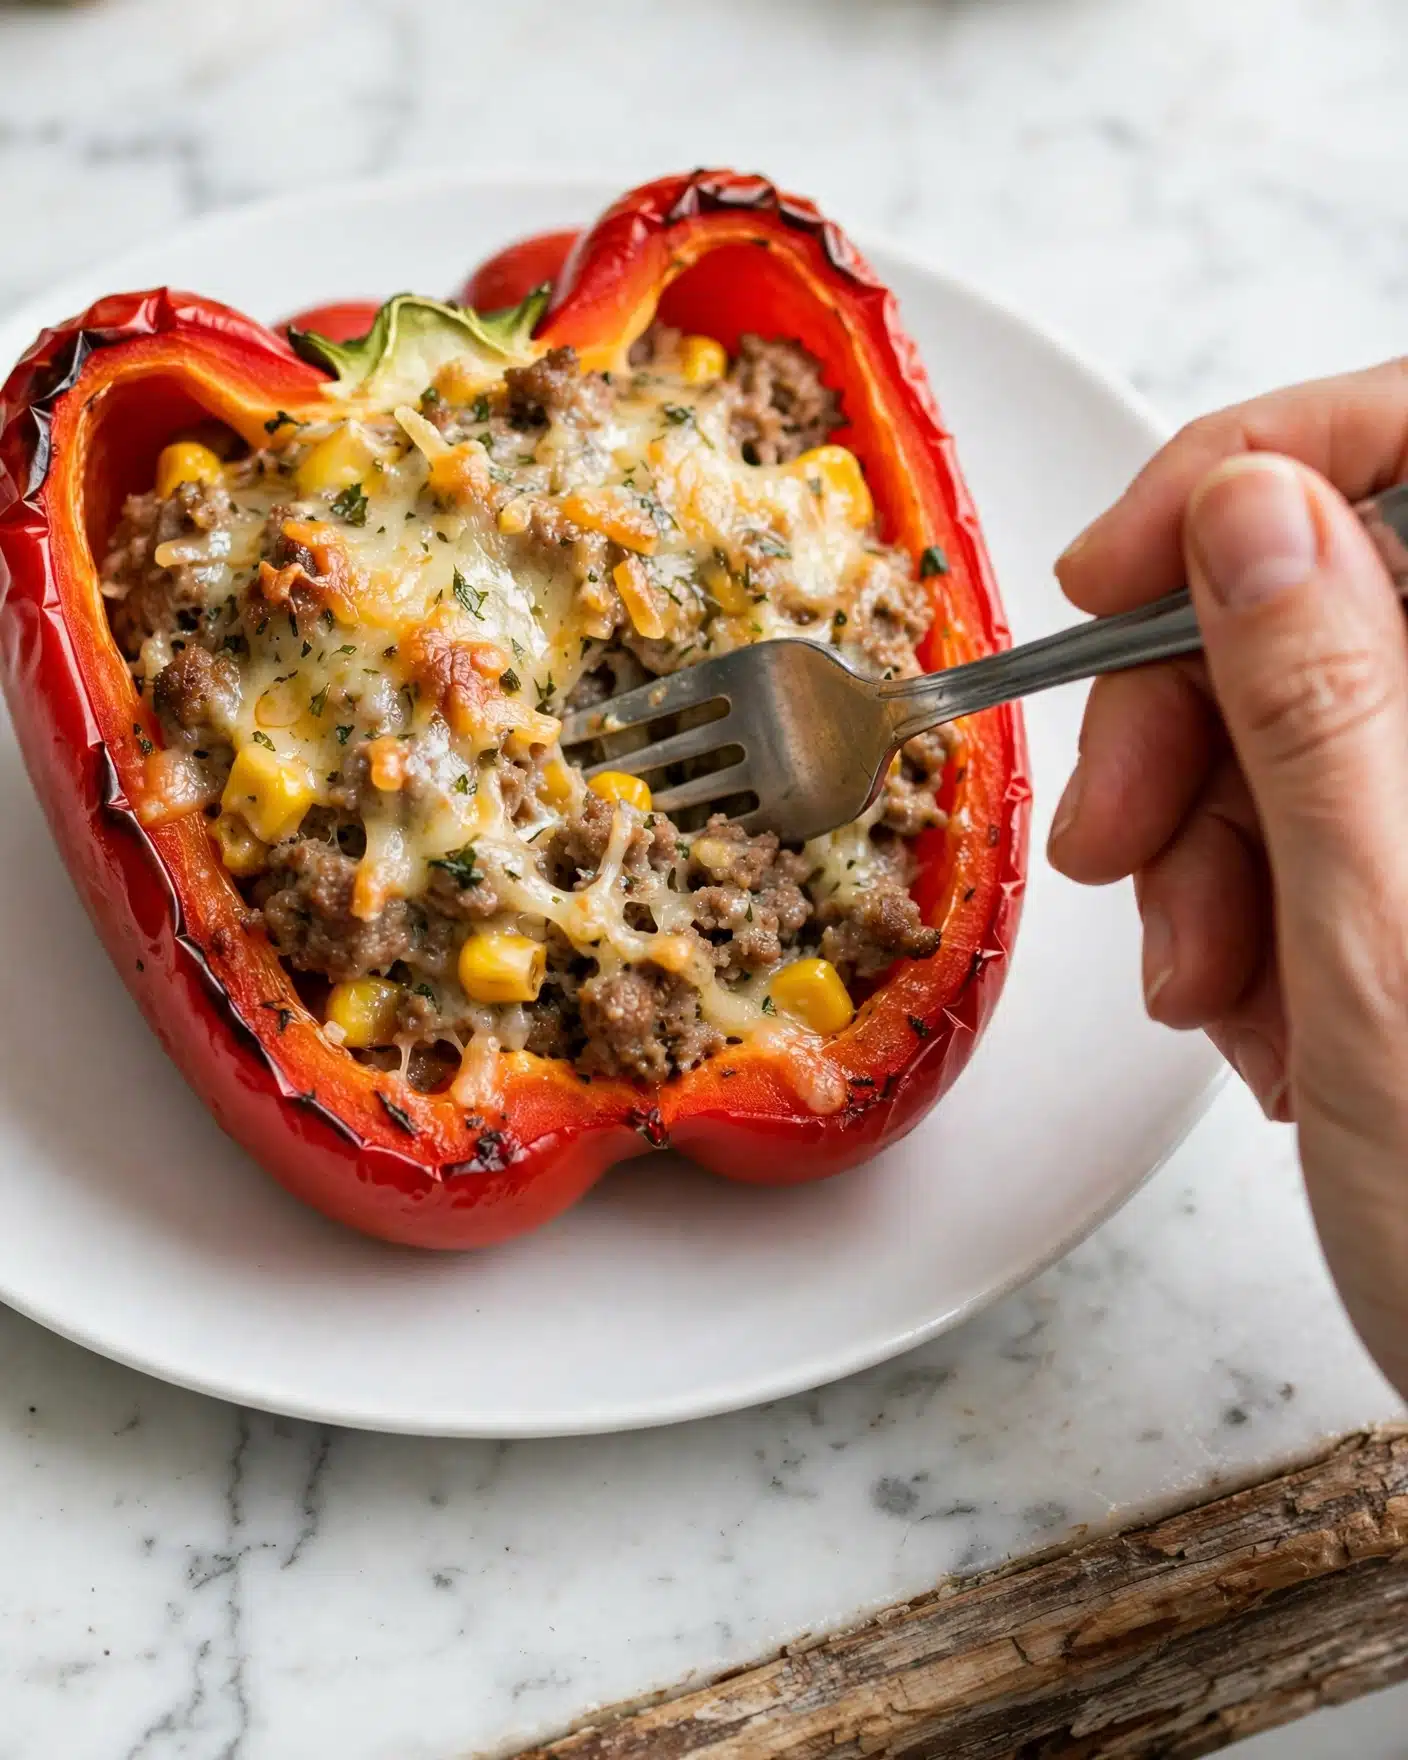
When I serve these stuffed peppers, I love to keep things simple but colorful on the plate. A fresh green salad with lime vinaigrette or a crunchy cabbage slaw pairs beautifully by cutting through the richness and adding a crisp texture contrast. You could also offer some warm tortillas or corn chips on the side to scoop up any extra filling or guacamole. For presentation, I like to plate one or two peppers per person, topped with a spoonful of sour cream, a dollop of guacamole, and a scatter of freshly chopped cilantro.
For beverages, a chilled margarita or a crisp Mexican lager is my go-to pairing; both complement the spice and savory depth perfectly. If you want a non-alcoholic option, a zesty lime agua fresca or sparkling water with a splash of fresh lime brightens the palate and keeps things refreshing. These peppers are best served warm to enjoy the melty cheese and tender pepper combination at its peak, but they also hold up well at room temperature if you’re serving a buffet or casual gathering.
This dish is versatile enough for a cozy weeknight dinner but also impressive enough for holidays or weekend get-togethers. Just add a festive table setting and some warm chatter, and you’ve got a memorable meal that everyone will adore.
Variations
Over time, I’ve experimented with all sorts of swaps and tweaks to this Mexican Stuffed Peppers Recipe to suit different tastes and dietary needs. For a vegetarian version, I swap the ground beef for a mix of diced mushrooms and black beans. The mushrooms provide that meaty texture, while black beans add protein and keep it hearty. For a vegan take, I leave out the cheese or use a plant-based shredded alternative and replace chicken broth with vegetable stock.
You can also tweak the spices based on your flavor preferences. I like to add smoked paprika for a deeper smoky vibe or fresh diced chilies for extra heat if the cayenne isn’t enough. For a different cooking method, I’ve sometimes parboiled the peppers for 5 minutes before stuffing to reduce baking time, which works well if you’re in a hurry.
Another fun twist is to experiment with different cheeses like cheddar or Monterey Jack for a sharper flavor, or topping the peppers with crunchy toasted pepitas for an extra layer of texture. The possibilities are endless, and I encourage you to play around and find your own favorite spin.
Storage and Reheating
Storing Leftovers
If you have any leftovers, I recommend transferring the stuffed peppers to an airtight container once completely cooled. I usually use glass containers with tight-fitting lids to keep them fresh and avoid absorbing fridge odors. Stored this way, they’ll stay fresh in the refrigerator for up to 3 to 4 days, making a convenient next-day lunch or dinner.
Freezing
This recipe freezes quite well, which is perfect for meal prepping. To freeze, wrap each stuffed pepper individually in plastic wrap or aluminum foil, then place them in a resealable freezer bag or airtight container. They keep best for up to 2 months. When you want to enjoy them, thaw overnight in the refrigerator before reheating to maintain texture and flavor.
Reheating
For reheating, I prefer the oven to keep the peppers tender and the cheese melty. Preheat your oven to 175C (350F), place the peppers in a baking dish covered with foil to prevent drying, and heat for about 20 minutes or until heated through. Avoid microwaving if you want to keep the texture intact, but if you’re short on time, microwave in short intervals and cover to minimize dryness. Adding a small splash of water before reheating can help keep them moist as well.
FAQs
Can I use different types of peppers for this recipe?
Absolutely! While I use large capsicums (bell peppers), you can experiment with poblano or even sweet mini peppers if you want smaller portions. Just keep in mind that different peppers may affect cooking time and sweetness.
Is this Mexican Stuffed Peppers Recipe spicy?
The spices add a nice warmth and mild heat, but it’s not overwhelmingly spicy. You can easily adjust the cayenne pepper to your heat preference or add fresh chilies for more kick.
Can I prepare this recipe ahead of time?
Yes! I often prepare the filling a day ahead and refrigerate it. When you’re ready, stuff the peppers and bake. This saves time and allows flavors to meld even more.
What can I serve instead of sour cream and guacamole?
If you prefer, plain Greek yogurt is a great substitute for sour cream, offering creaminess with a bit of tang. For guacamole alternatives, try a fresh pico de gallo or a simple salsa verde for extra zest.
Is it possible to make this recipe gluten-free?
Definitely. This Mexican Stuffed Peppers Recipe is naturally gluten-free as long as you choose gluten-free chicken broth or stock. Just double-check labels to be safe, and enjoy without worry.
Conclusion
I truly hope you enjoy making and savoring this Mexican Stuffed Peppers Recipe as much as I do. It’s such a rewarding dish, packed with warmth, vibrant flavors, and wholesome ingredients that bring everyone around the table together. Whether it’s a busy weeknight or a special occasion, this recipe is an easy way to add a bit of magic to your meal rotation. Give it a try, and I can’t wait for you to discover why it’s one of my all-time favorites!
PrintMexican Stuffed Peppers Recipe

These Mexican Stuffed Peppers feature vibrant capsicums filled with a flavorful mixture of ground beef, rice, corn, and aromatic spices. Topped with melted mozzarella and baked to perfection, they’re served with fresh guacamole and sour cream for a deliciously satisfying meal that’s perfect for any occasion.
- Prep Time: 20 minutes
- Cook Time: 50 minutes
- Total Time: 1 hour 10 minutes
- Yield: 5 servings
- Category: Main Course
- Method: Baking
- Cuisine: Mexican
Ingredients
Peppers
- 5 large capsicum/peppers (about 12cm/4.5″ tall)
- 1 tbsp olive oil
Filling
- 1 onion, chopped (brown, white, or yellow)
- 3 garlic cloves, minced
- 350g (12oz) lean ground beef
- 1/4 cup tomato paste
- 1 1/4 cups (315 ml) low sodium chicken broth/stock
- 1/2 cup long or medium grain rice, uncooked
- 1 cup corn kernels
- 1 cup green onions, finely sliced (or red onion)
- 1 1/2 cups (150g) shredded mozzarella
- 1/2 cup (125 ml) water
- 1/2 tsp cayenne pepper
- 1 tbsp dried oregano
- 2 tsp ground cumin
- 2 tsp ground coriander
- 1.5 tsp onion powder
- 3/4 tsp salt
To Serve
- Guacamole (see quick guac note)
- Sour cream
- 1 tbsp fresh coriander/cilantro, finely chopped
Instructions
- Preheat Oven: Preheat your oven to 180°C (350°F) to prepare for baking the stuffed peppers.
- Prepare the Peppers: Using a small knife, cut around the top of each capsicum at a downward 45-degree angle to create a lid. Remove the tops and scoop out the seeds carefully. Trim the bottoms if necessary to ensure they sit flat in the baking dish, being cautious not to create holes.
- Arrange Peppers: Place the hollowed out capsicums upright in a baking dish that fits them snugly, preventing tipping during baking.
- Sauté Aromatics: Heat the olive oil in a large skillet over high heat. Add the chopped onion and minced garlic, and cook for about 2 minutes until softened and fragrant.
- Cook Beef: Add the ground beef to the skillet, breaking it apart as it cooks. Continue until the beef has browned completely and there is no pink remaining.
- Add Spices and Tomato Paste: Stir in the cayenne pepper, dried oregano, cumin, coriander, onion powder, and salt, mixing well. Then add the tomato paste and cook for 1 minute to deepen the flavors.
- Add Rice, Corn, and Broth: Stir in the uncooked rice, corn kernels, and chicken broth. Bring the mixture to a simmer, cover with a lid, reduce heat to medium-low, and cook for 13 to 15 minutes. Rice should be just cooked and mixture still loose.
- Finish Filling: Stir in the finely sliced green onions for fresh flavor.
- Fill Peppers: Spoon half of the beef and rice filling into each prepared capsicum. Sprinkle half of the shredded mozzarella over the first layer, then fill to the top with the remaining filling.
- Top and Prepare for Baking: Place the capsicum lids back onto the peppers. Pour 1/2 cup of water into the baking dish to help keep the peppers moist during cooking. Cover the dish tightly with aluminum foil.
- Bake Covered: Bake in the preheated oven for 45 minutes, allowing the flavors to meld and the peppers to soften.
- Finish Baking: Remove the foil and the capsicum lids. Sprinkle the remaining mozzarella cheese on top of the peppers and bake uncovered for an additional 5 to 10 minutes until the cheese has melted and is bubbly.
- Serve: Garnish with fresh chopped coriander/cilantro and serve warm with sour cream and quick guacamole on the side for a delightful Mexican-inspired meal.
Notes
- Note 1: Choose large, firm capsicums about 4.5 inches tall for best stuffing results.
- Note 2: Long or medium grain rice works best to avoid excessive stickiness in the filling.
- Note 3: Fresh or frozen corn kernels can be used; no need to thaw.
- Note 4: Using a snug baking dish helps keep the peppers upright while baking.
- Note 5: Quick guacamole is made by mashing ripe avocado with lime juice, salt, and optionally diced tomato and onion.


